Introduction
This guide provides instructions on installing and configuring OneDrive for use on a Mac. Please note that we have observed slight variations in both the appearance and behavior of OneDrive between different computers. Although we have made efforts to capture these differences, the instructions in this document may not fully match what you see on your computer. Please reach out to be-help@uw.edu with any questions.
Prerequisites
- macOS 13.0 Ventura or later. If lower than this version, then it is not possible to install OneDrive. Contact be-help@uw.edu for assistance.
- Access to your Duo device.
Before you get started
- Check to see if OneDrive is installed. Open Finder, navigate to Applications and check for the presence of OneDrive.
- If OneDrive is not installed, then proceed to Installation instructions below. Otherwise, skip to the Configuration Instructions section.
Installation Instructions
There are two methods to complete installation:
- App Store (preferred)
Open the App Store app and sign in with your AppleID if your account is not already signed in. Search for the OneDrive app and install from the list.
- Manual (requires CBE-IT assistance)
End users are unable to manually install the OneDrive app on their own. Please email be-help@uw.edu for assistance.
Once OneDrive is installed, launch it from the Applications folder and proceed with Configuration Instructions below.
Configuration Instructions
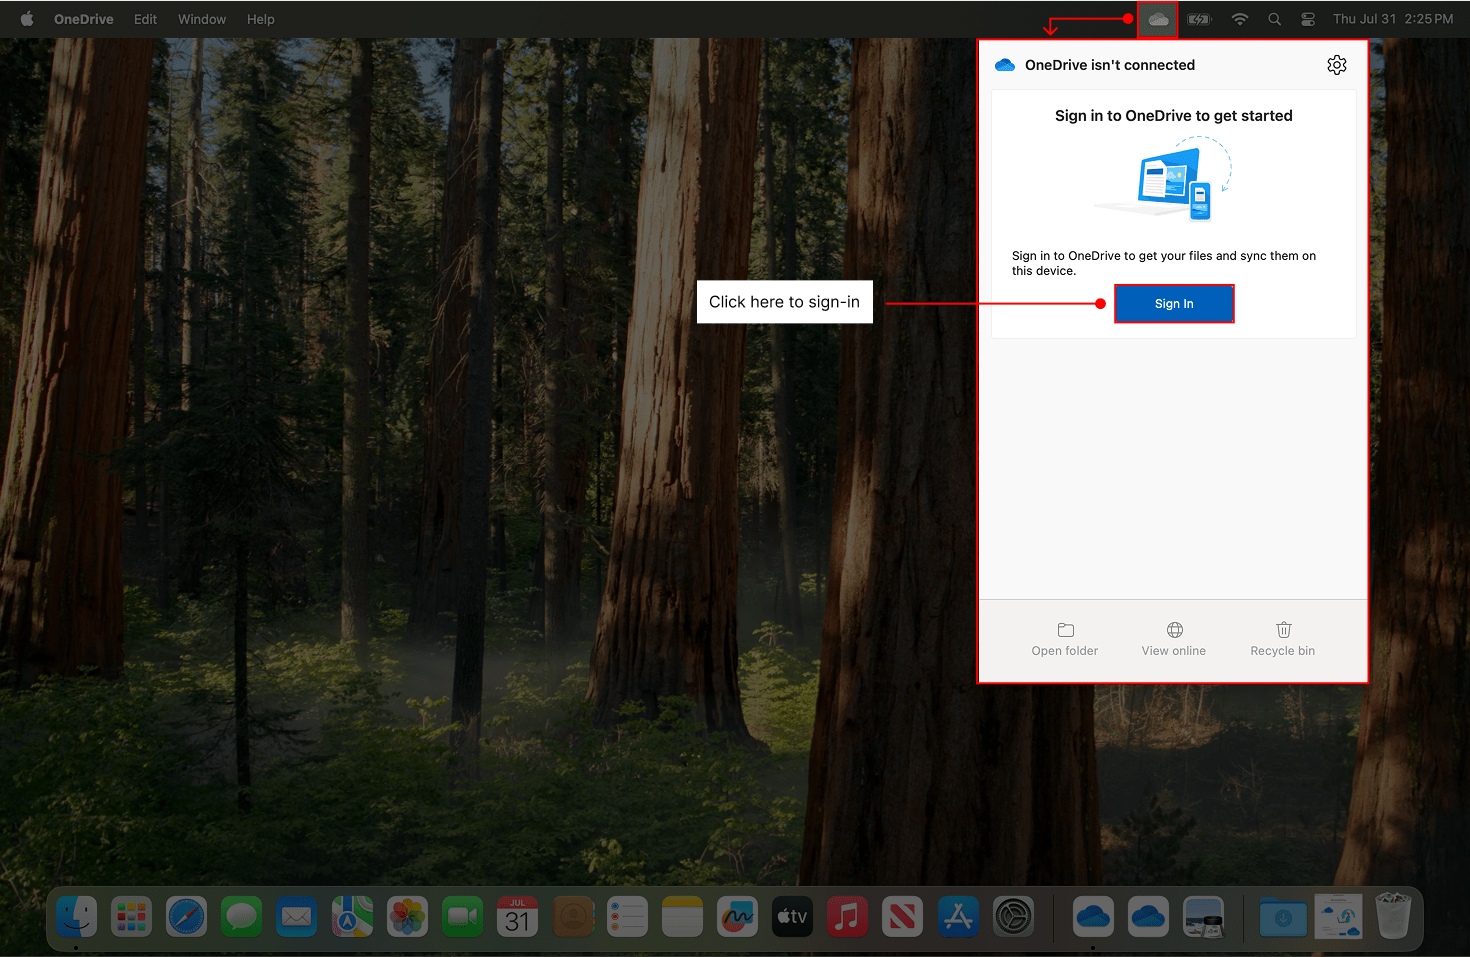
If not already running, launch OneDrive from the Applications folder. When OneDrive is first installed, it will show as signed out as in this image:

Click the OneDrive icon to bring up the sign-in screen as below:
Click the Sign In button then enter your email address. Note that Ashlar ‘s account was used for demonstration purposes, but you should put in your own address and click “Sign In”.
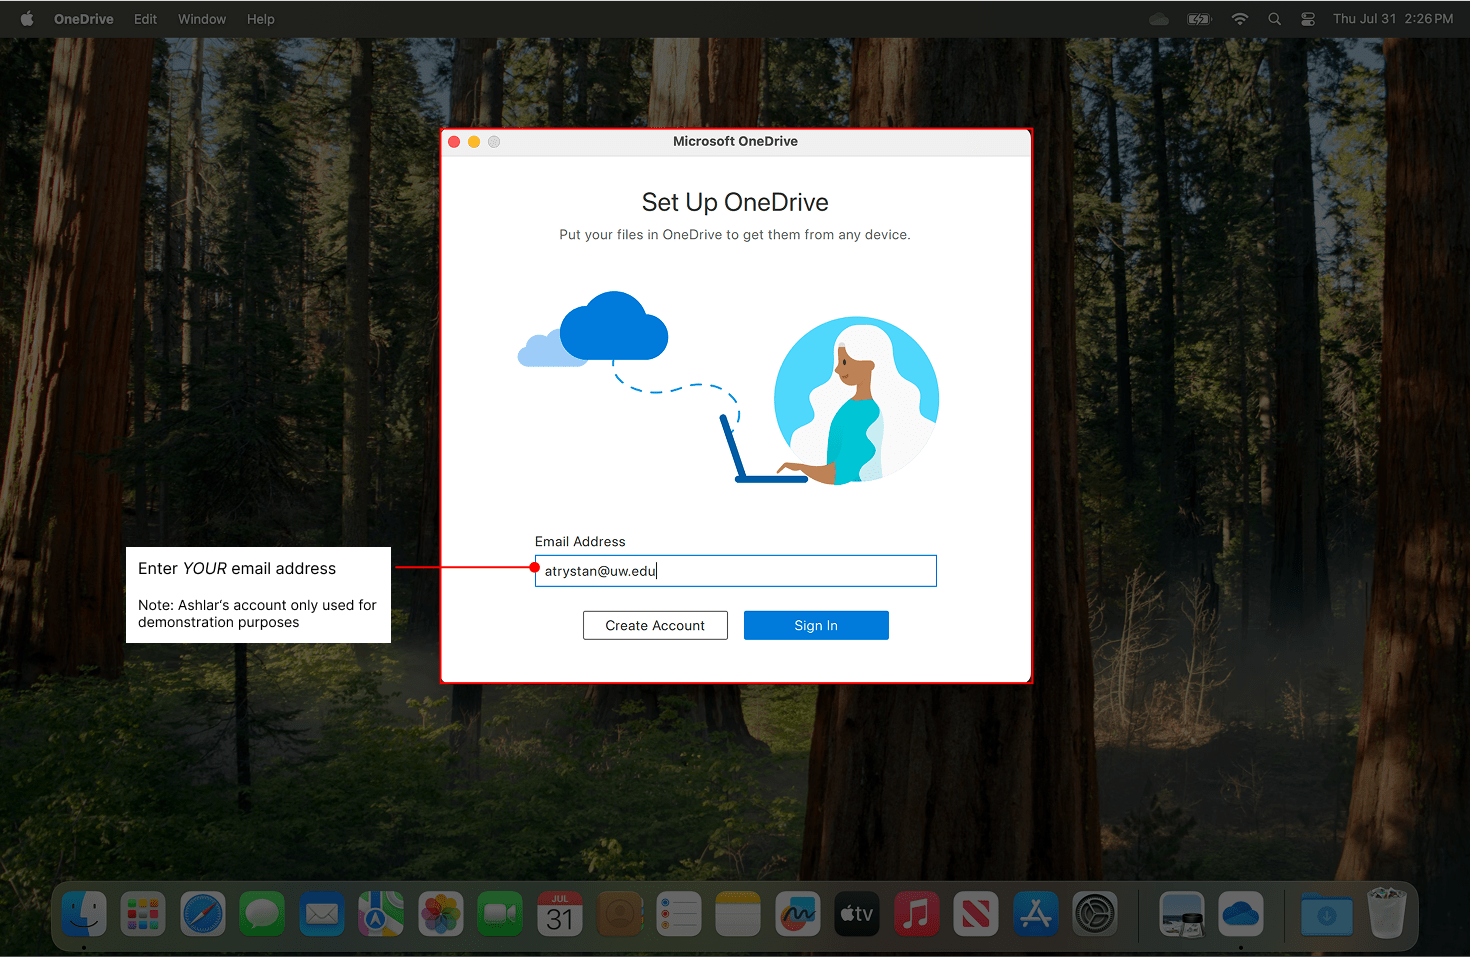
Follow the prompts to authenticate with your NetID and password using Duo.
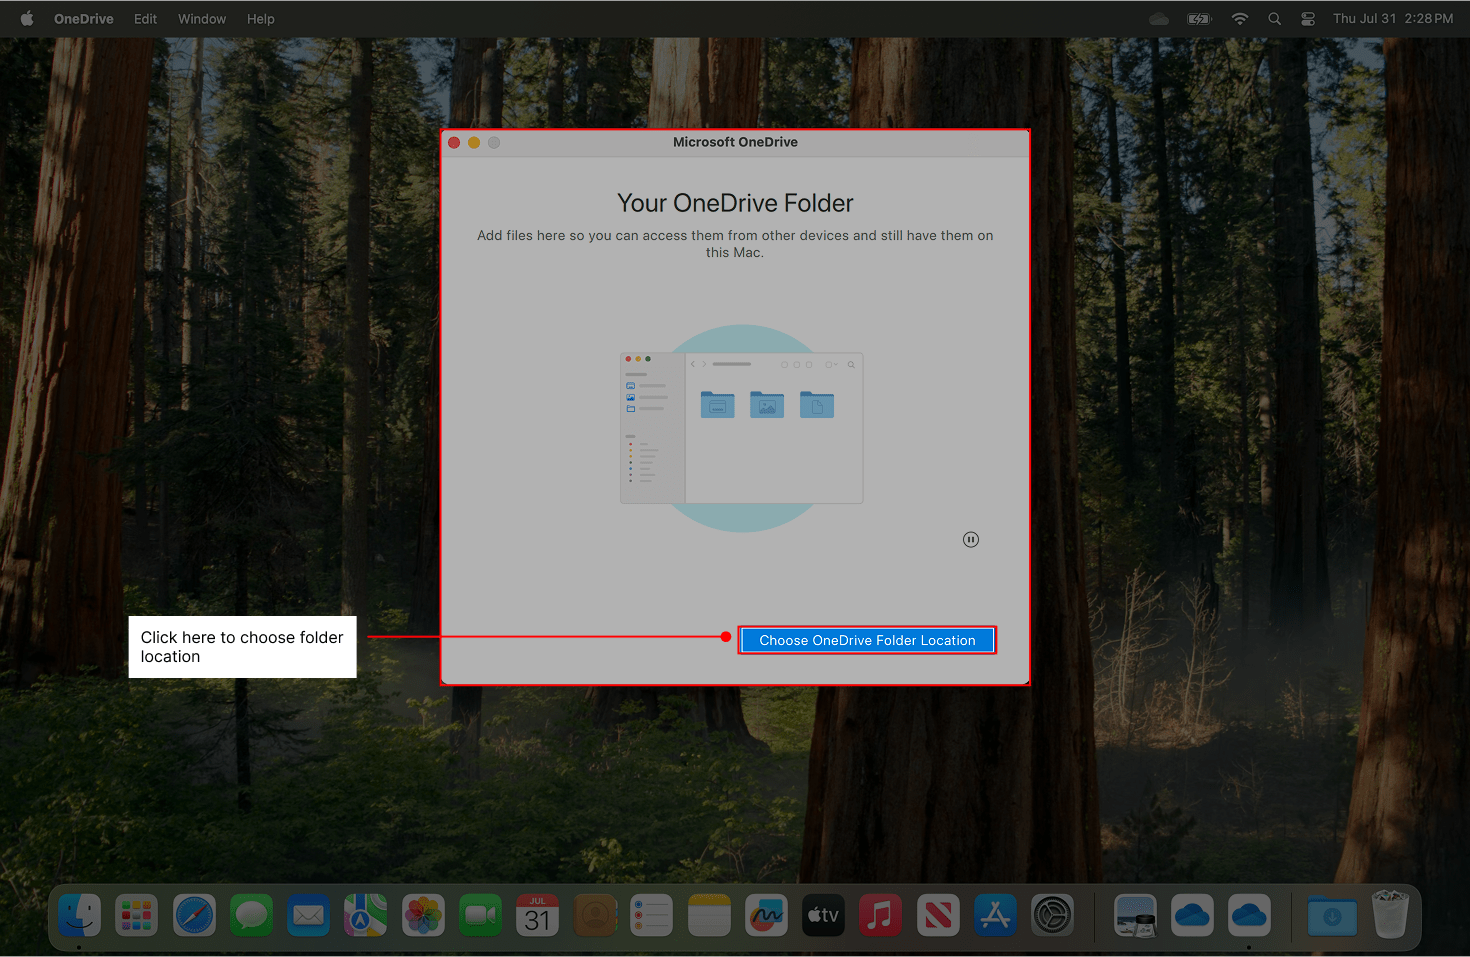
You will be asked to choose your OneDrive folder location. We recommend accepting the default location for consistency and ease of administration. Click “Choose OneDrive Folder Location” then “Choose this location”.
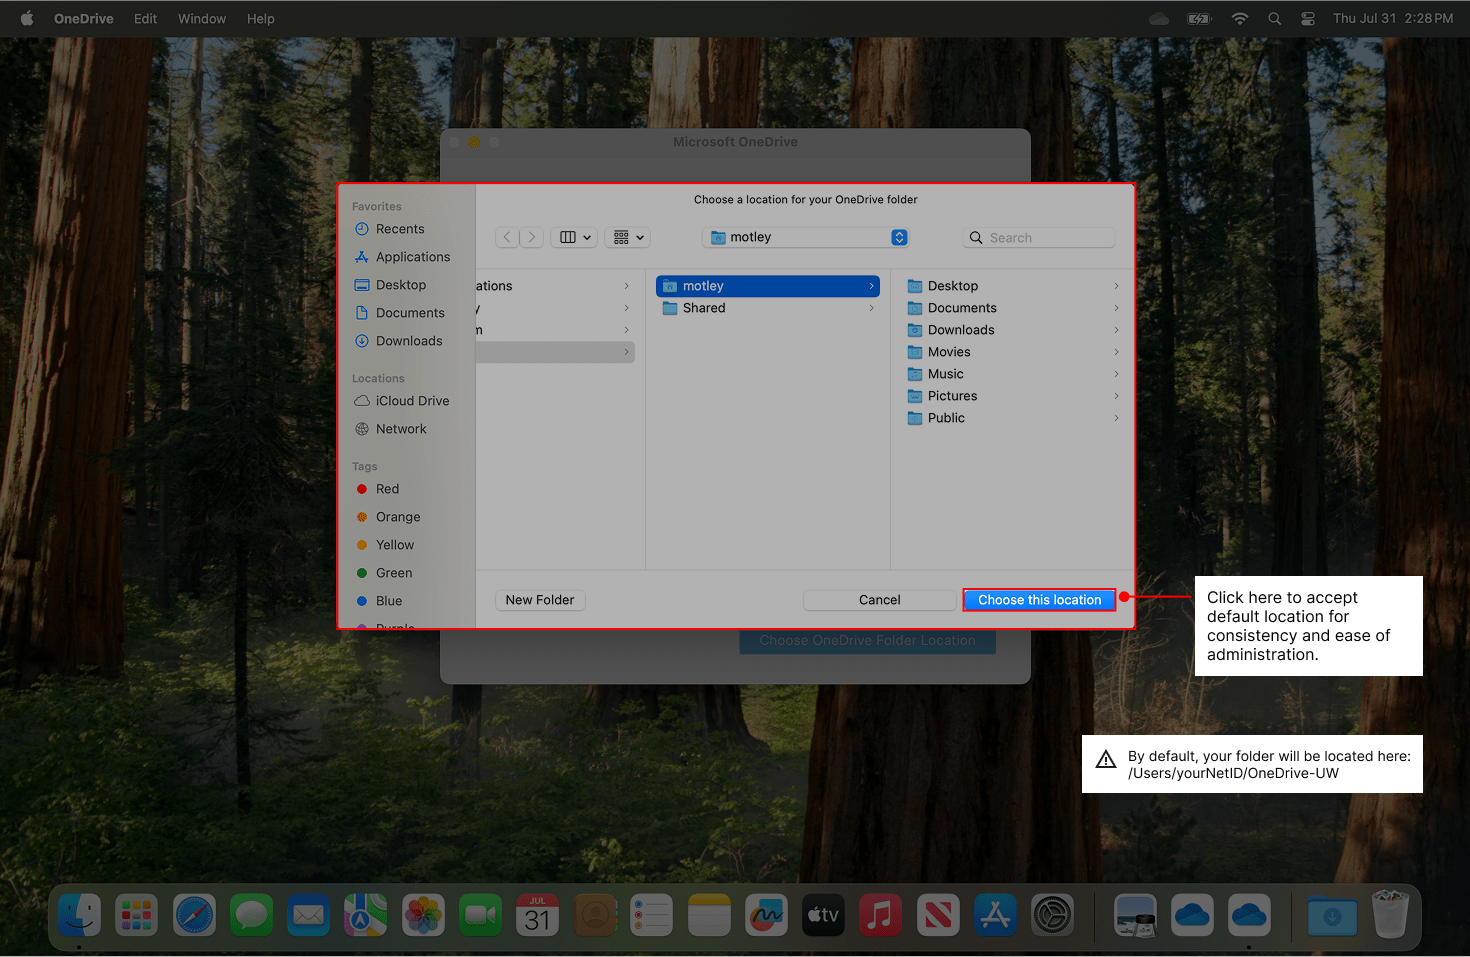
By default, your folder will be located here:
/Users/yourNetID/OneDrive-UW
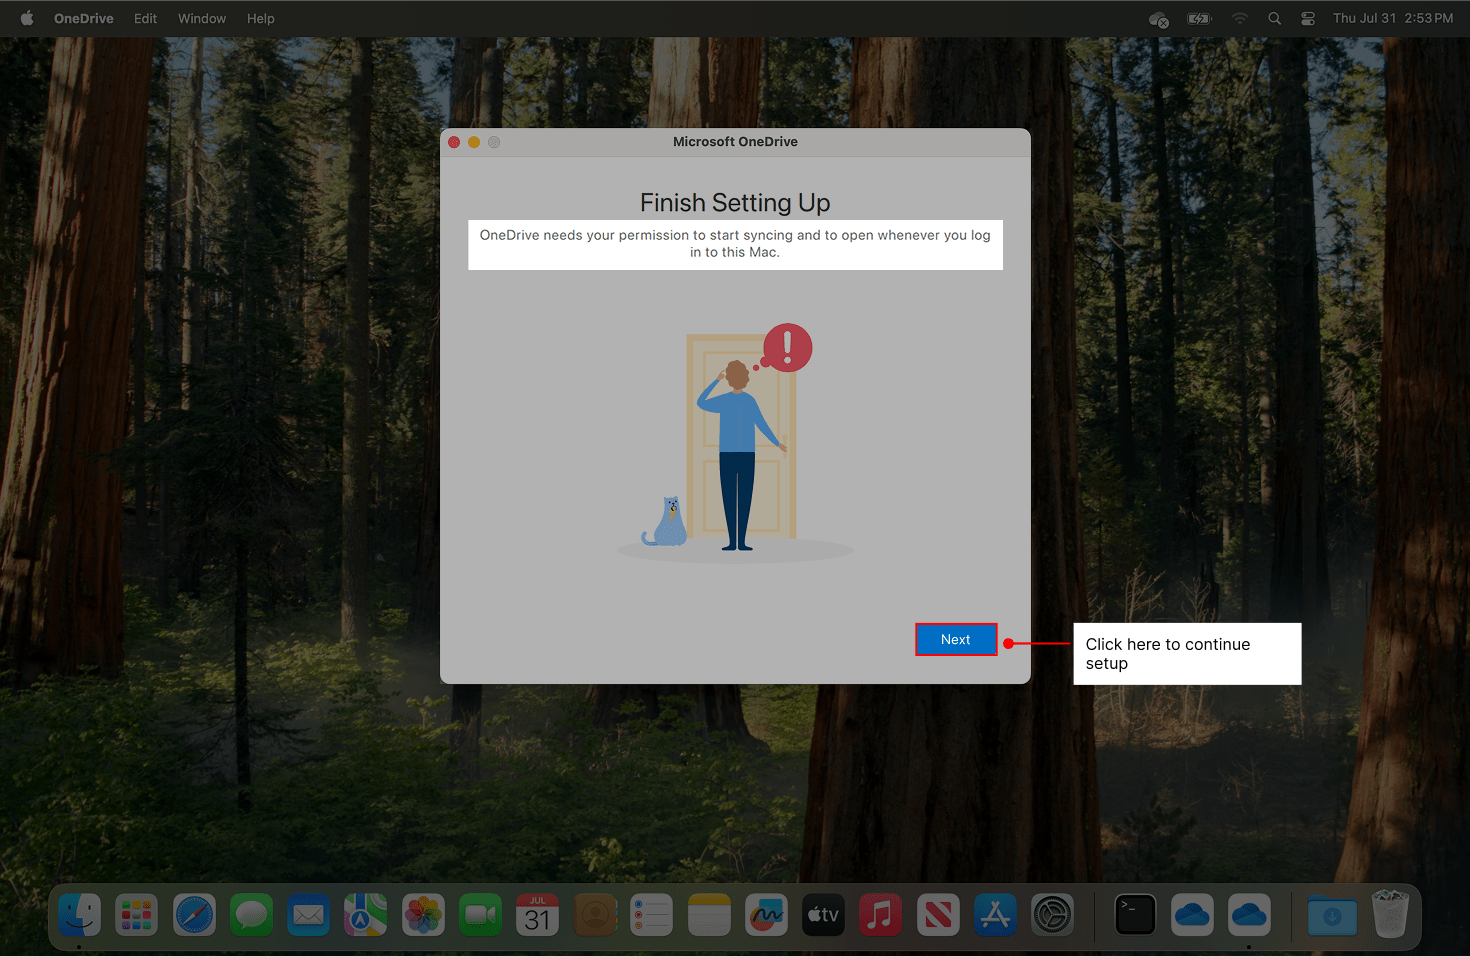
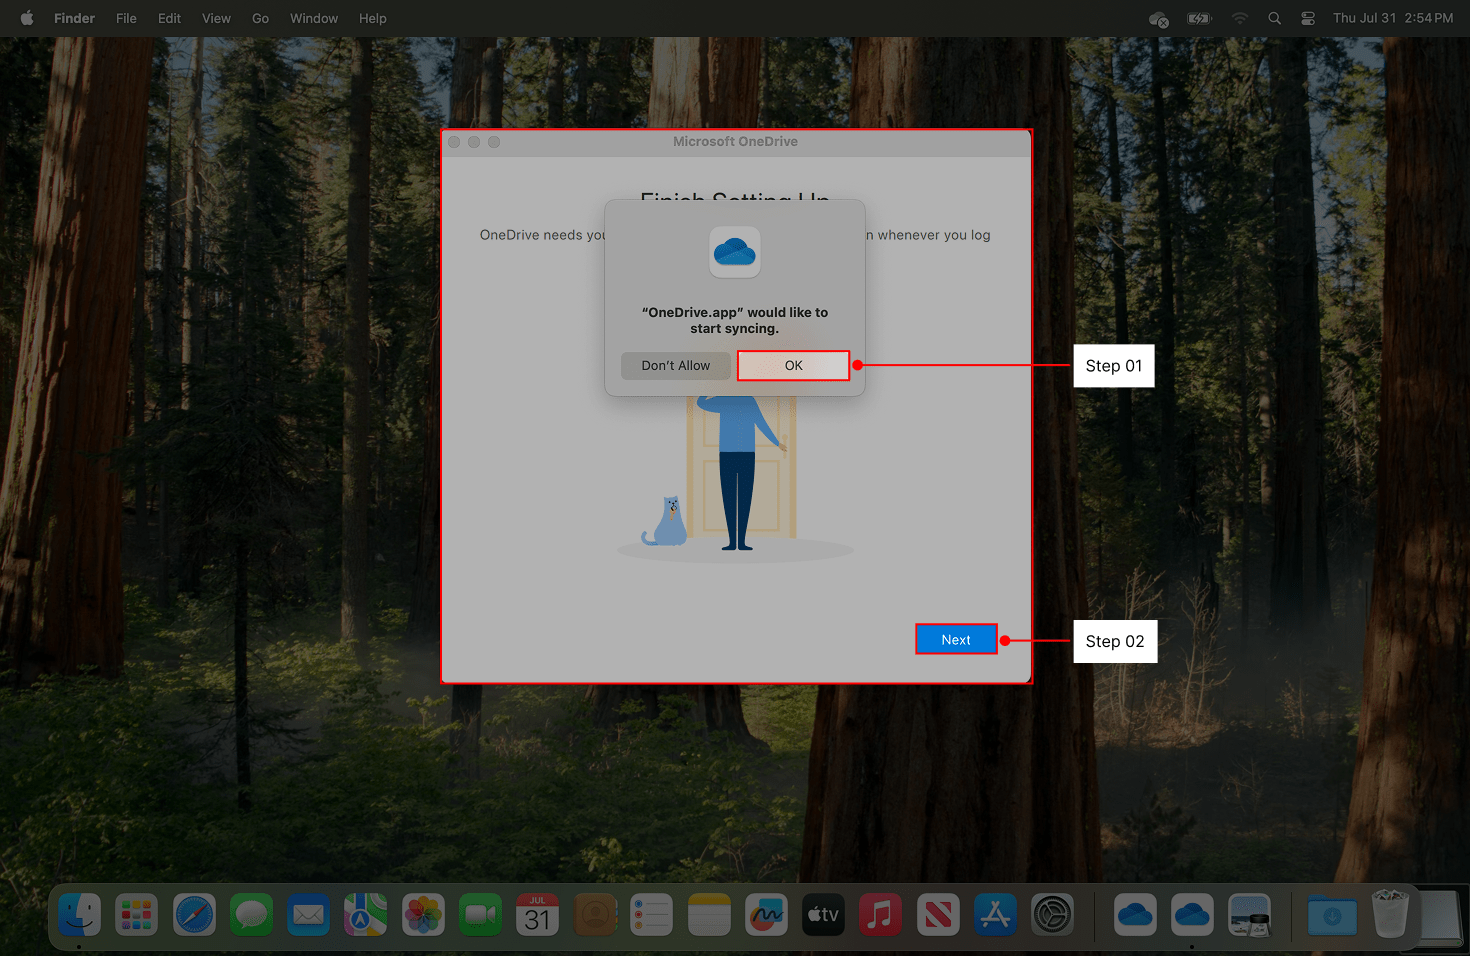
Click “Next” to proceed through two screens until prompted to allow OneDrive.app to begin syncing. Click Ok then Next to continue setup.
You will see several screens that address the basic functionality of OneDrive. Please take a moment to review each of these.
You may be prompted to choose folders to automatically back up. Our recommendation is to not allow this behavior and instead to add files and folders to OneDrive manually. If selectable toggles are present, turn them off.
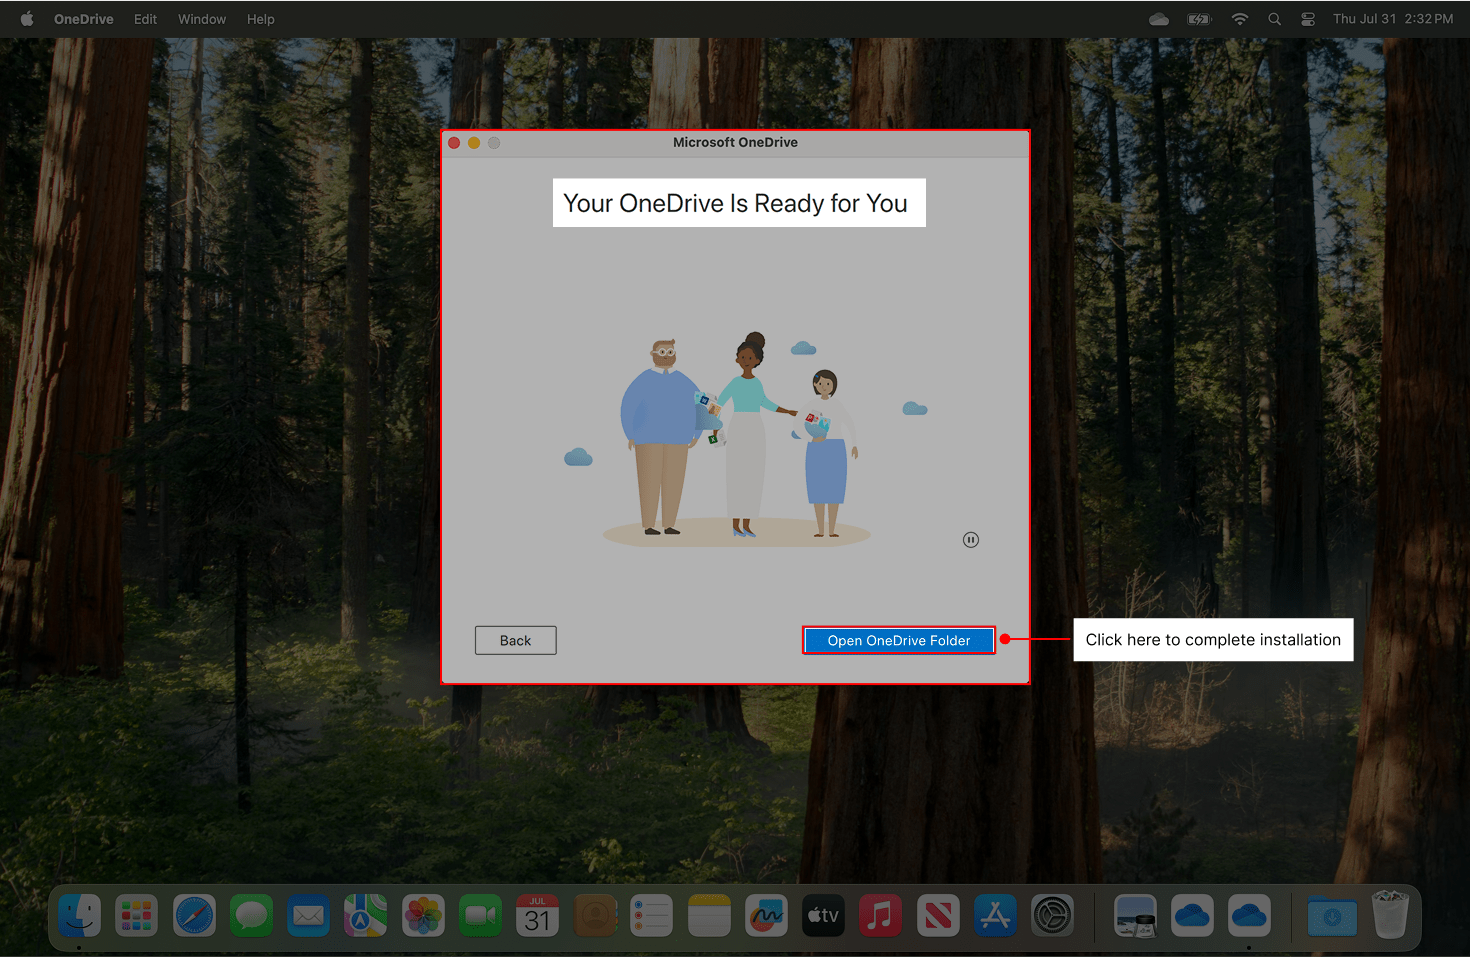
On the final screen, you will see a message that OneDrive is ready for you—click the “Open OneDrive folder” button to complete installation.
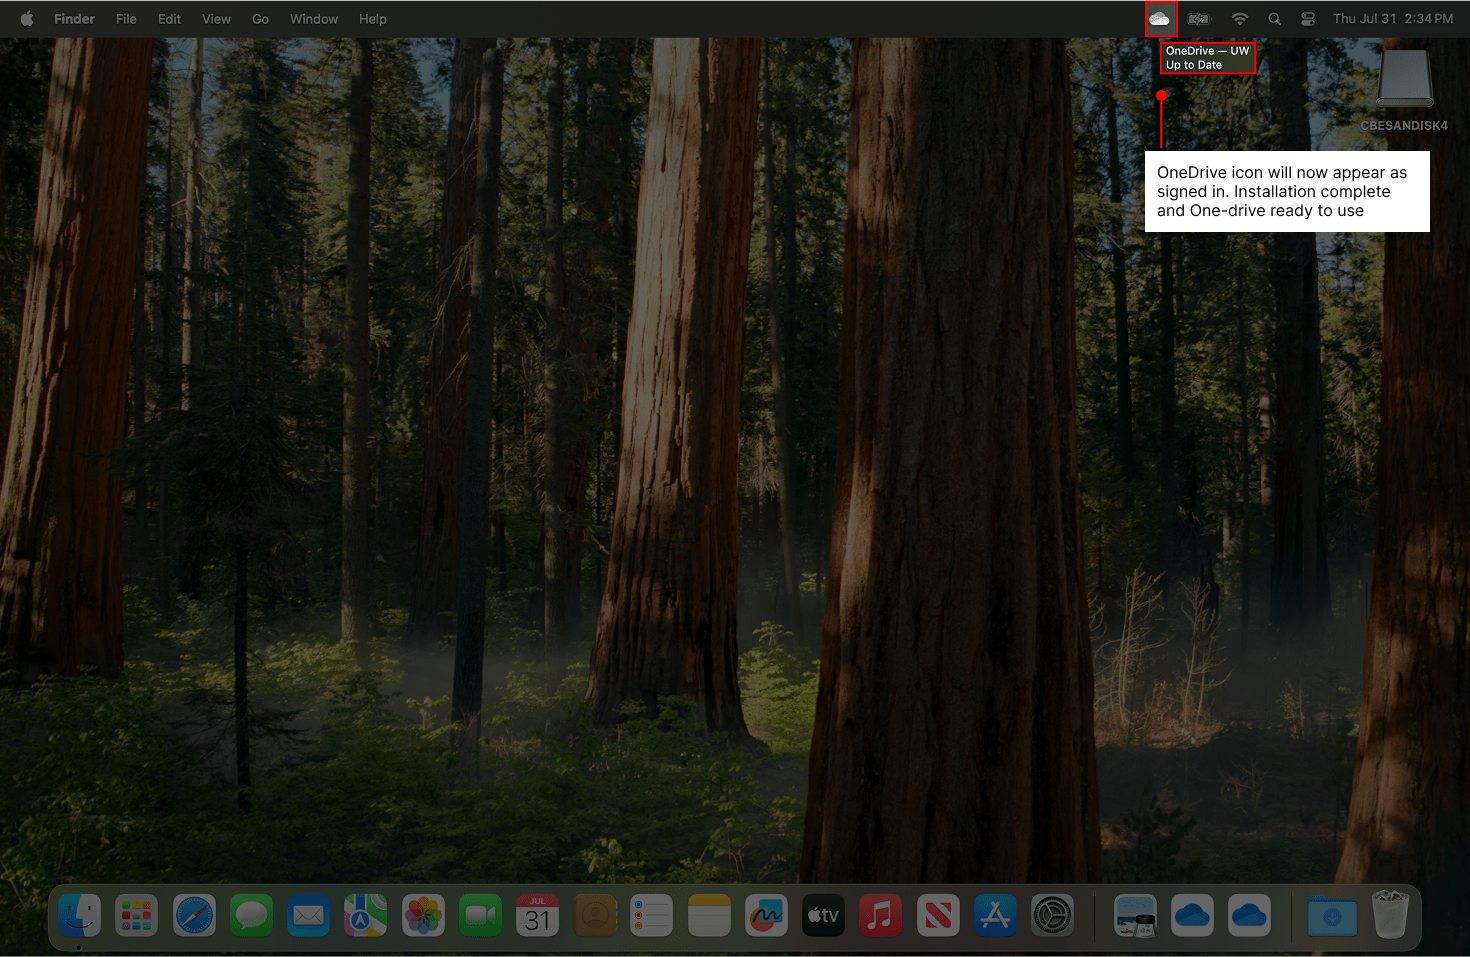
Your installation is complete, and OneDrive has begun to synchronize files and folders. The OneDrive icon will now appear as signed in:
Configuration is now complete and you may begin to use OneDrive. In your OneDrive folder, you may notice that unexpected or empty files appear during this process, which is normal. Many users will have accidentally saved Microsoft Word, Excel, or PowerPoint documents into OneDrive since these apps are OneDrive-aware, and some Microsoft apps like Teams will store files here.
Next: OneDrive Usage Guide