Overview
This section will walk you through adding your UW Google and UW Office 365 mail accounts to Thunderbird.
- Add UW Google mail account first
- Add UW Office 365 mail account second
During setup, you will need to log in to your UW email accounts. Be sure you have your Duo device available for this.
Once the accounts are added, you will wait for the Thunderbird app to synchronize your accounts to the app before proceeding to the next step.
Set up Thunderbird with mail accounts
First account: add UW Google mail account to Thunderbird
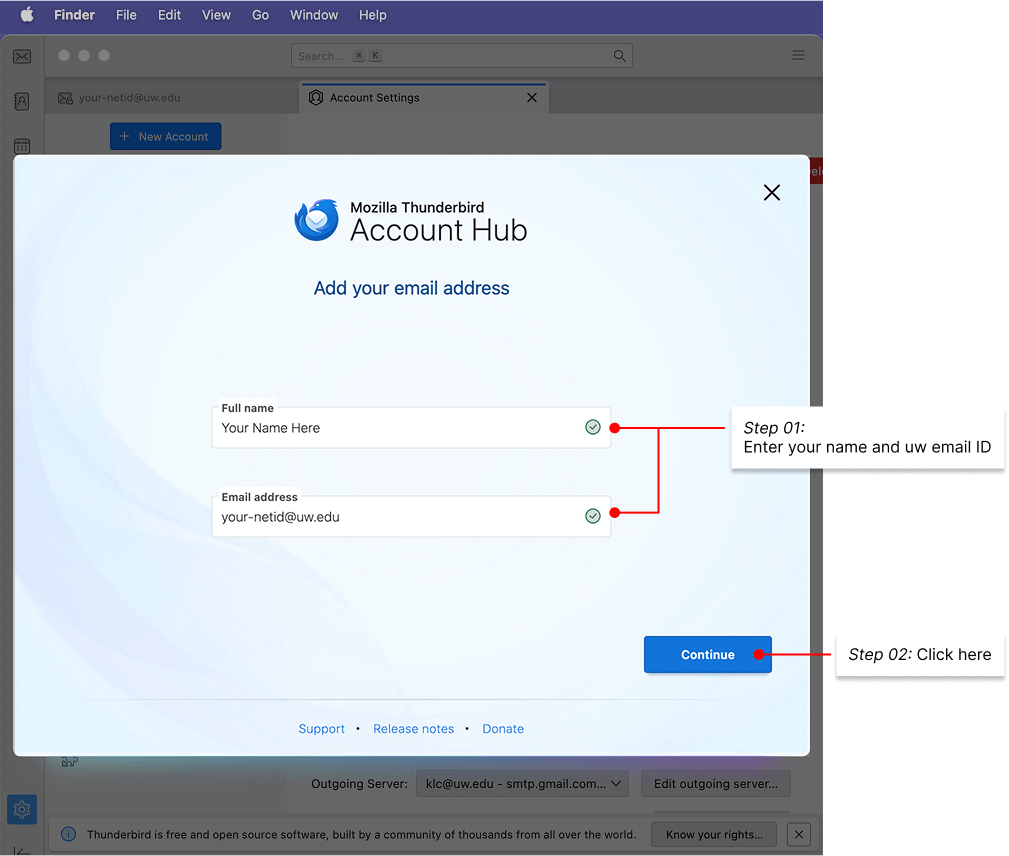
Once you have installed Thunderbird in the previous section, you are ready to begin setting it up. When launching Thunderbird for the first time, you will see the screen below to add your first account.
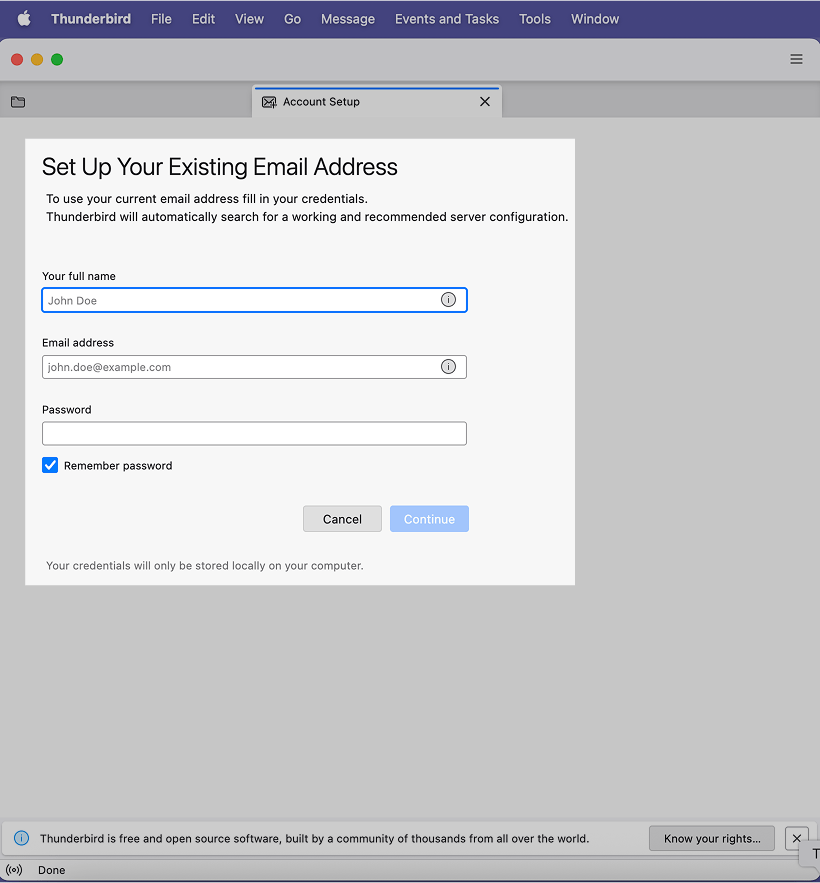
- Enter your name and UW email address. Do not enter your password here.
- Once you fill in the name and email address boxes, Configure manually will be available to click on. Do so. DO NOT click Continue.

Enter UW Google mail settings
Modify the manual configuration information to match the settings shown below (most of the suggested information that is prefilled will be wrong). Your UW email address will be prefilled in the username box in both the incoming and outgoing section. Double check that all other settings exactly match those shown here. You do not need to test the configuration. Simply click Done.

| Incoming Server | |
| Protocol: | IMAP |
| Hostname: | imap.gmail.com |
| Port: | 993 |
| Connection security: | SSL/TLS |
| Authentication method: | OAuth2 |
| Username: | your-netid@uw.edu |
| Outgoing Server | |
| Hostname | smtp.gmail.com |
| Port: | 465 |
| Connection security: | SSL/TLS |
| Authentication method: | OAuth2 |
| Username: | your-netid@uw.edu |
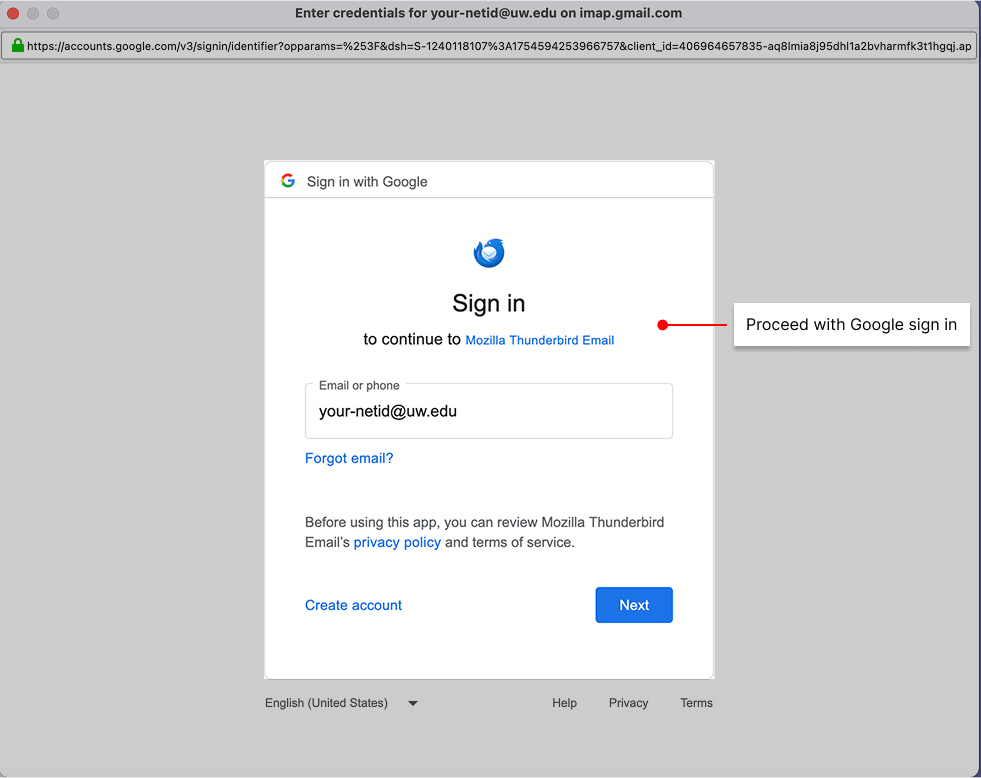
Sign in to UW Google mail
The Google sign in window will appear. Proceed through the Google sign in process. Duo authentication will be required.
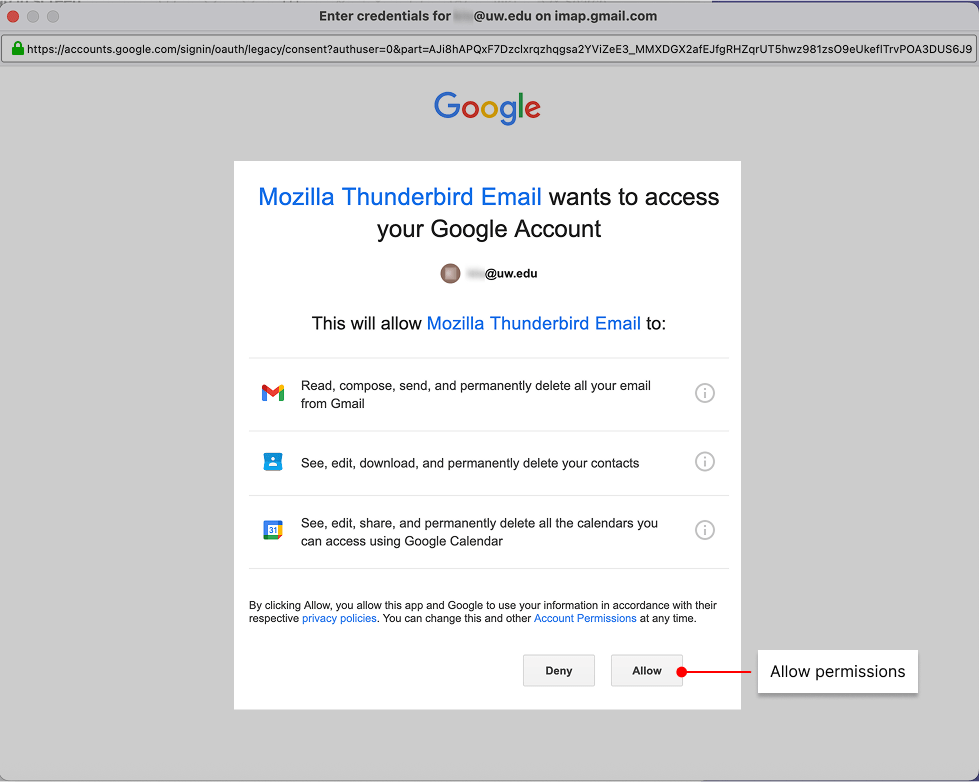
Once Duo Authentication is completed, Allow Thunderbird to access your Google Account.
You should see a screen like the one below indicating you have successfully created your Google account in Thunderbird. Click Finish.
Note: if later in the initial setup process, you are asked a second time to allow Thunderbird access to your Google account, click allow again.

Additional UW Google mail setup steps
When asked to make Thunderbird the default mail client, click Skip Integration.

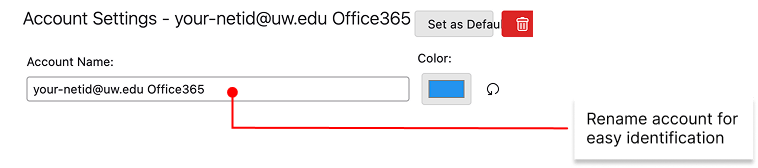
After creating the account, change the account name to easily identify each email account you set up.
- Mac users: From the Thunderbird menu, choose Account Settings. Account setting will open in a new tab in Thunderbird.

- Windows users: Click the “hamburger” (three bars) menu near the right end of the top bar of the app screen. Choose Account Settings. Account settings will open in a new tab in Thunderbird.

- Select the account you created in the account list on the left. It will currently be named as your email address.
- At the top of the Accounts Settings for this account, change the Account Name field similarly to what is shown below.

Second account: add UW Office 365 mail account to Thunderbird
Add a second account for your UW Office 365 mail account.
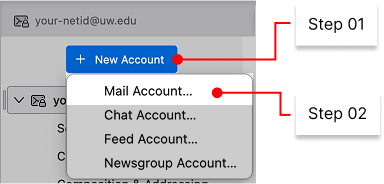
In the left column, above the account you just created, click the New Account button. Select Mail Account….
You get a different account setup window this time. Enter your name and email address. Click Continue.
Sign in to your UW Office 365 mail account
When prompted, enter your password and authenticate through Duo. Wait patiently while Thunderbird looks up configuration settings. This can take a bit of time.
Thunderbird will eventually locate your UW Office 365 email account and bring up the next window. Click Edit Configuration. DO NOT click Continue.

Click Advanced Config,

In the dialog box that pops up, click OK to confirm advanced configuration.
Mac users:

Windows users:

Enter UW Office 365 mail settings
You will be taken back to the Account Settings tab. Your UW Office 365 account has been added but still needs to be manually configured correctly.
Click on the second account in the left column list which will be named with your email address. Change the Account Name field to give this account an identifiable name as well.
Below the name of your Office 365 account, click Server Settings. Modify the settings to match those below. The username will be your UW email address. Double check that all other settings exactly match those shown here
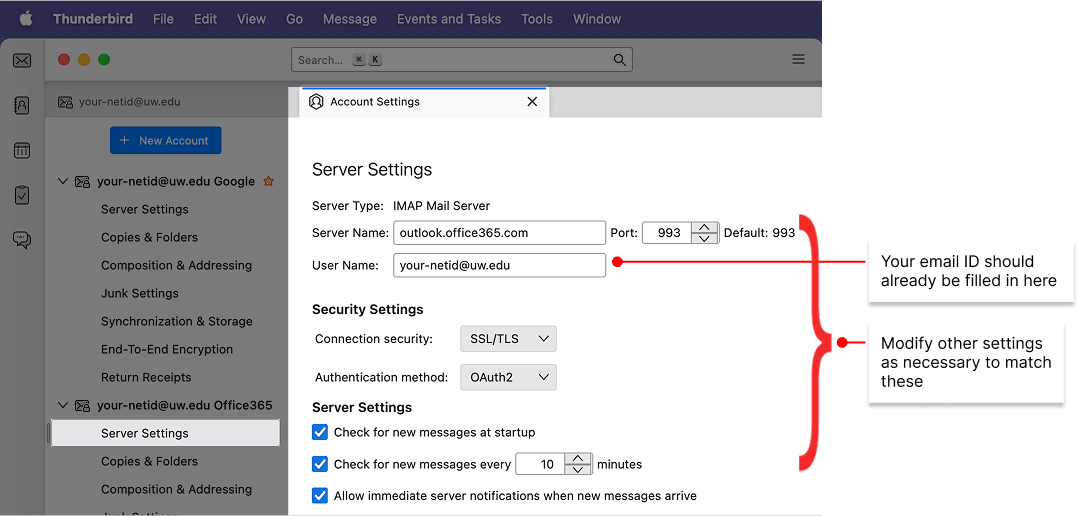
| Server Settings | |
| Server Type: | IMAP Mail Server (pre-filled) |
| Server Name: | outlook.office365.com |
| Port: | 993 |
| Username: | your-netid@uw.edu |
| Connection security: | SSL/TLS |
| Authentication method: | OAuth2 |
| rest of settings will already be selected correctly |
In the left-hand list, scroll to the bottom and select Outgoing Server. In the list of Outgoing Server Settings, select the item that contains office365.com. Click Edit….
Modify the settings to match those shown below. Again, your username is your UW email address.

| Outgoing/SMTP Server | |
| Server Name: | smtp.office365.com |
| Port: | 587 |
| Connection security: | STARTTLS |
| Authentication method: | OAuth2 |
| Username: | your-netid@uw.edu |
Both email accounts should now be successfully added to Thunderbird. You can click the X on the Account Settings tab to close it.
On the main Thunderbird tab, you will see both of your accounts listed on the left column. You can widen the left column if you can’t see the full account name identifying which is Google and which is Office 365.
Wait for email accounts to syncronize in Thunderbird
Thunderbird will now synchronize your email accounts from the mail servers to the desktop application.
- Thunderbird will synchronize all Google mail labels as folders in your Google account.
- Thunderbird will only synchronize the Inbox in your Office 365 account by default. If you have created other folders in Outlook on the Web, you can synchronize them by explicitly adding them (link).
You can see the progress of the sync by looking at the bottom bar of the Thunderbird window. This process may take a very long time (possibly days) if you have a lot of email.

Important: You must allow the synchronization process to complete before copying any email from your Google to your Office 365 account.
Keep your computer on (and keep it open, if it is a laptop), plugged in, and connected to the internet. It may be necessary to modify sleep settings to keep the computer awake so the sync completes as quickly as possible.
When all email is fully sync’d the status bar at the bottom of the program window will show that your Google account is up to date or will display no message.

Previous: Overview and Preparation