Introduction
This document will guide you through considerations for migrating data from Google Drive or other sources into a departmental SharePoint site.
Prerequisites:
- Completion of the OneDrive Usage Guide
- Completion of the SharePoint Usage Guide
- Access to Google Drive and any relevant Shared Google Drives
- Access to external disks or file servers such as Solo if any of their contents should be migrated.
Caveats
- It is necessary to convert any Google-native documents such as Google Docs, Google Sheets, or Google Slides, prior to migrating them into either OneDrive or SharePoint. For this reason, it will not be possible to use the the Google Drive synchronizer app–Google File Stream–to copy files. Rather, as outlined below, it is necessary to manually download files and folders from Google Drive then upload them via the OneDrive app.
- When downloading files from Google Drive, Google will create and then download a Zip file to disk. Google has a filesize limit of approximately 2GB. If your file set, when zipped, exceeds that size, then Google will generate additional Zip files as needed. If this occurs, it would be necessary to manually combine the contents of these Zip files prior to upload into SharePoint. We demonstrate how to do this below.
Best practices
- Remain organized and vigilant. Find a workflow that suits you or your departmental needs and follow it strictly. Consult with CBE-IT if there are any concerns.
- Consider whether you need that file. Now may be an appropriate time to delete old, unneeded documents.
- Create a departmental strategy for how files will be stored. What folders are needed to properly organize files in a logical and accessible way? Is there any reorganization in Google Drive that you might complete prior to migrating?
- Adopt the mindset of COPY-VERIFY-DELETE. Do not move files and folders from other locations into SharePoint. Instead, copy them in, allow the synchronization to complete, then verify that they copied correctly. Once you are satisfied by the file copy, then delete the original.
- Avoid keeping duplicate files between the two services lest someone mistakenly edit an old copy instead of the live copy. Once a copy operation has been verified in the target, then delete the source data.
- Migrate when ready. Depending on your usage and needs, you may find it beneficial to leave some files and folders in Google for an appropriate date.
- Migrate in small chunks rather than try to do everything at once. A small folder will cause no issue, but larger folders may create multiple Zip files and cause great confusion. If you notice that more than one Zip file has downloaded, you may find it beneficial start over with a smaller set of files and folders such that you only manipulate one Zip file at a time. Alternatively, it may be necessary to download subfolders individually and move them into place rather than attempt to download a higher-level or root folder.
- Review the “Preparing for a successful transfer” instructions in the OneDrive Usage Guide.
- Ensure that there is sufficient disk space available on your computer to download files, process, and synchronize with SharePoint. For a given folder size, you should have slightly more than double the disk space available. For example, if you migrate a 150MB folder, you should have at least 300MB of free space.
- Clean up after each operation completes to ensure that you do not become confused by previous files and that you have sufficient free disk space to continue your migration.
A basic workflow
- Organize files and folders in Google Drive prior to migration. Delete unneeded items before proceeding.
- Individually download files and folders from Google Drive.
- Expand Zip files on disk.
- Copy files into SharePoint and allow to synchronize.
- Verify that files appear in SharePoint as expected.
- Delete original files from Google Drive and the downloaded Zip files and their expanded folders from disk.
Remember: Copy-Verify-Delete
Gathering data from Google Drive
For this demonstration, we have created two folders in an empty Google Drive:
- A small folder – contains three Google-formatted documents to demonstrate a simple migration and how to convert into Microsoft-native formats.
- A big folder – contains 8,192 Microsoft Word files at 1MB each for a total of 8GB to demonstrate what happens when you download larger folders. This document set contains three levels of folders which will demonstrate how folder structure is maintained when downloading.
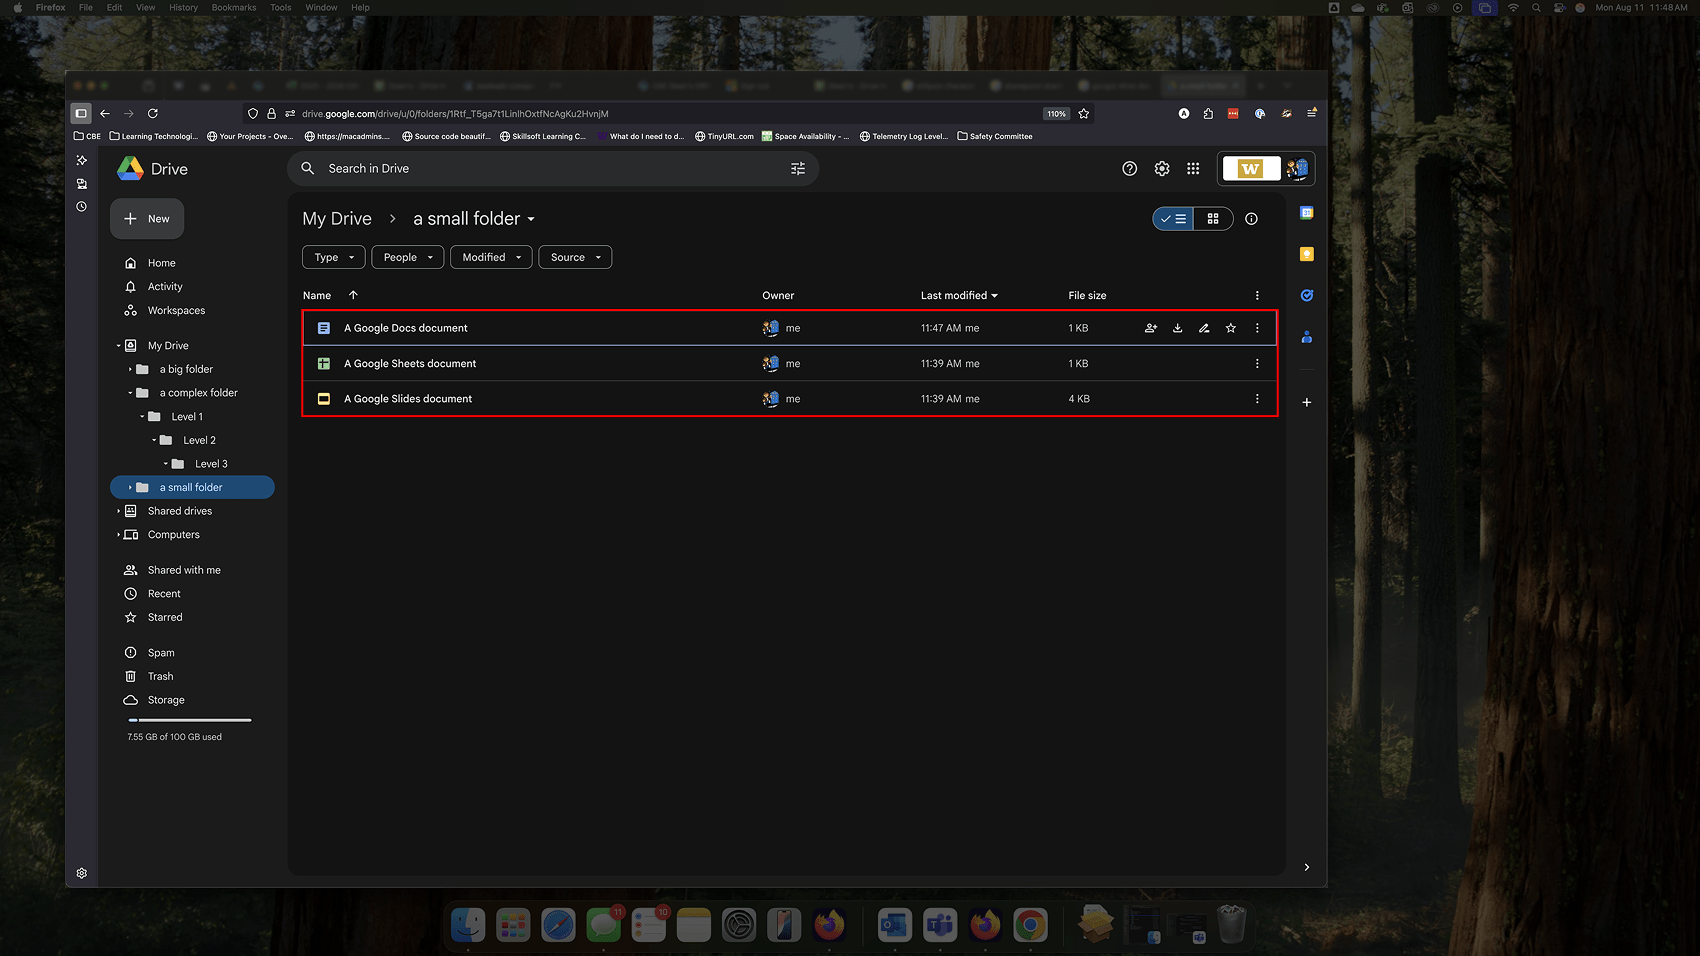
A small folder
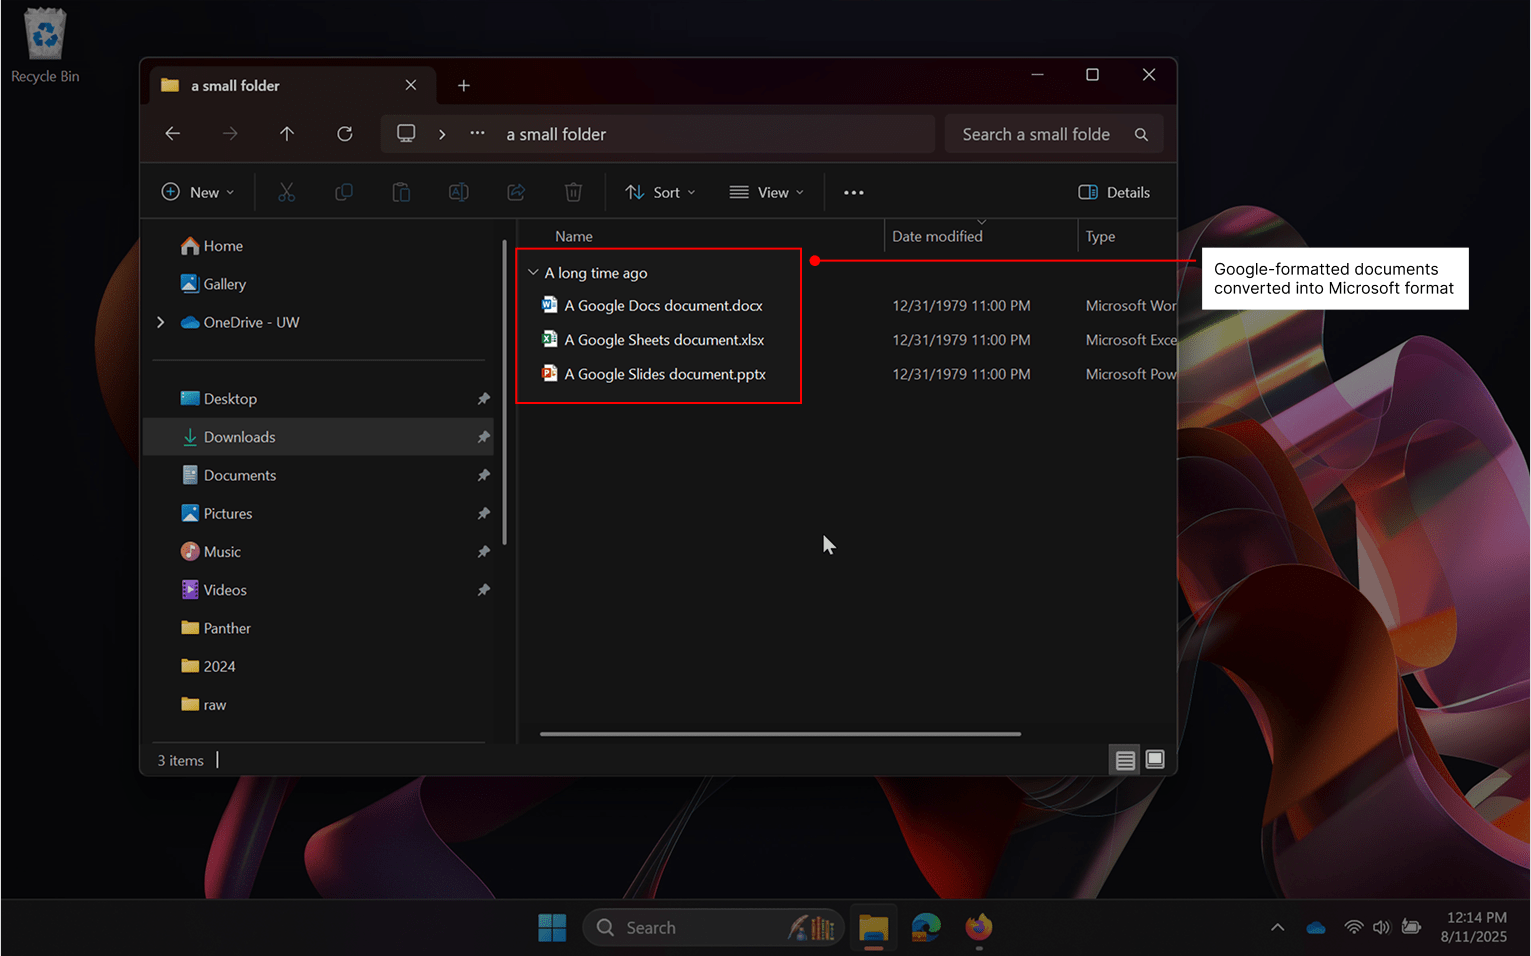
Examining “a small folder”, we note that it contains a Google Docs file, a Google Sheets file, and a Google Slides file.
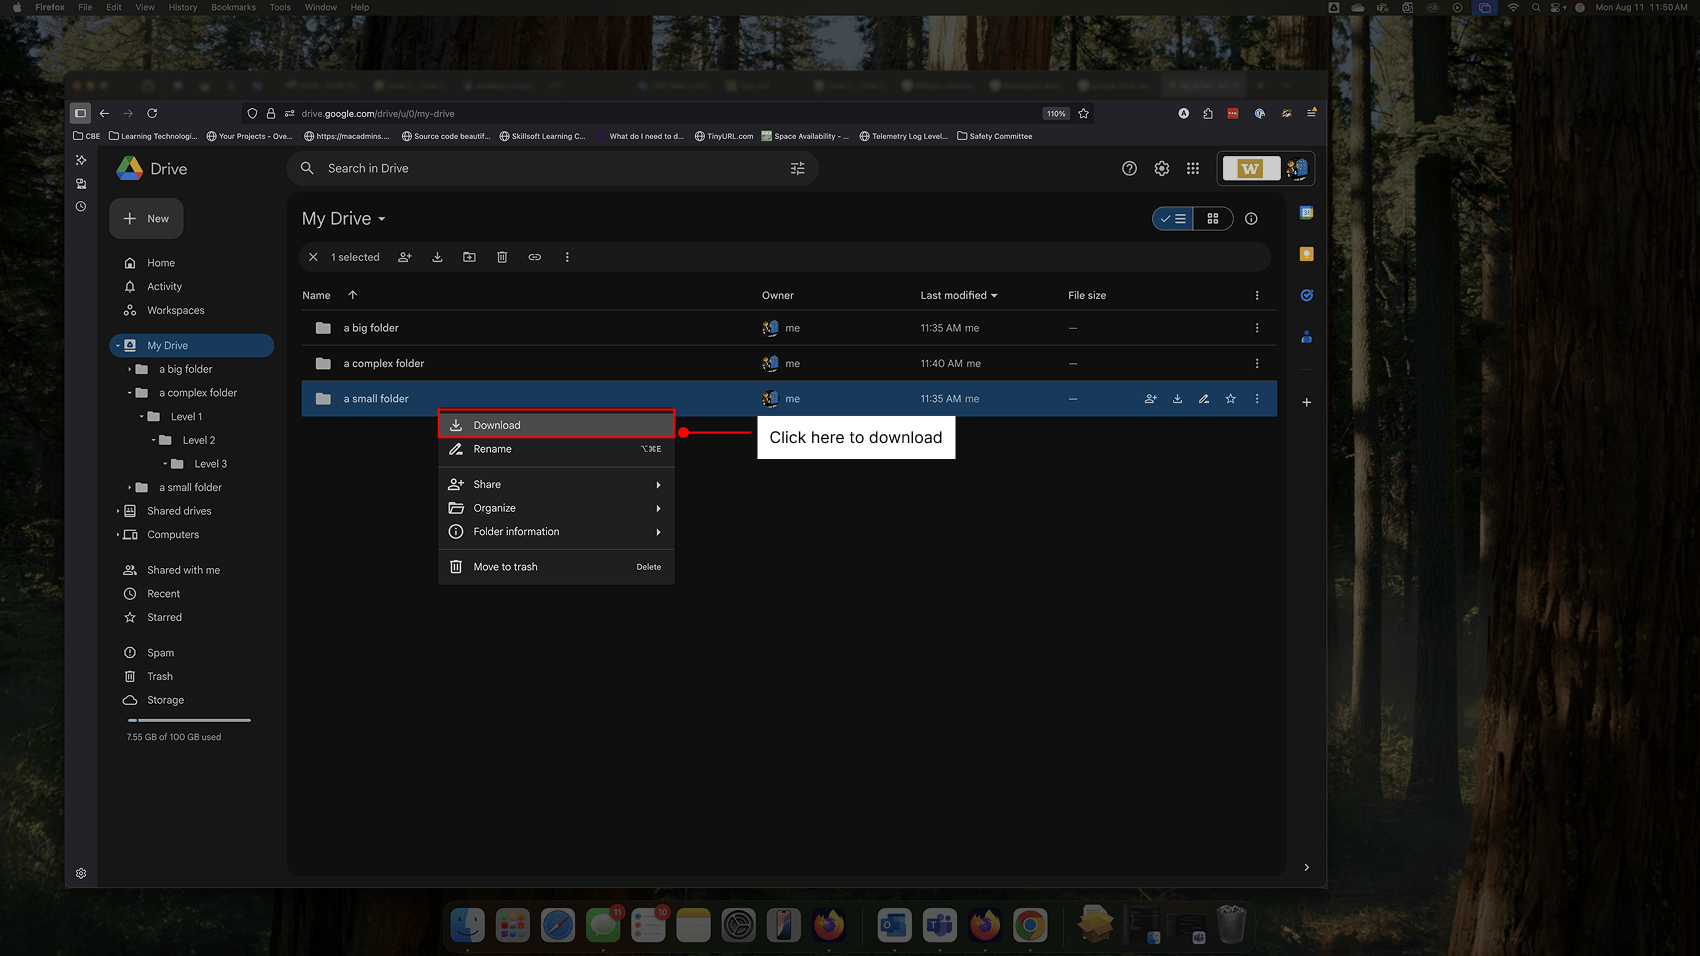
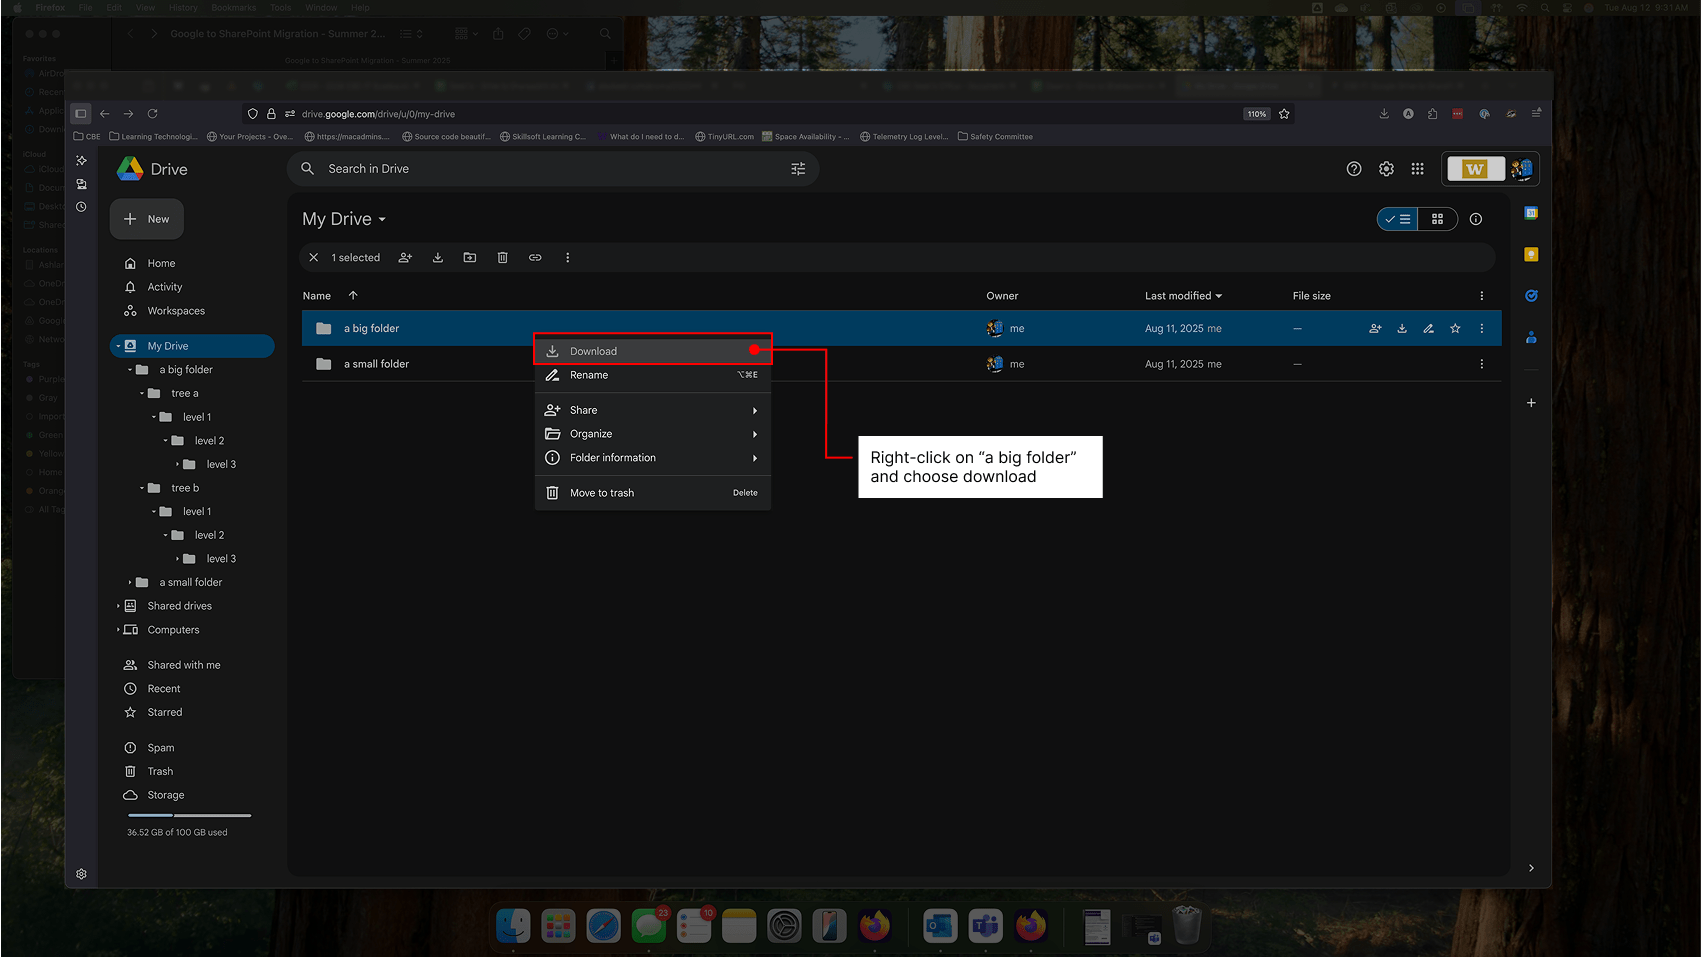
These files, as they are currently stored online, are incompatible with SharePoint and must first be converted. Fortunately, Google Drive will convert them into Microsoft standard formats when downloaded. Moving up one level in our folder tree, we can right-click on “a small folder” and choose the “Download” option.
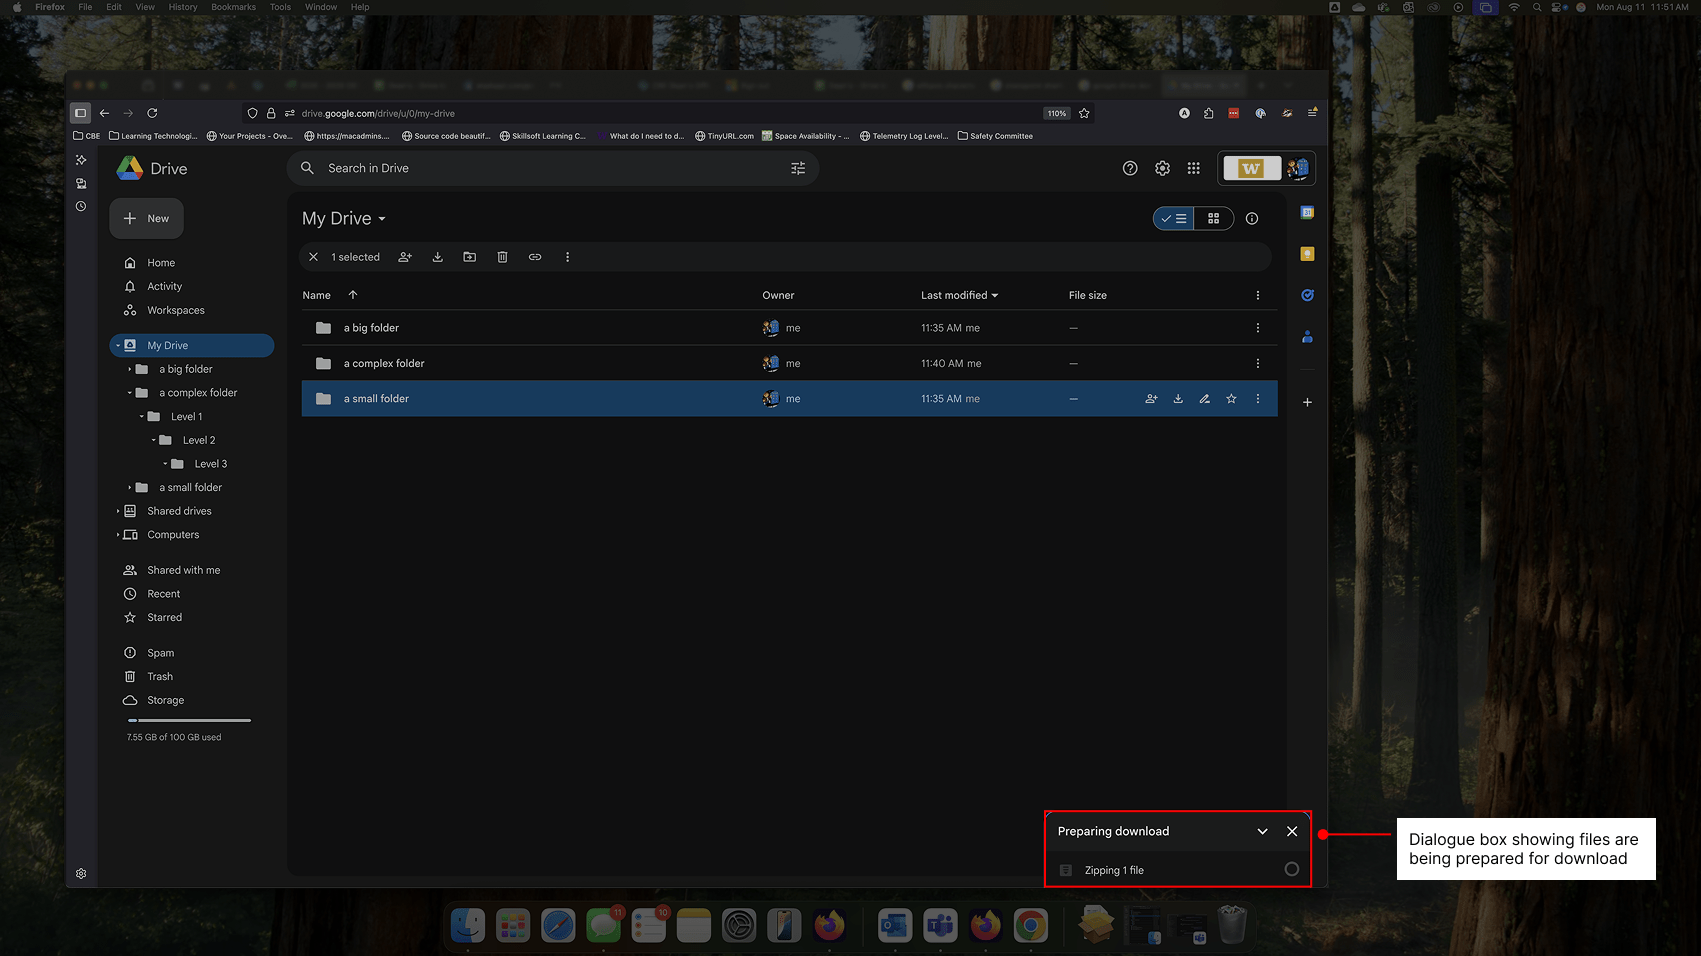
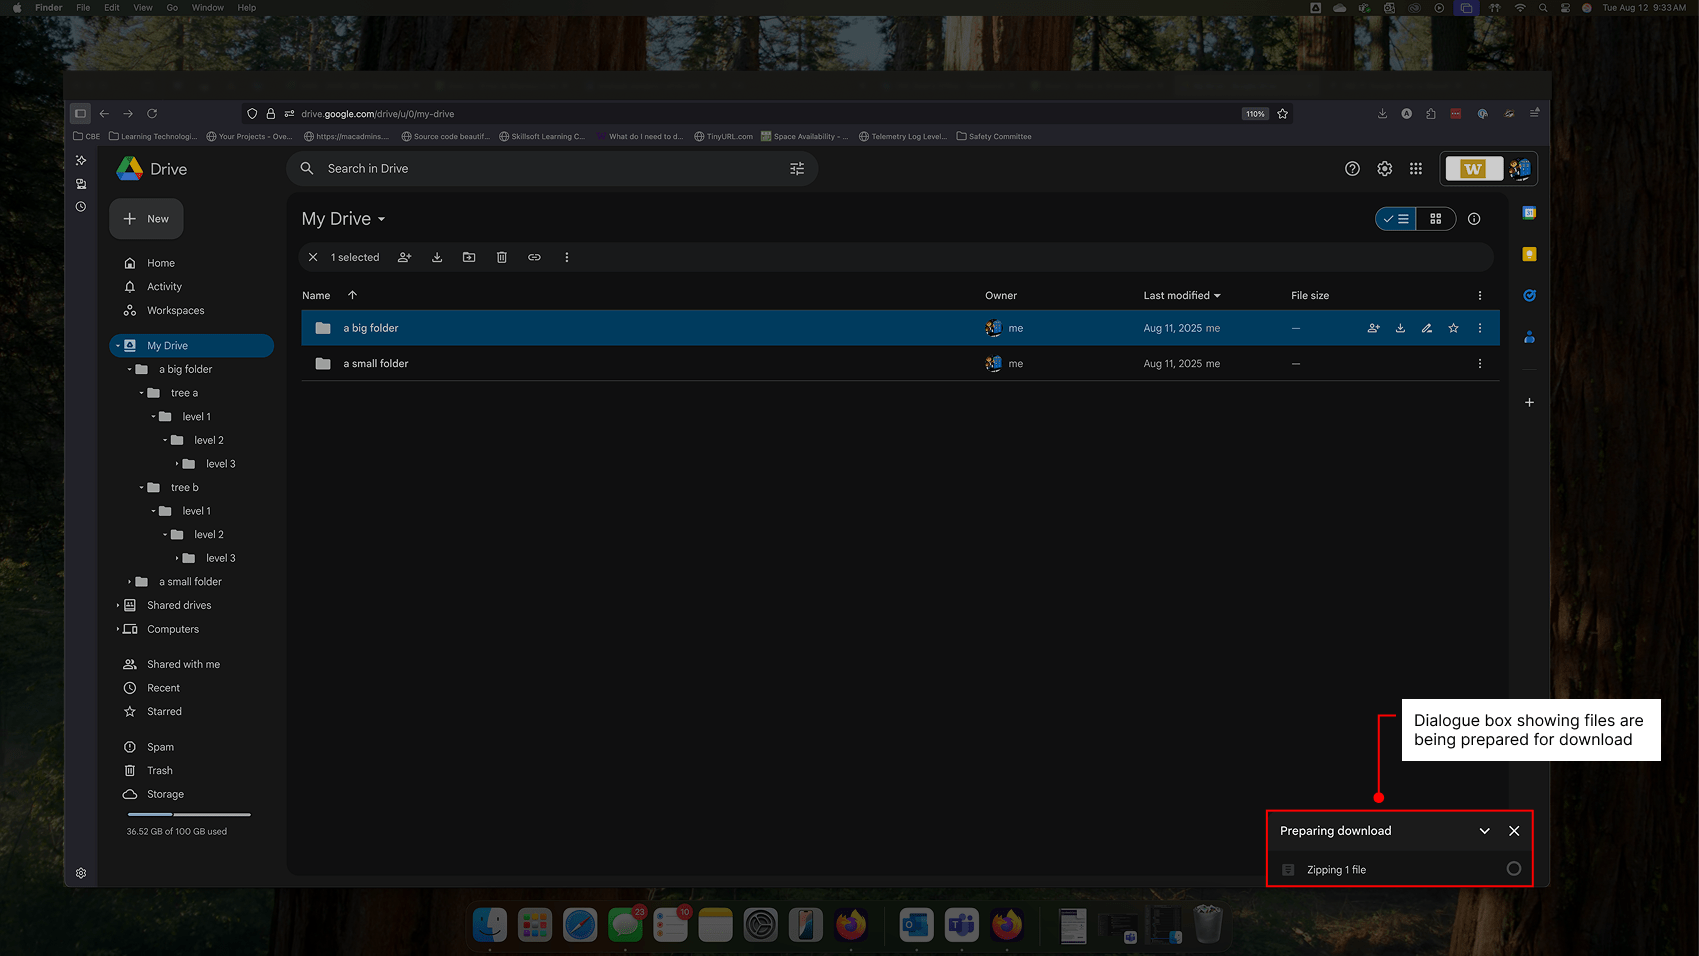
A dialog appears indicating that the files are being prepared for download, after which the download will complete automatically.

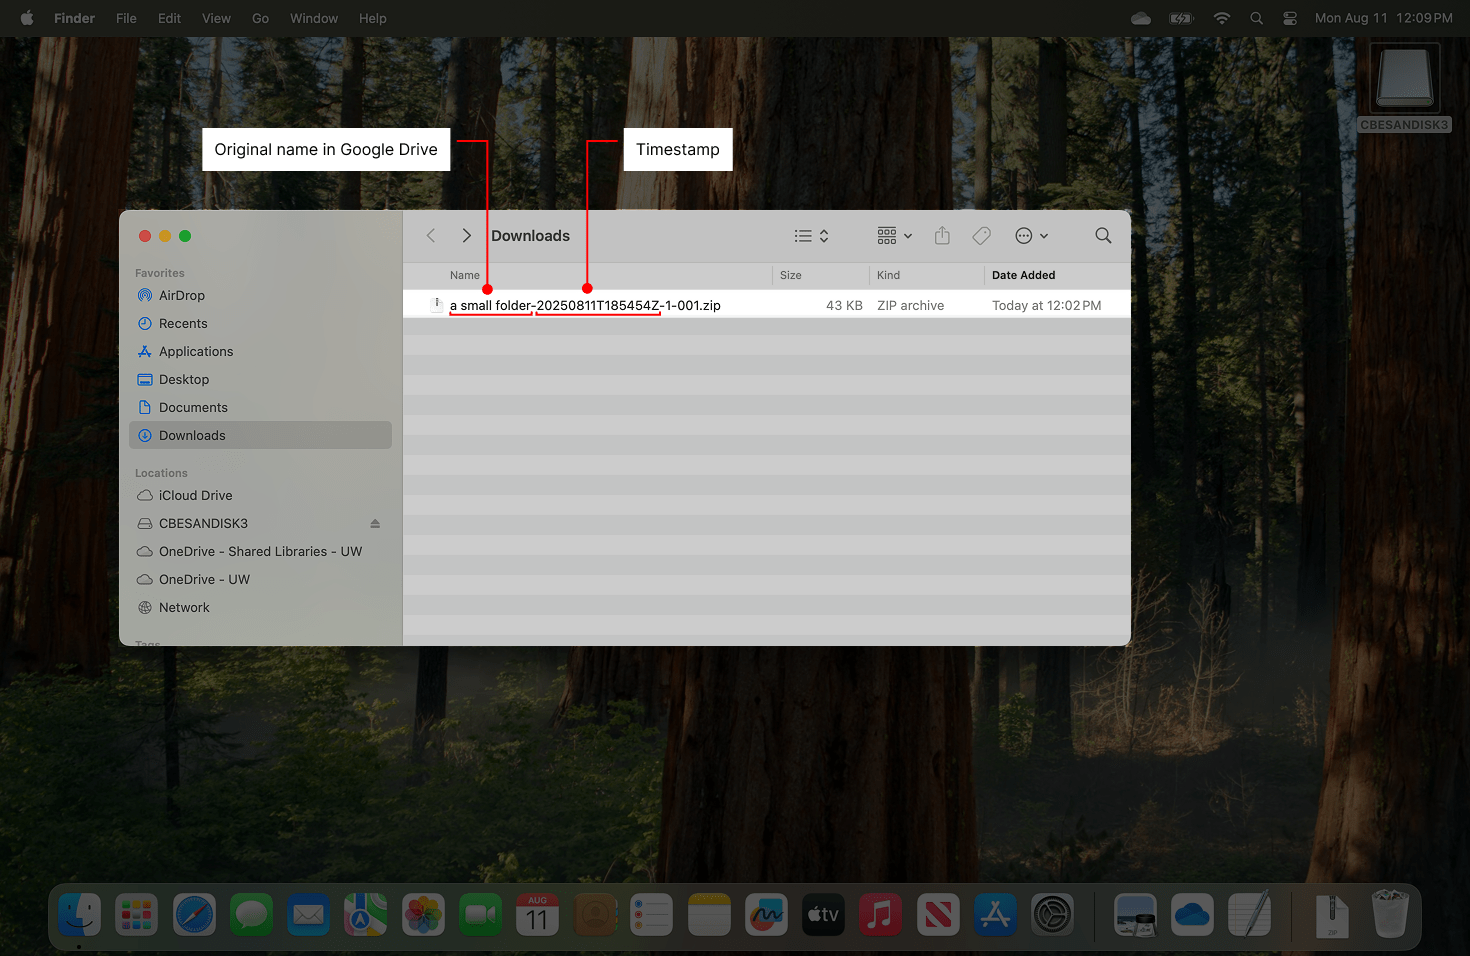
Note that the Zip file contains the original name in Google Drive along with a timestamp from the moment it was downloaded. The timestamp is in UTC form and is ordered as Year-Month-Day-T-Hour-Second-Millisecond-Z. Note that the time (“T”) will be located in Greenwich Mean Time (“Z”), also known as “Zulu Time”. In our example below, the file was created on 11 August 2025 at 18:54 GMT.
You may now extract (i.e. unzip) the Zip file just downloaded.
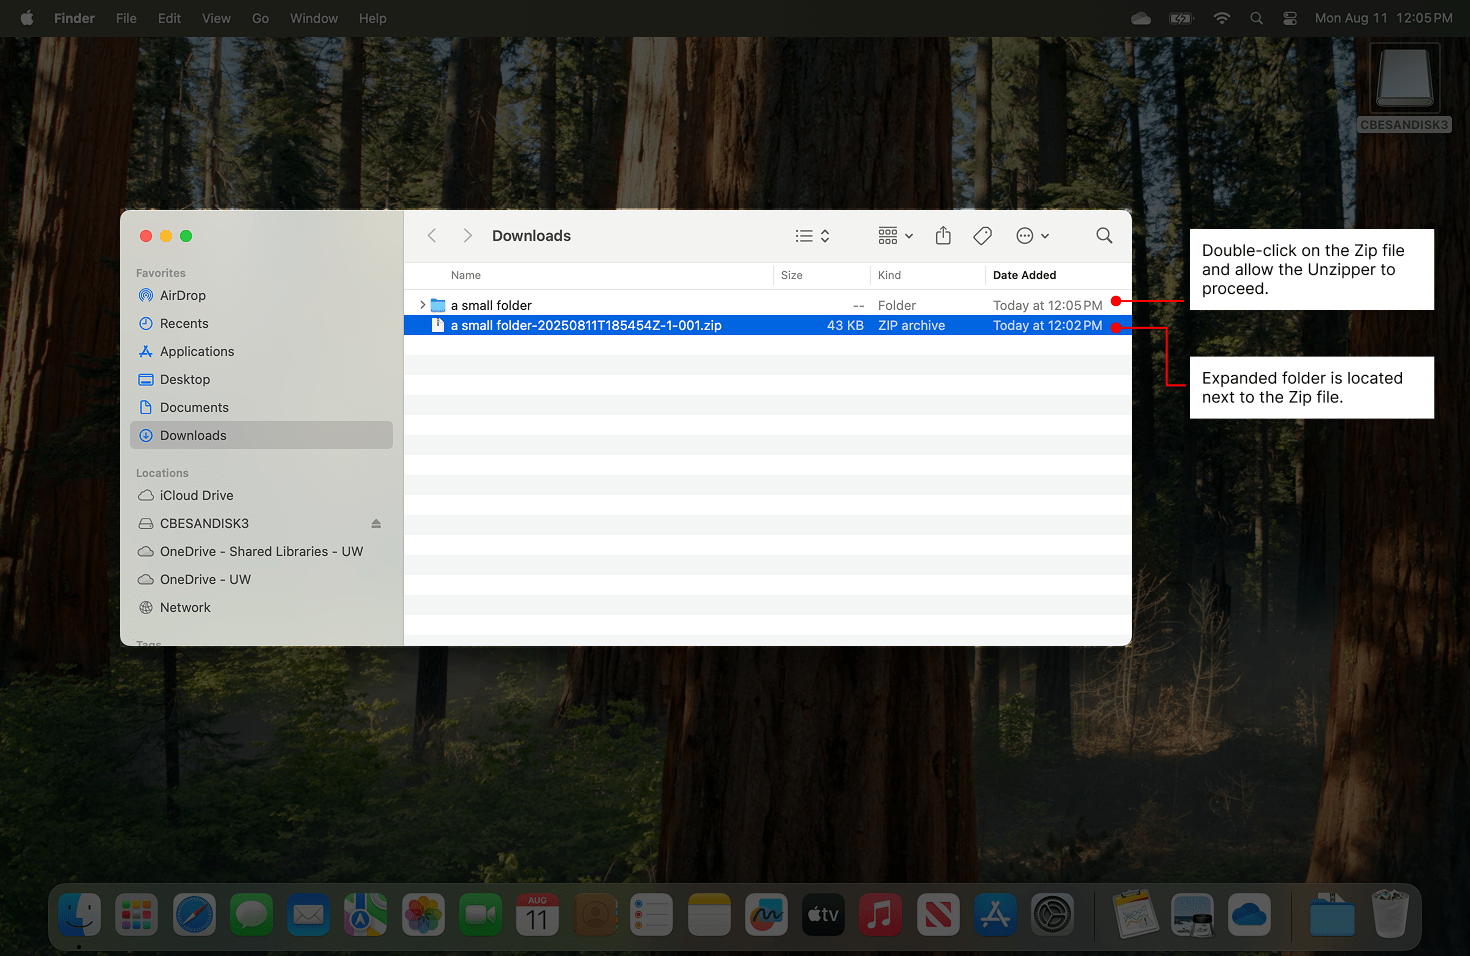
Mac:
Double-click on the Zip file and allow the Unzipper to proceed. Note that the expanded folder is located next to the Zip file.
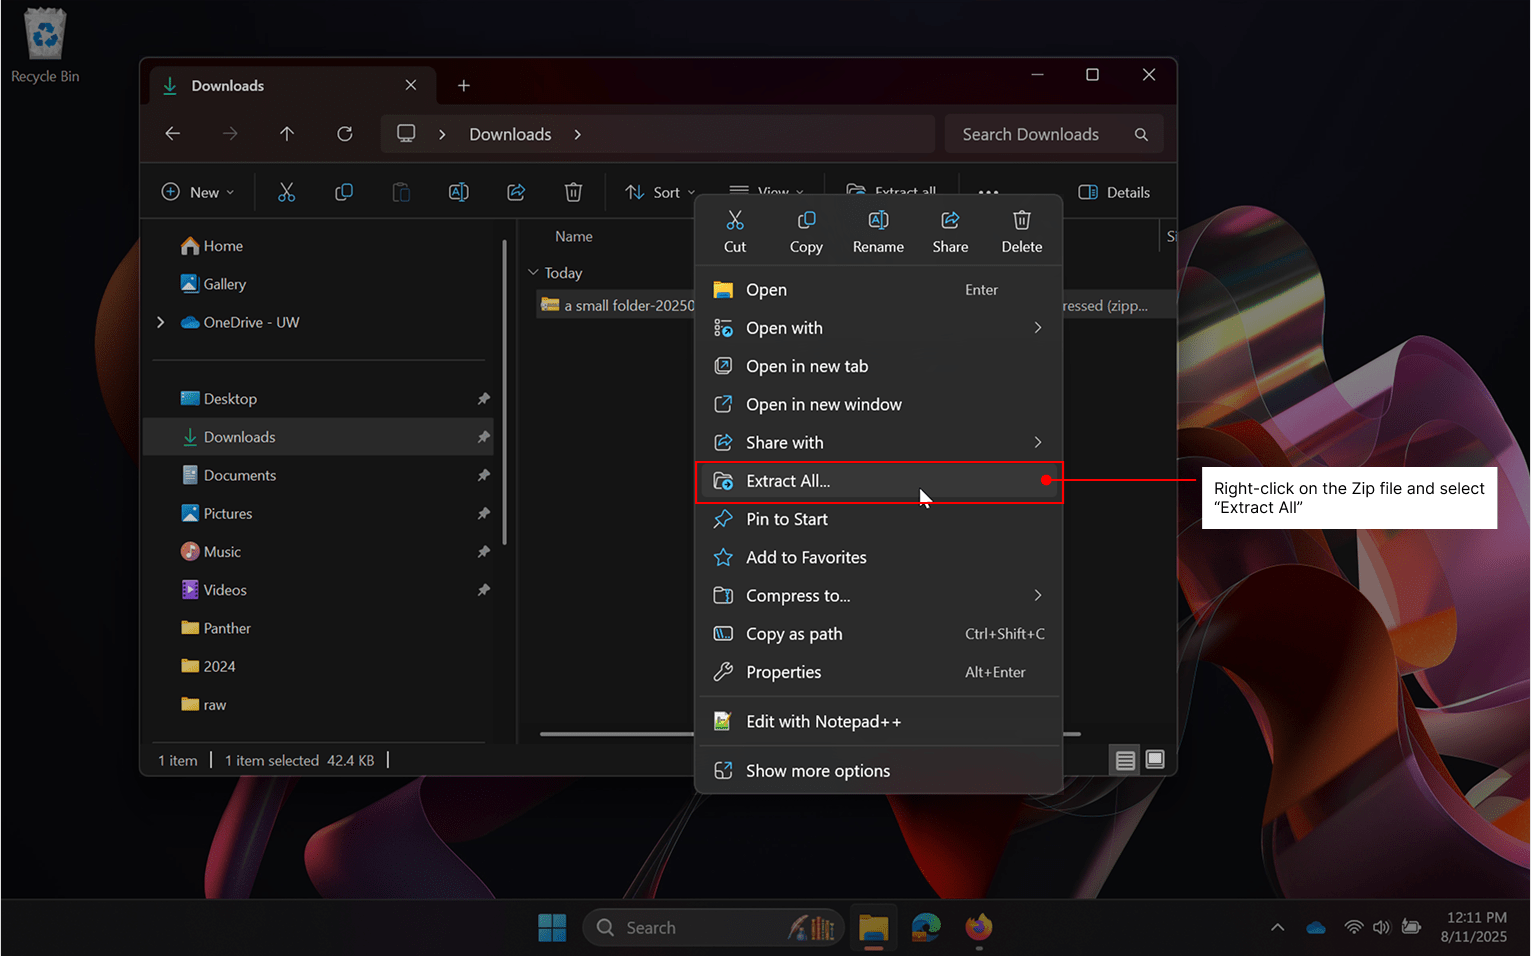
Windows:
Right-click on the Zip file and select “Extract All”.
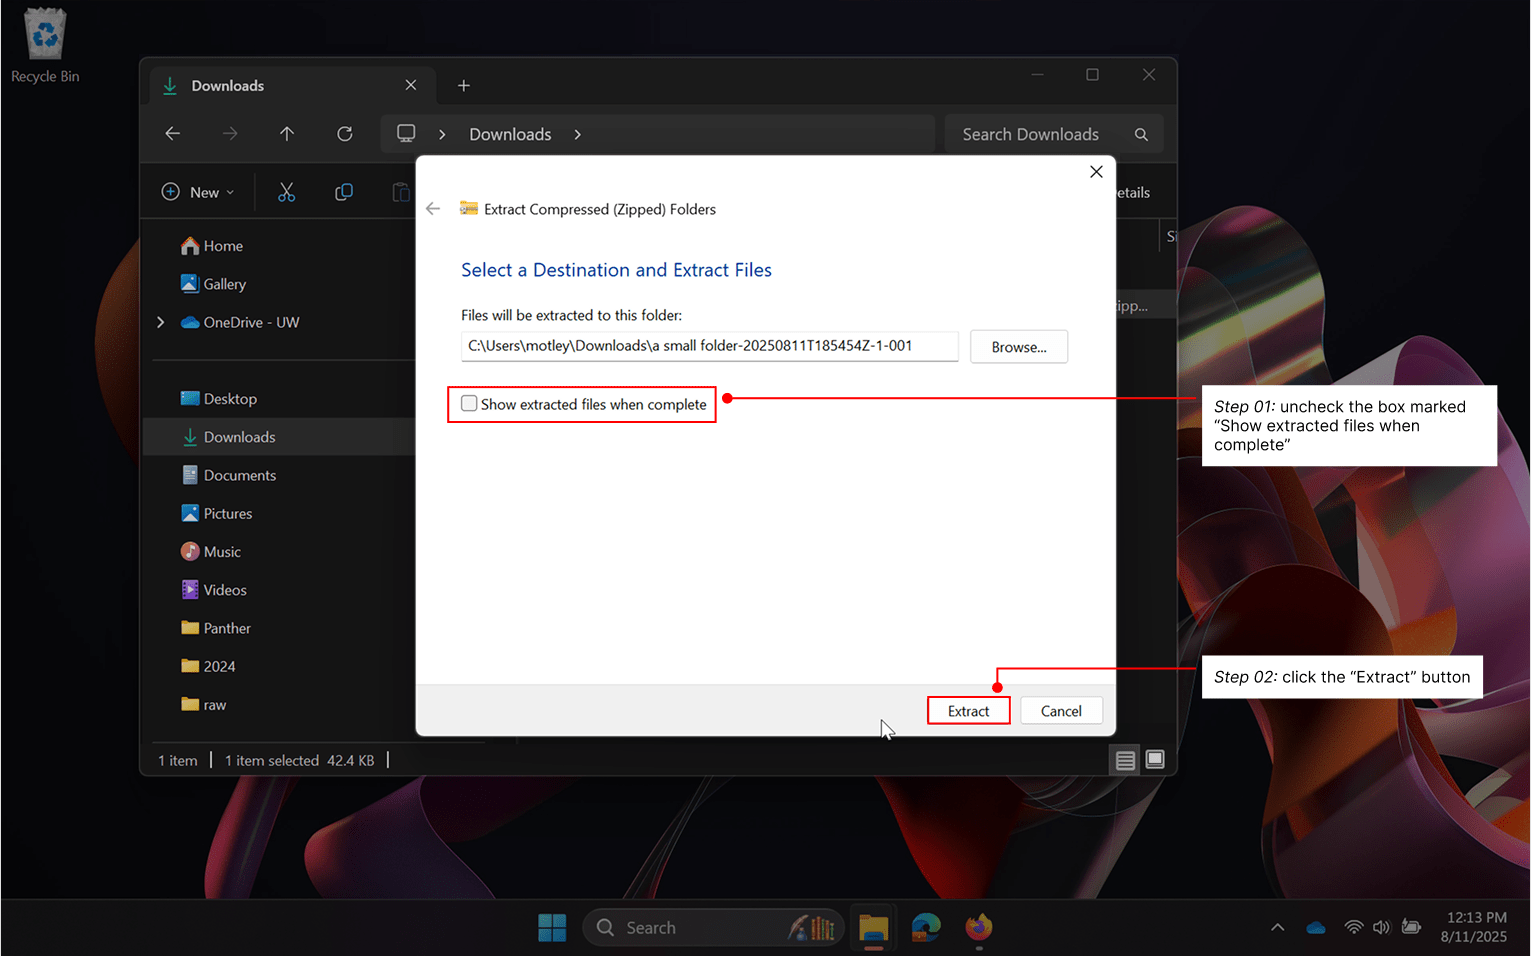
On the dialog that appears, uncheck the box marked “Show extracted files when complete” and click the “Extract” button. Note that on windows, extracted files are embedded in a folder with the same name as the Zip file, and you will find that “a small folder” is inside this folder.
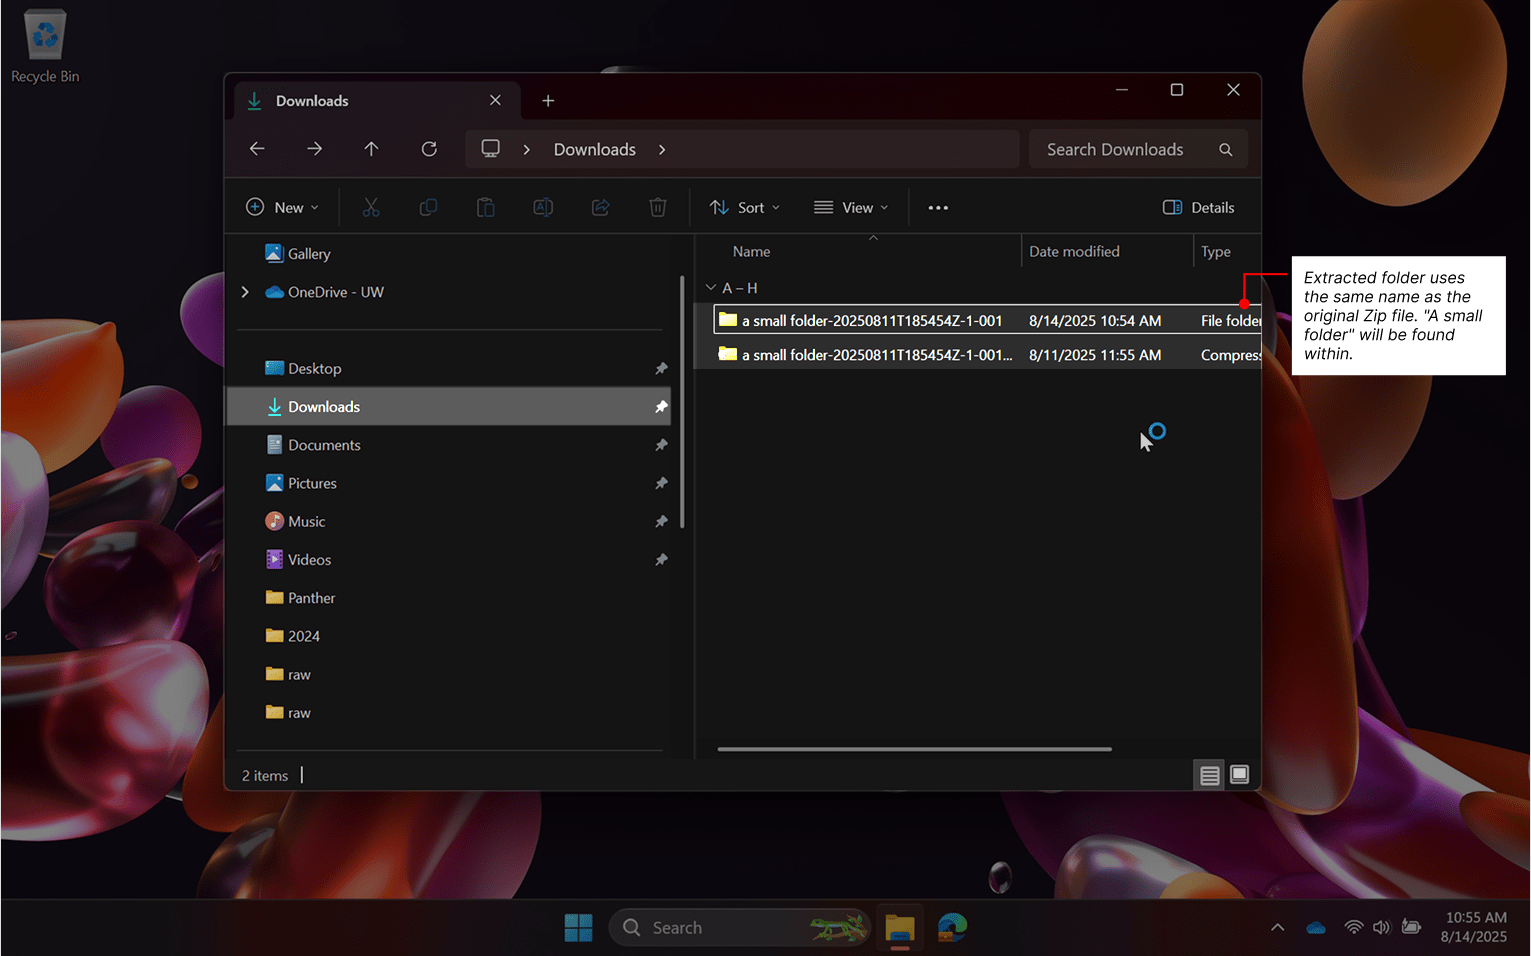
After the extraction process completes, we see both the original Zip file and the expanded folder next to each other.
When we examine the contents of the folder, we see that the Google-formatted documents have been appropriately converted into Microsoft format, and can now be moved into SharePoint. As in the example below, Google may not properly preserve file modification dates during the transfer process.
A big folder
This demonstration is intended to explain why it will be generally preferable to avoid downloading large folder sets and how doing so can dramatically increase the complexity of your migration. It will also demonstrate that existing folder structures will be maintained when a folder is downloaded from Google Drive. We have purposefully set up a somewhat complex operation to illustrate that these operations are more difficult to complete and can cause confusion.
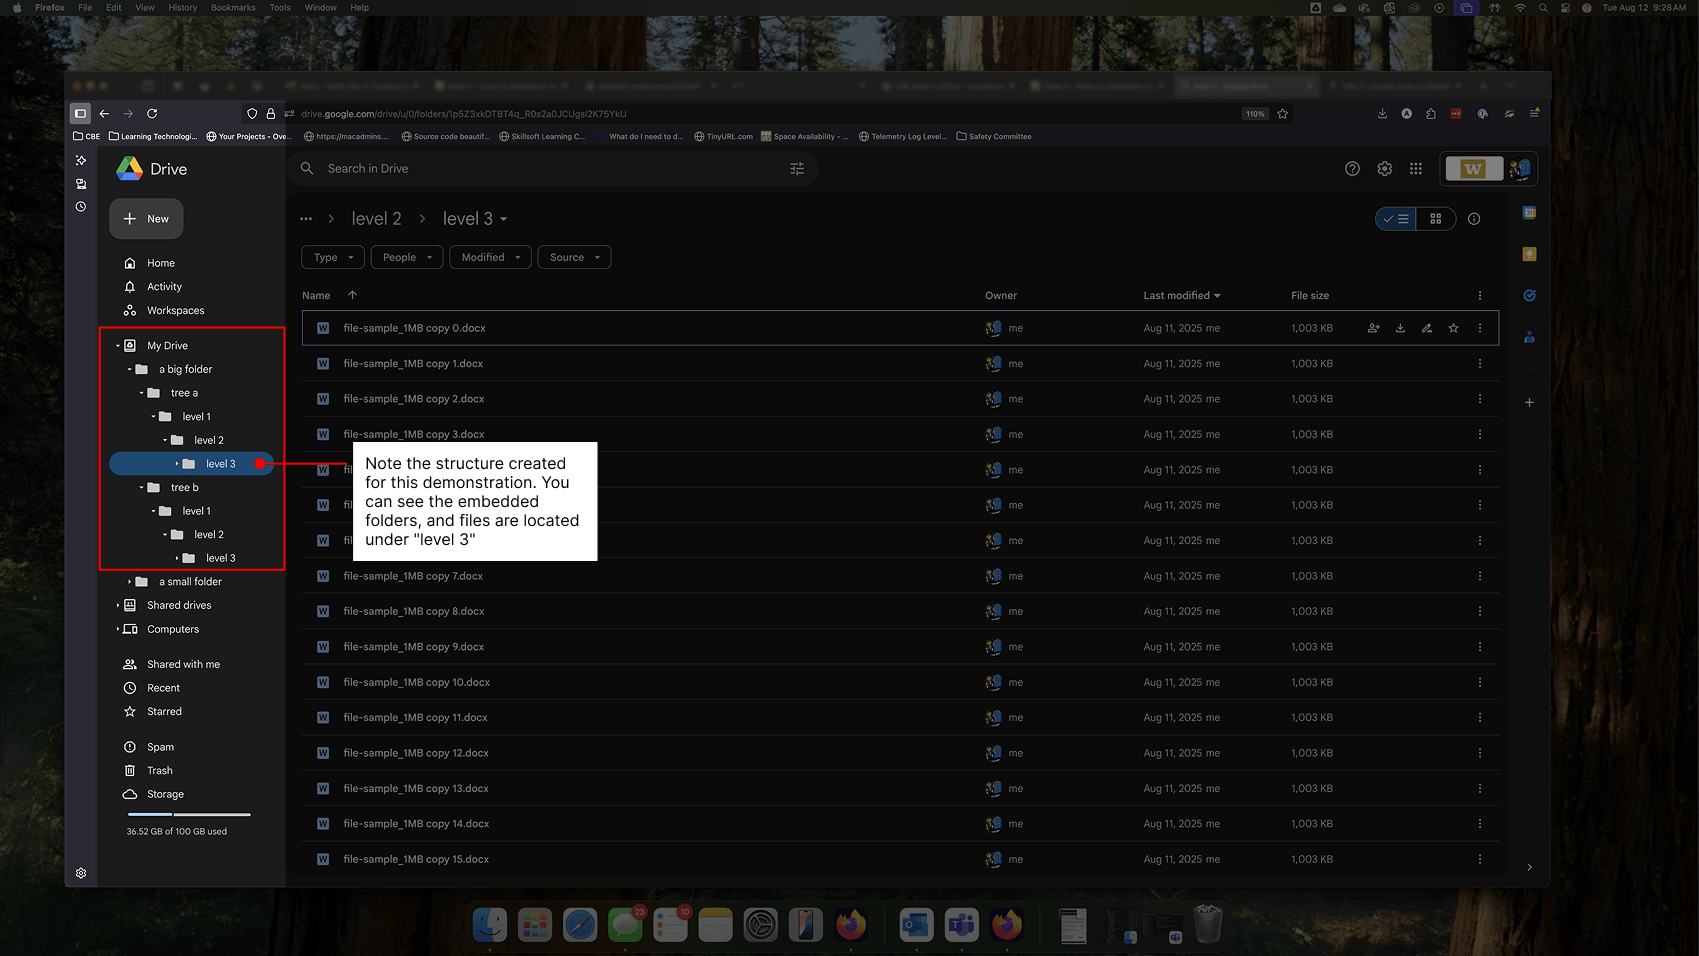
In Google Drive within “a big folder”, we have created two separate sub-folders:
- tree a
- tree b
In each there are three levels of folders, labeled “level 1” through “level 3”. In each of the “level 3” folders, 4,096 Word files of 1MB in size have been copied for a total number of 8192 and a total size of 8GB.
From within Google Drive, if you right-click on “a big folder” and choose “Download”, Google Drive will prepare then download Zip files as before.
It should be noted that a folder that contains a large number of files will take additional processing time, and Google may throttle operations to conserve on computing time. When processing completes, we see that two Zip files have automatically downloaded.

These Zip files have a counter appended to each file, beginning with “001”, and which will iterate upward with each additional file created. In our demonstration, we have these files:
- a big folder-20250812T163200Z-1-001.zip
- a big folder-20250812T163200Z-1-002.zip
When we expand them, we can see that within each, the original folder structure from Google Drive is maintained. Since we have two Zip files, we now have duplicate, parallel structures where files will be distributed somewhat evenly between them. These duplicate folders must be combined prior to uploading into SharePoint.
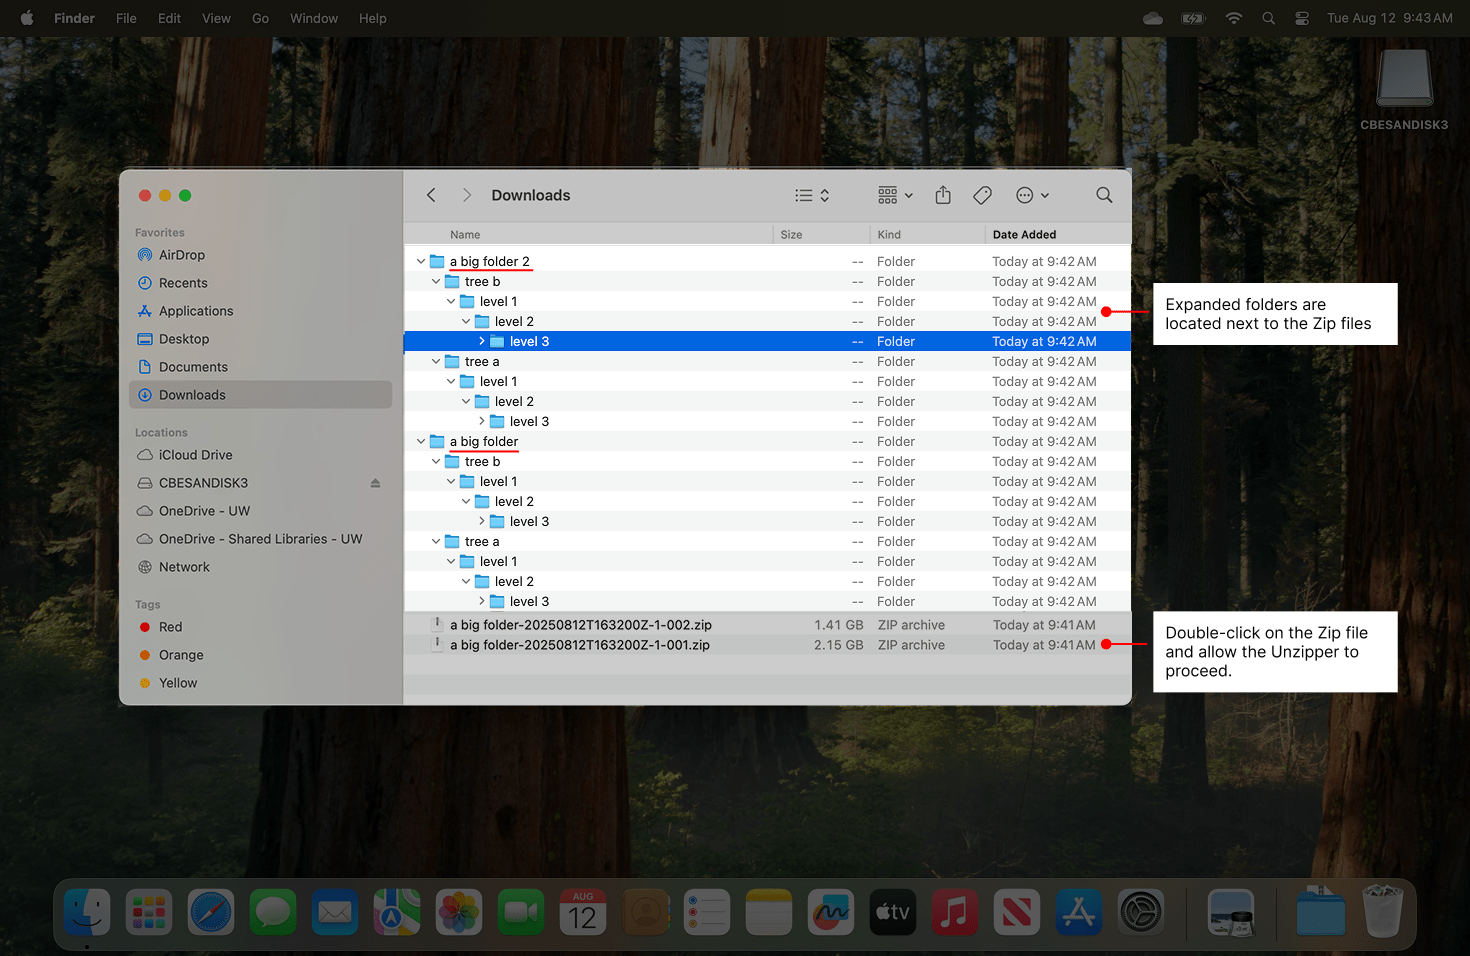
Mac:
On a Mac, combining files and folders can complex. If you have access to a Windows PC, we recommend using it to perform these operations.
It can be difficult to combine these parallel trees because doing so through a simple drag-and-drop operation will cause the contents of one folder to overwrite the contents of the other. Instead, it will be necessary to descend through the folder structure and manually combine files at each level. For this example, you might descend into
/a big folder/tree a/level 1/level 2/level 3/
then copy contents to clipboard by pressing Command+C:
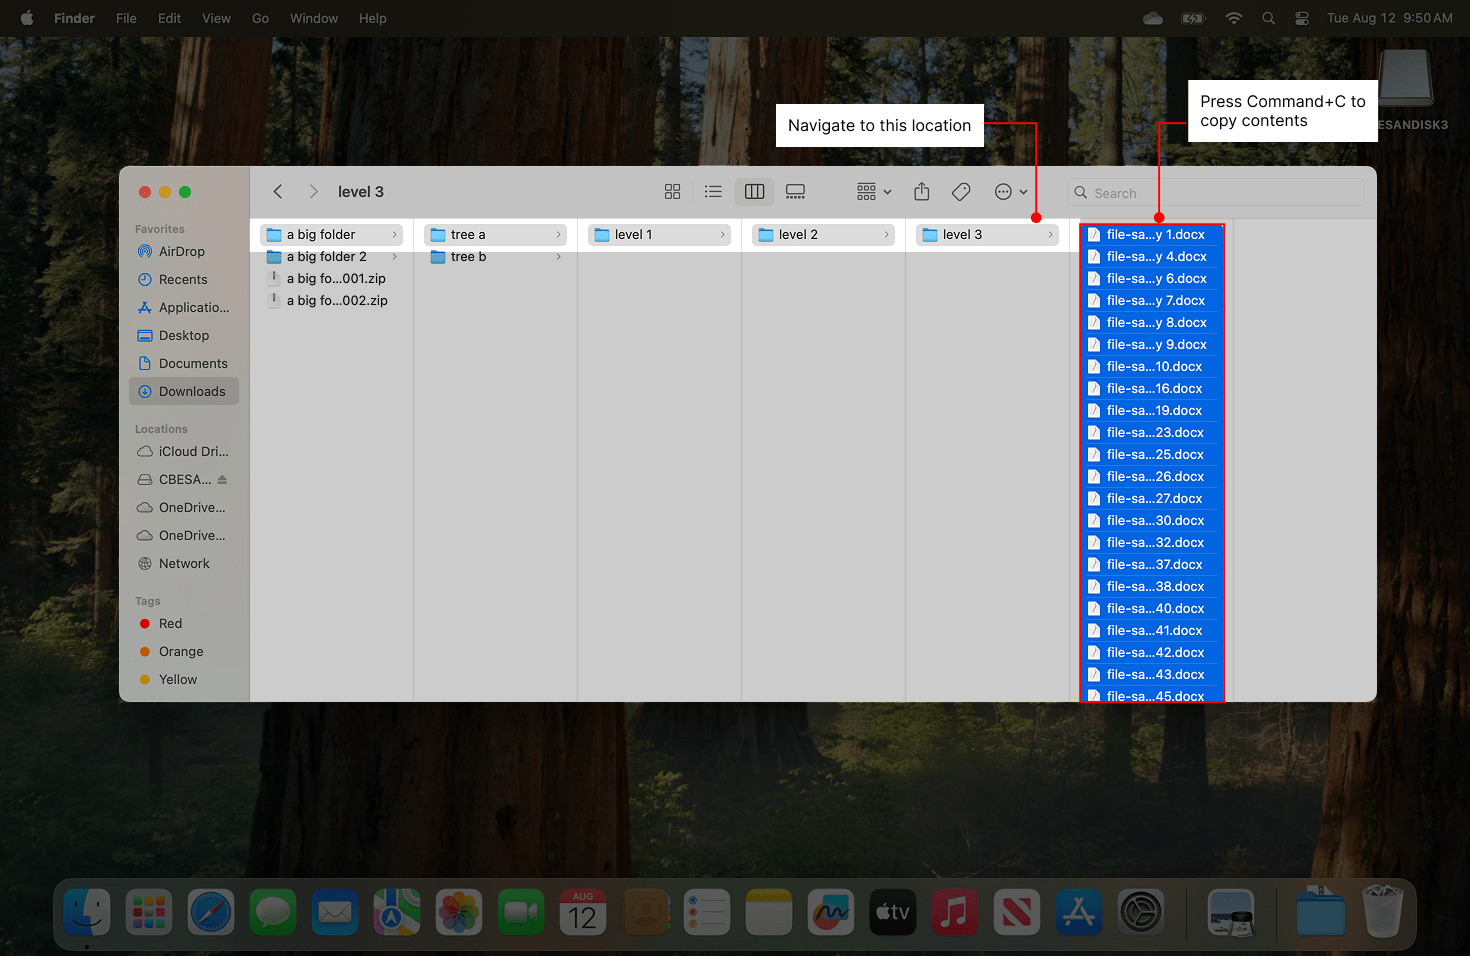
You can then move into
/a big folder 2/tree a/level 1/level 2/level 3/
and paste contents by pressing Command+V:
The two file sets will now be combined in
/a big folder 2/tree a/level 2/level 2/level 3
Since we also have files under “tree b”, we would repeat the operation to copy the remaining files. Once combined, it will be possible to migrate your files into SharePoint.
Windows:
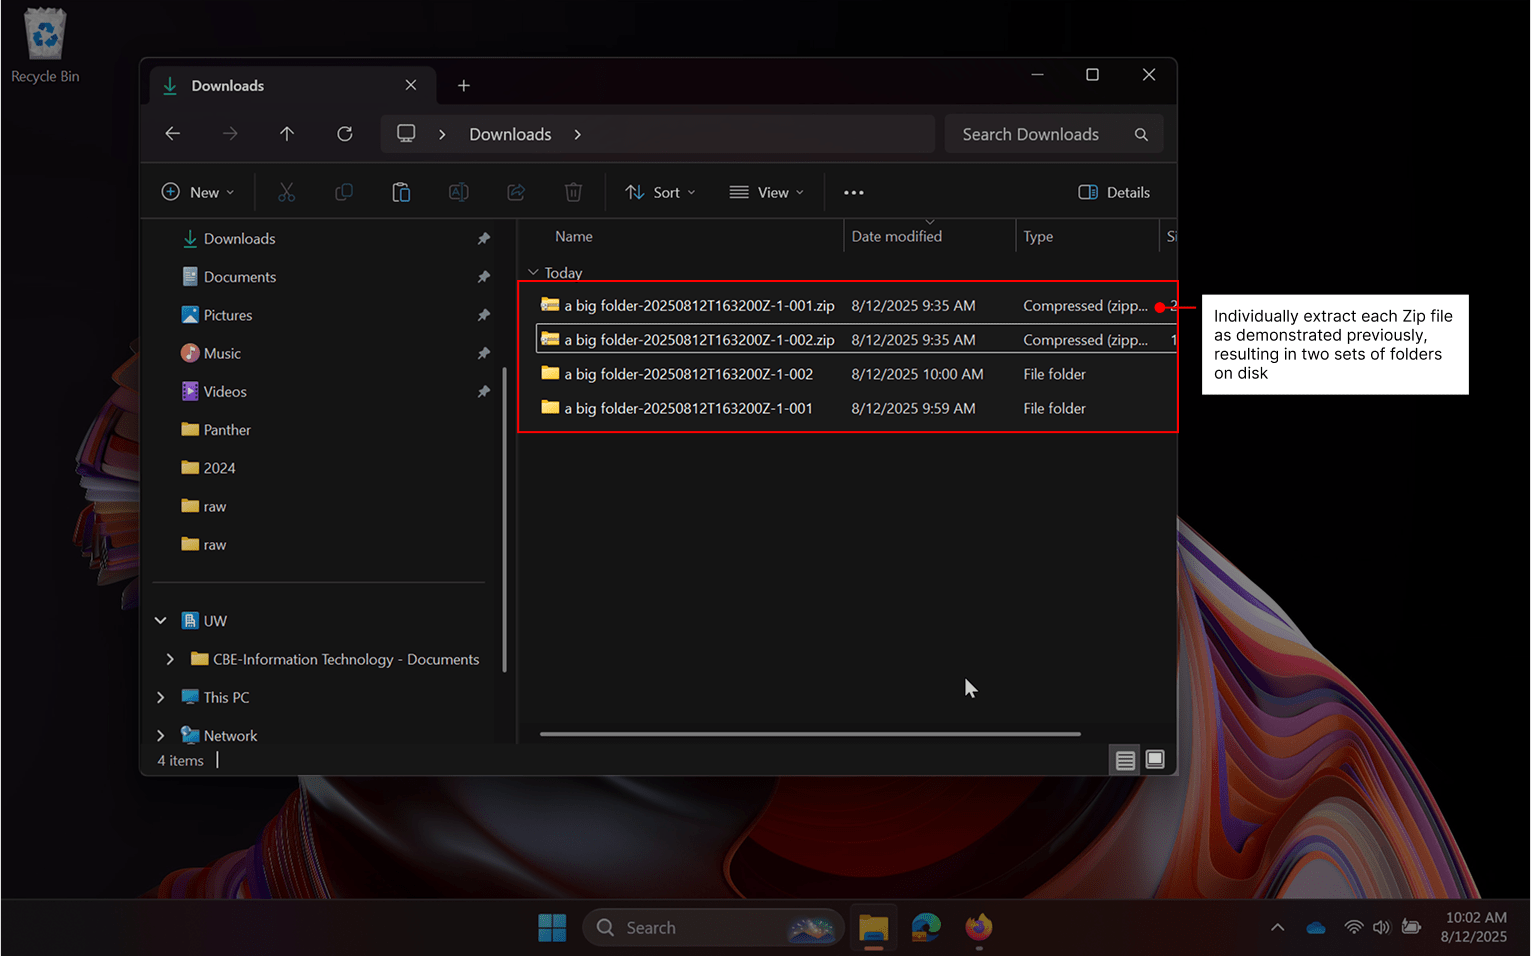
Windows handles the merging of contents more easily and will be the preferred platform to conduct this migration. To prepare for this, we will individually extract each Zip file as demonstrated previously, resulting in two sets of folders on disk.
Descend into the first “a big folder” folder and press CTRL+A to select all.
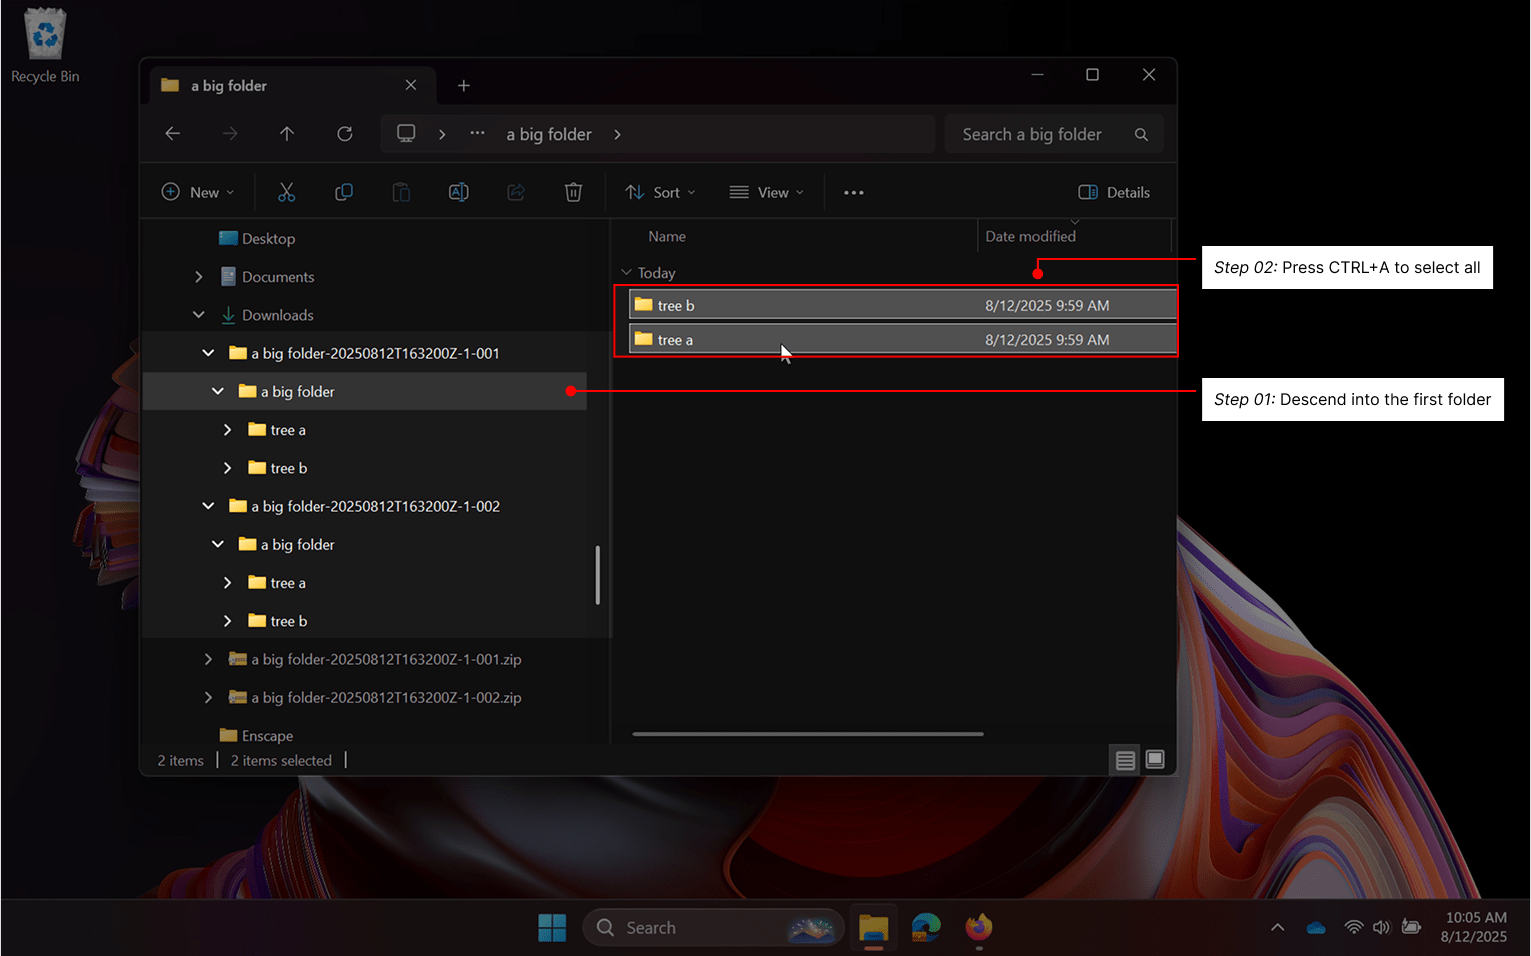
Right-click and hold, then copy contents into the second “a big folder”. Alternatively, you may press Control + C from the source folder to copy items and Control + V in the destination folder to paste them.
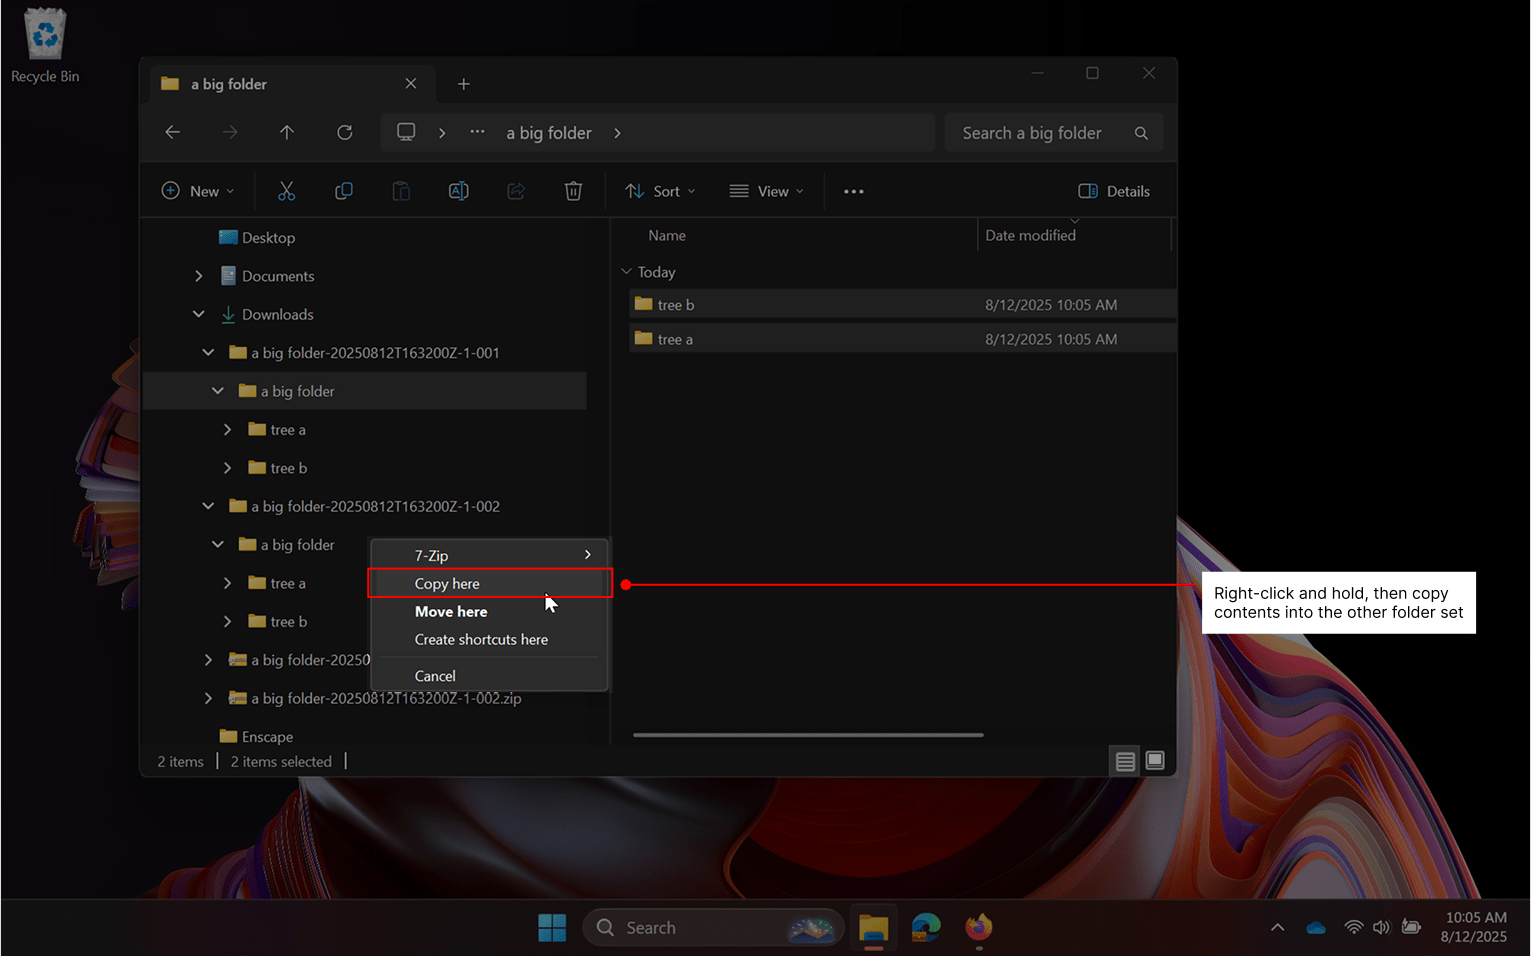
A file copy operation will occur, combining the contents of the two folders.
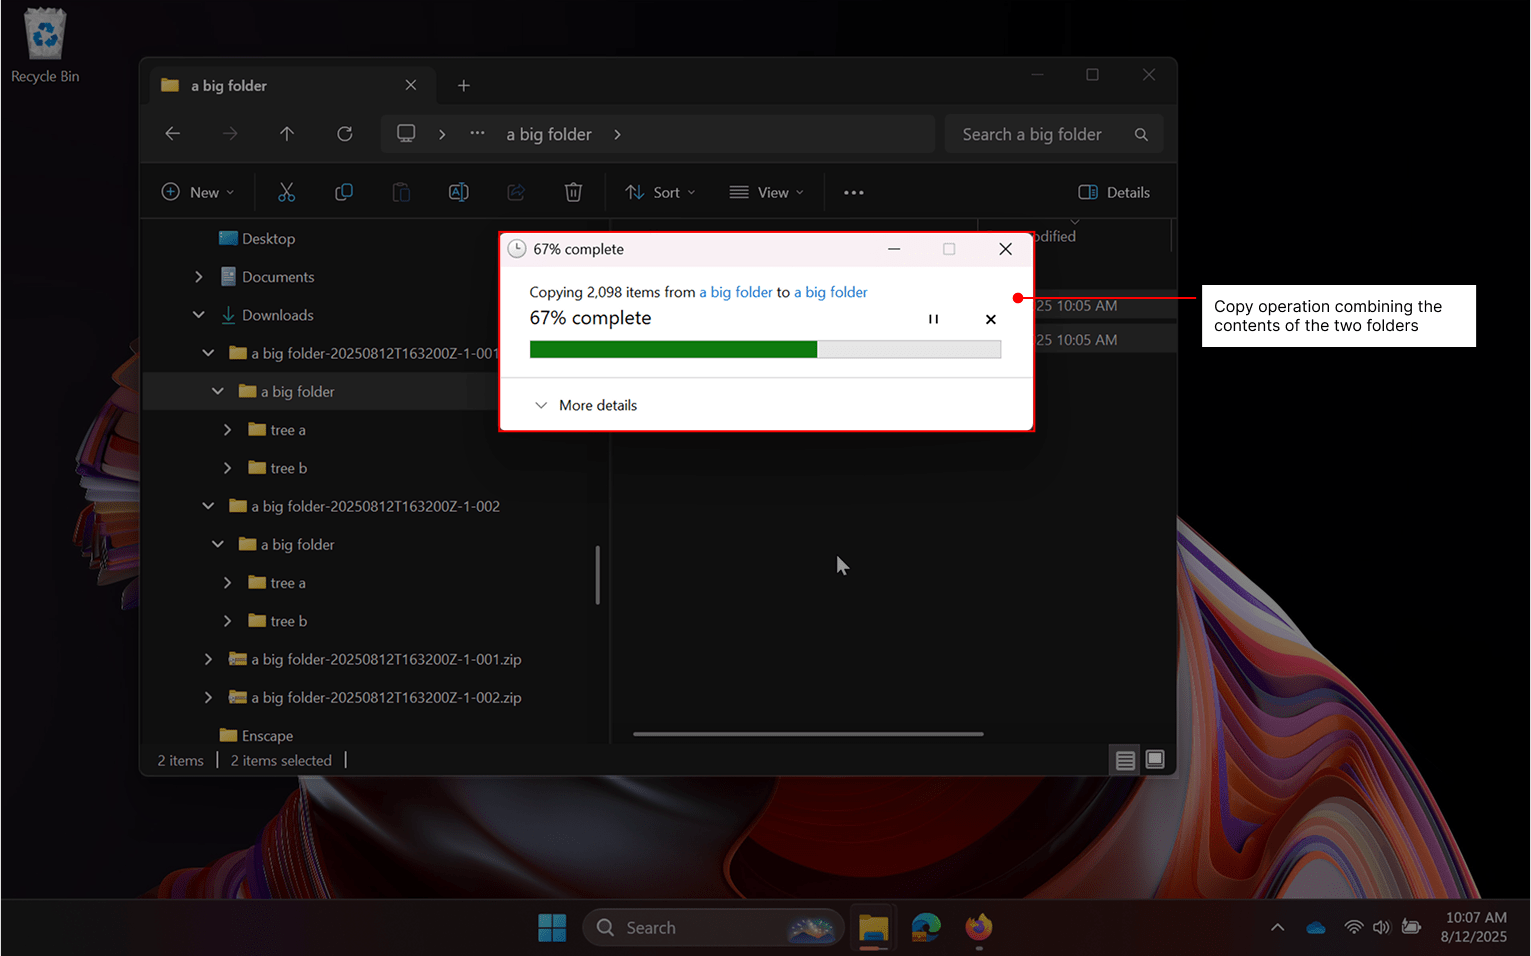
The two file sets will now be combined in
\a big folder 2\tree a\level 2\level 2\level 3
Once in a single location, it will be possible to migrate your files and folders into SharePoint.