Introduction
This document explains how to use SharePoint using techniques learned in the OneDrive Usage Guide. We demonstrate how to synchronize a SharePoint site with the OneDrive app, how to manage files within SharePoint, and how to share documents and folders. These instructions are directed towards departmental administrators rather than individual end users.
Please note that we have observed slight variations in both the appearance and behavior of OneDrive between different computers. Although we have made efforts to capture these differences, the instructions in this document may not fully match what you see on your computer. Please reach out to be-help@uw.edu with any questions.
Prerequisites
- Completed configuration of the OneDrive app
- Access to your Duo device
- 10 minutes to set up synchronization with SharePoint
Accessing the SharePoint site
Departmental administrators:
Reference the List of CBE SharePoint Sites to identify the URL to your department’s SharePoint instance. All sites are in this format:
https://uwnetid.sharepoint.com/sites/cbe-[DEPARTMENT]
Your department will have a site name that includes a two or three letter abbreviation of the department’s name. Depending on your particular affiliations with the CBE, you may receive access to more than one SharePoint site. Access to a SharePoint site requires you to be explicitly invited to it–please contact the listed access control administrators if you believe that you should have access to a particular site.
All features of SharePoint are available through both the OneDrive app and the web interface, and include the direct creation and editing of Microsoft documents, file and folder management, and the sharing of documents. For demonstration purposes, we will reference the CBE-IT SharePoint site throughout this document. When there are differences between macOS and Windows, we demonstrate both versions.
Individual end users:
You will not be able to directly access a SharePoint site. Rather, the specific files and folders that have been shared with you will appear under the “Shared” folder here:
https://uwnetid-my.sharepoint.com/
Accessing SharePoint via the web browser
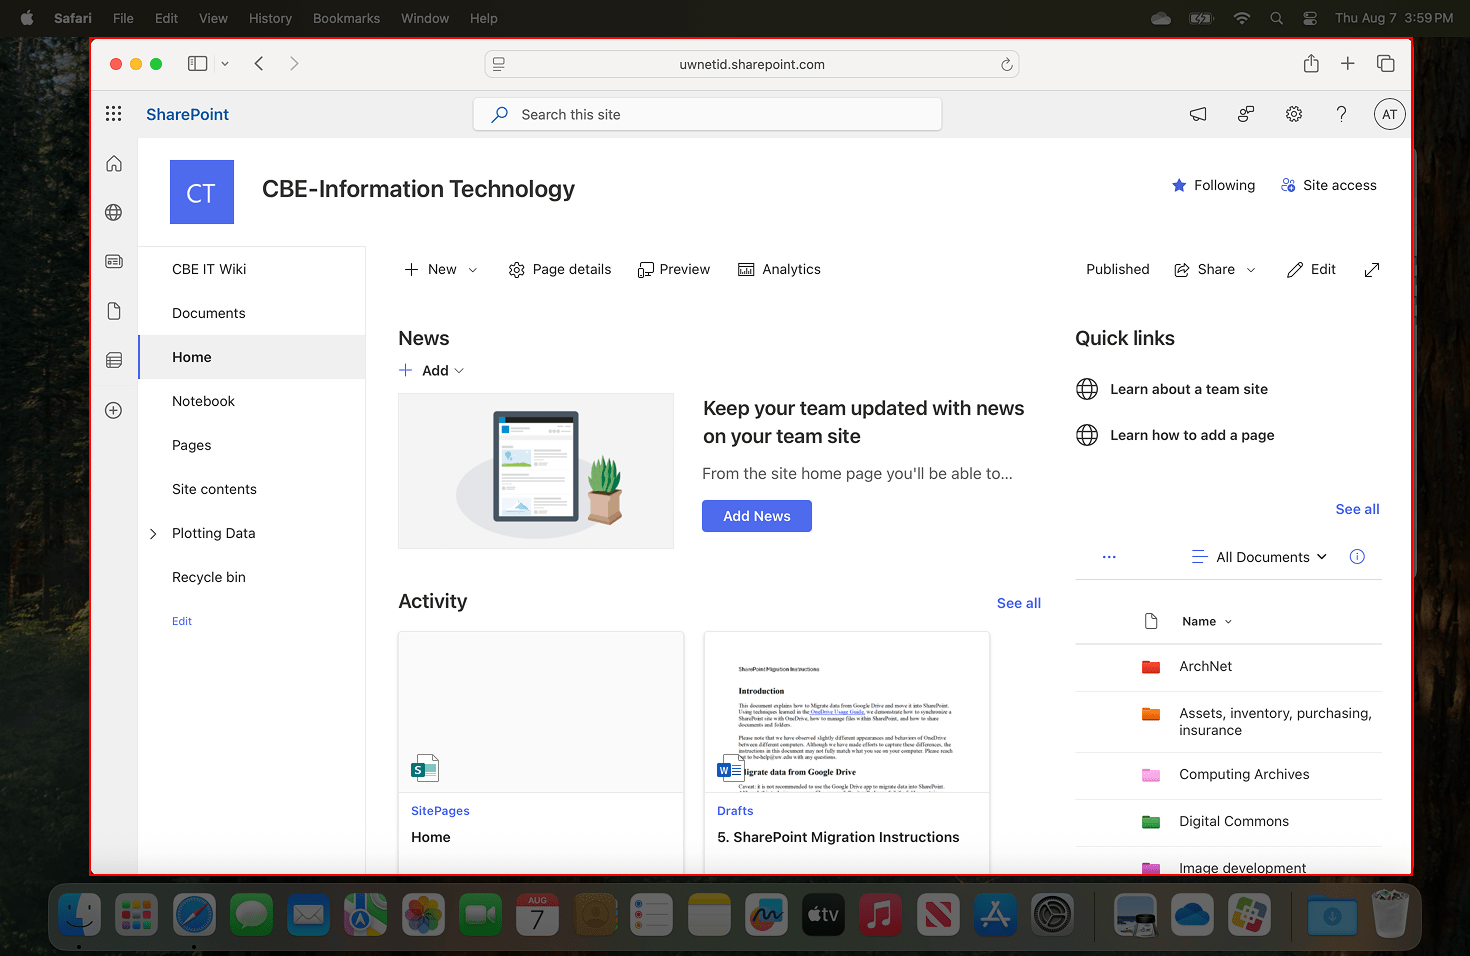
In your preferred web browser, enter the URL to your SharePoint departmental site then follow any prompts to authenticate your NetID. When logged in, you will be presented with a homepage.
Files and folders are located in “Documents”, found on the left navigation.
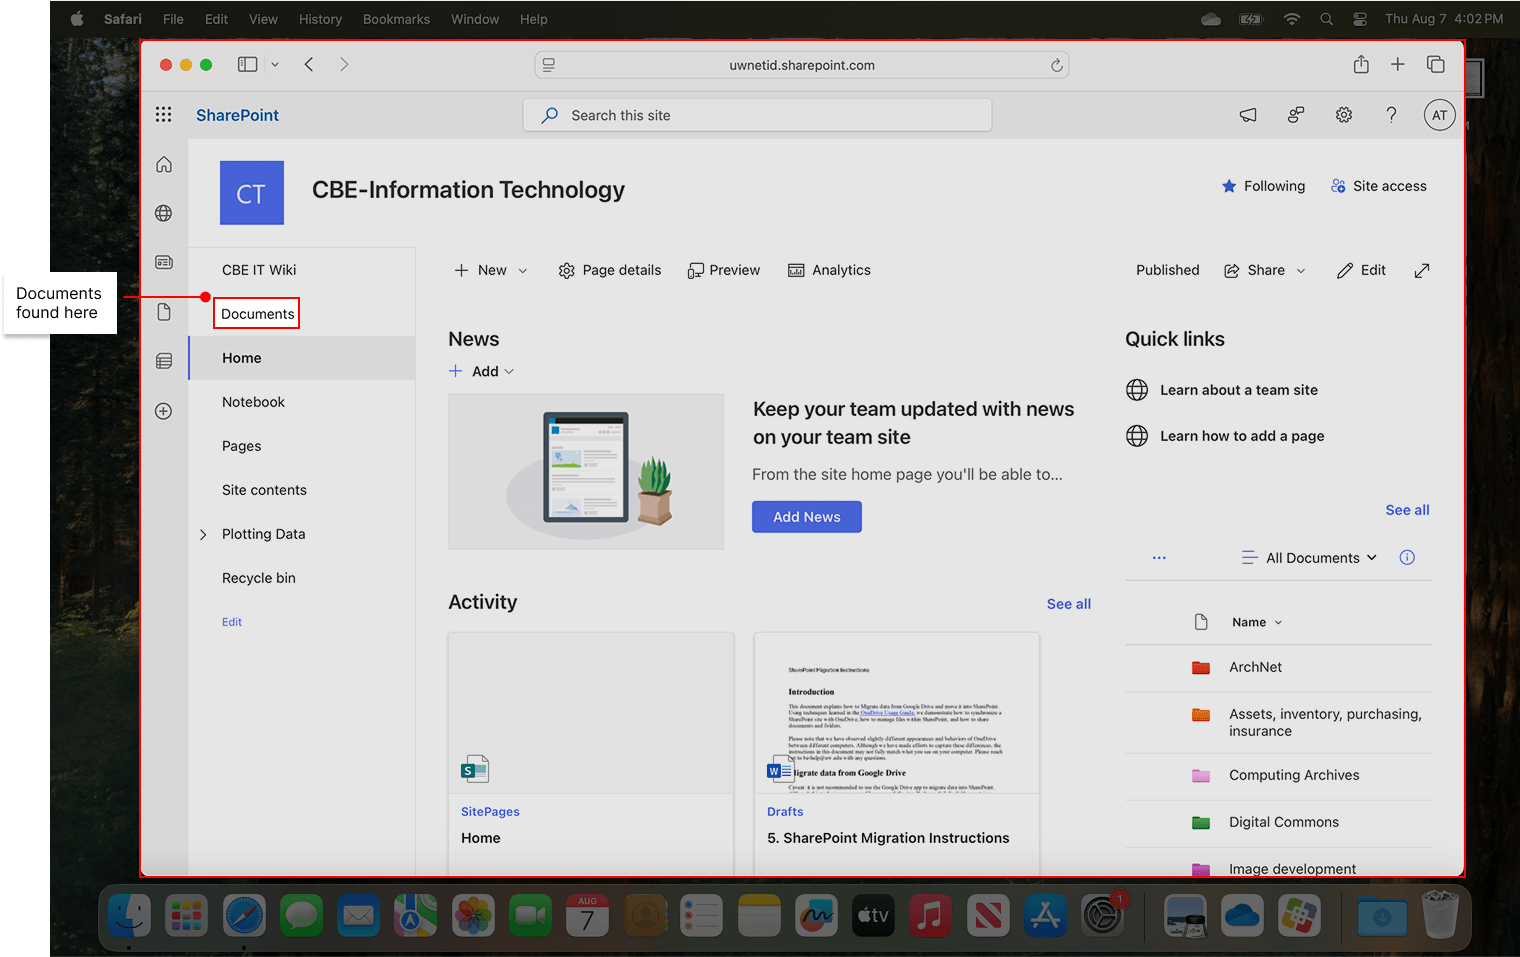
Click it to bring up the “Documents” page.
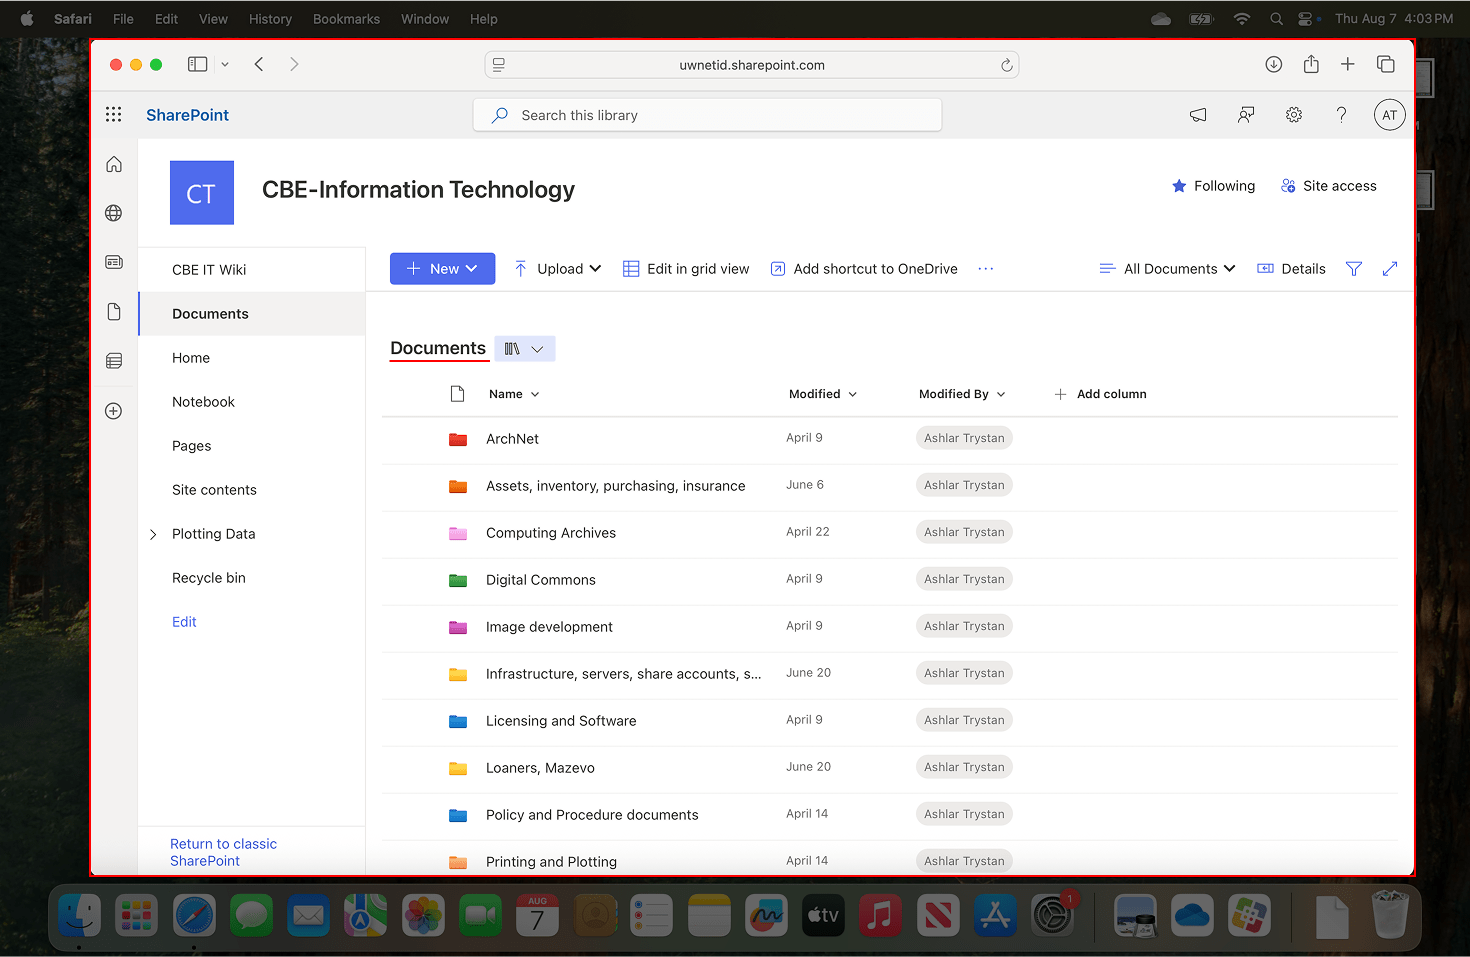
Note that in the CBE-IT site, a series of folders has been created for file storage and organization. Departments may create any folders that will logically organize their documents.
You may create a new folder by clicking the “New” button and selecting “Folder”.
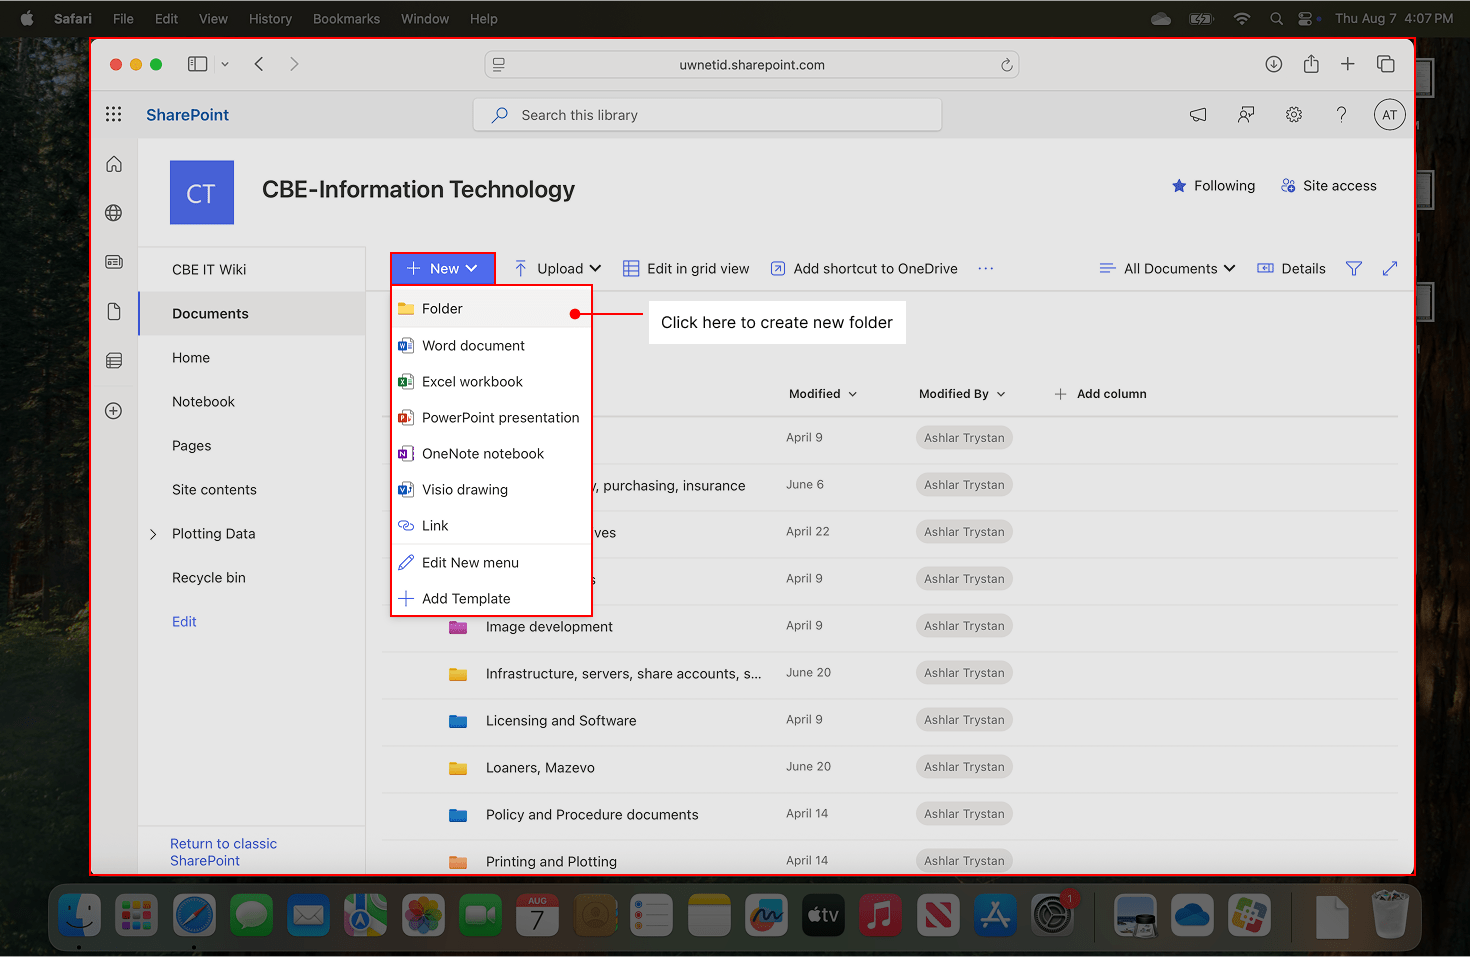
Note that you can customize folders with up to 16 different colors.

You may likewise create standard Microsoft documents in Word, Excel, PowerPoint, and Visio formats.
Synchronize SharePoint in OneDrive app
Synchronization allows for the SharePoint Documents folder or any subfolder thereof to be accessible from the macOS Finder or Windows File Explorer as a folder. It will allow for the easy movement of files into or out of SharePoint through normal file copy operations. As a result, it will be possible to copy in files and folders directly without having to make use of the SharePoint web interface. We foresee two basic use cases for synchronization:
- To have the documents of an entire site accessible
- To have a specific folder that you use frequently made easily available
Note that you may synchronize several folders even across multiple SharePoint sites as appropriate for your use cases.
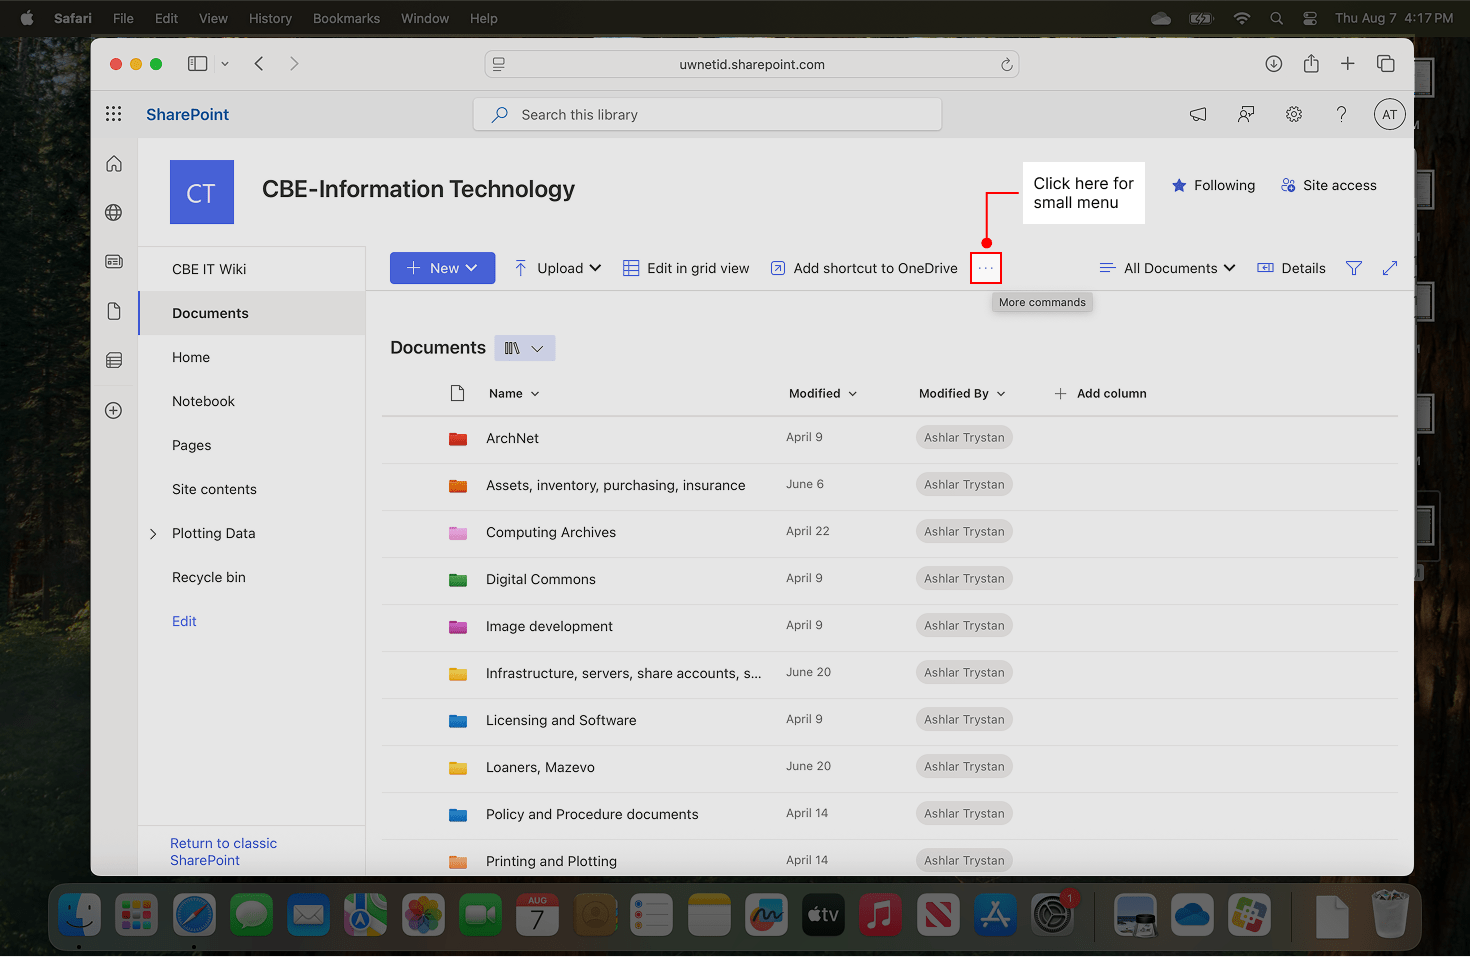
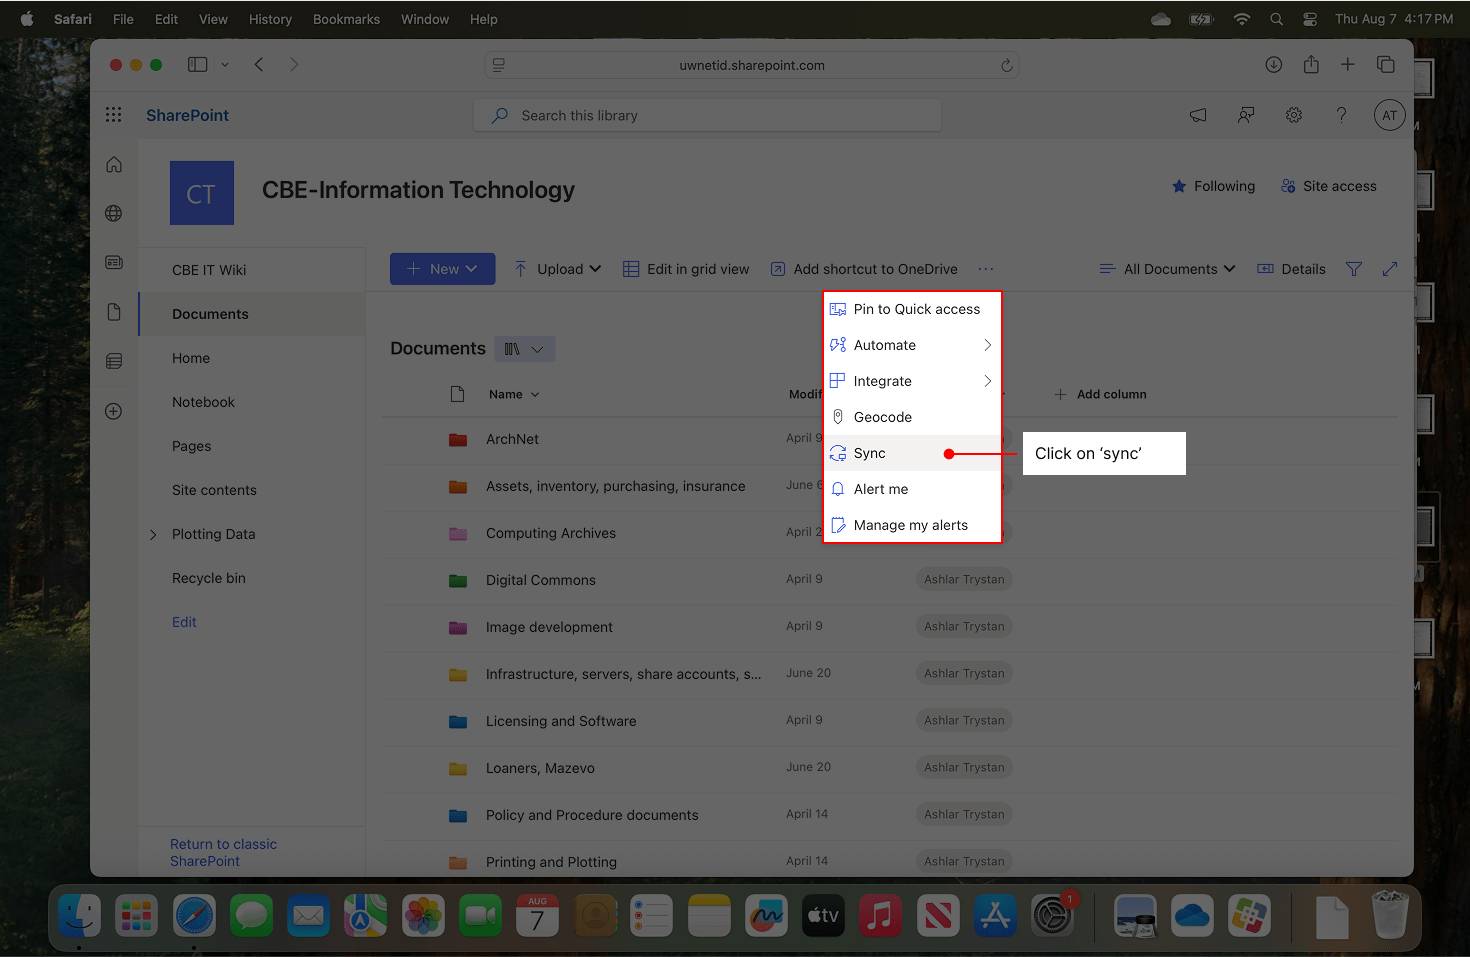
From within the “Documents” page in SharePoint, locate the toolbar near the top of the screen. Click on the small menu shown with an ellipsis (” …”) then choose “sync”.
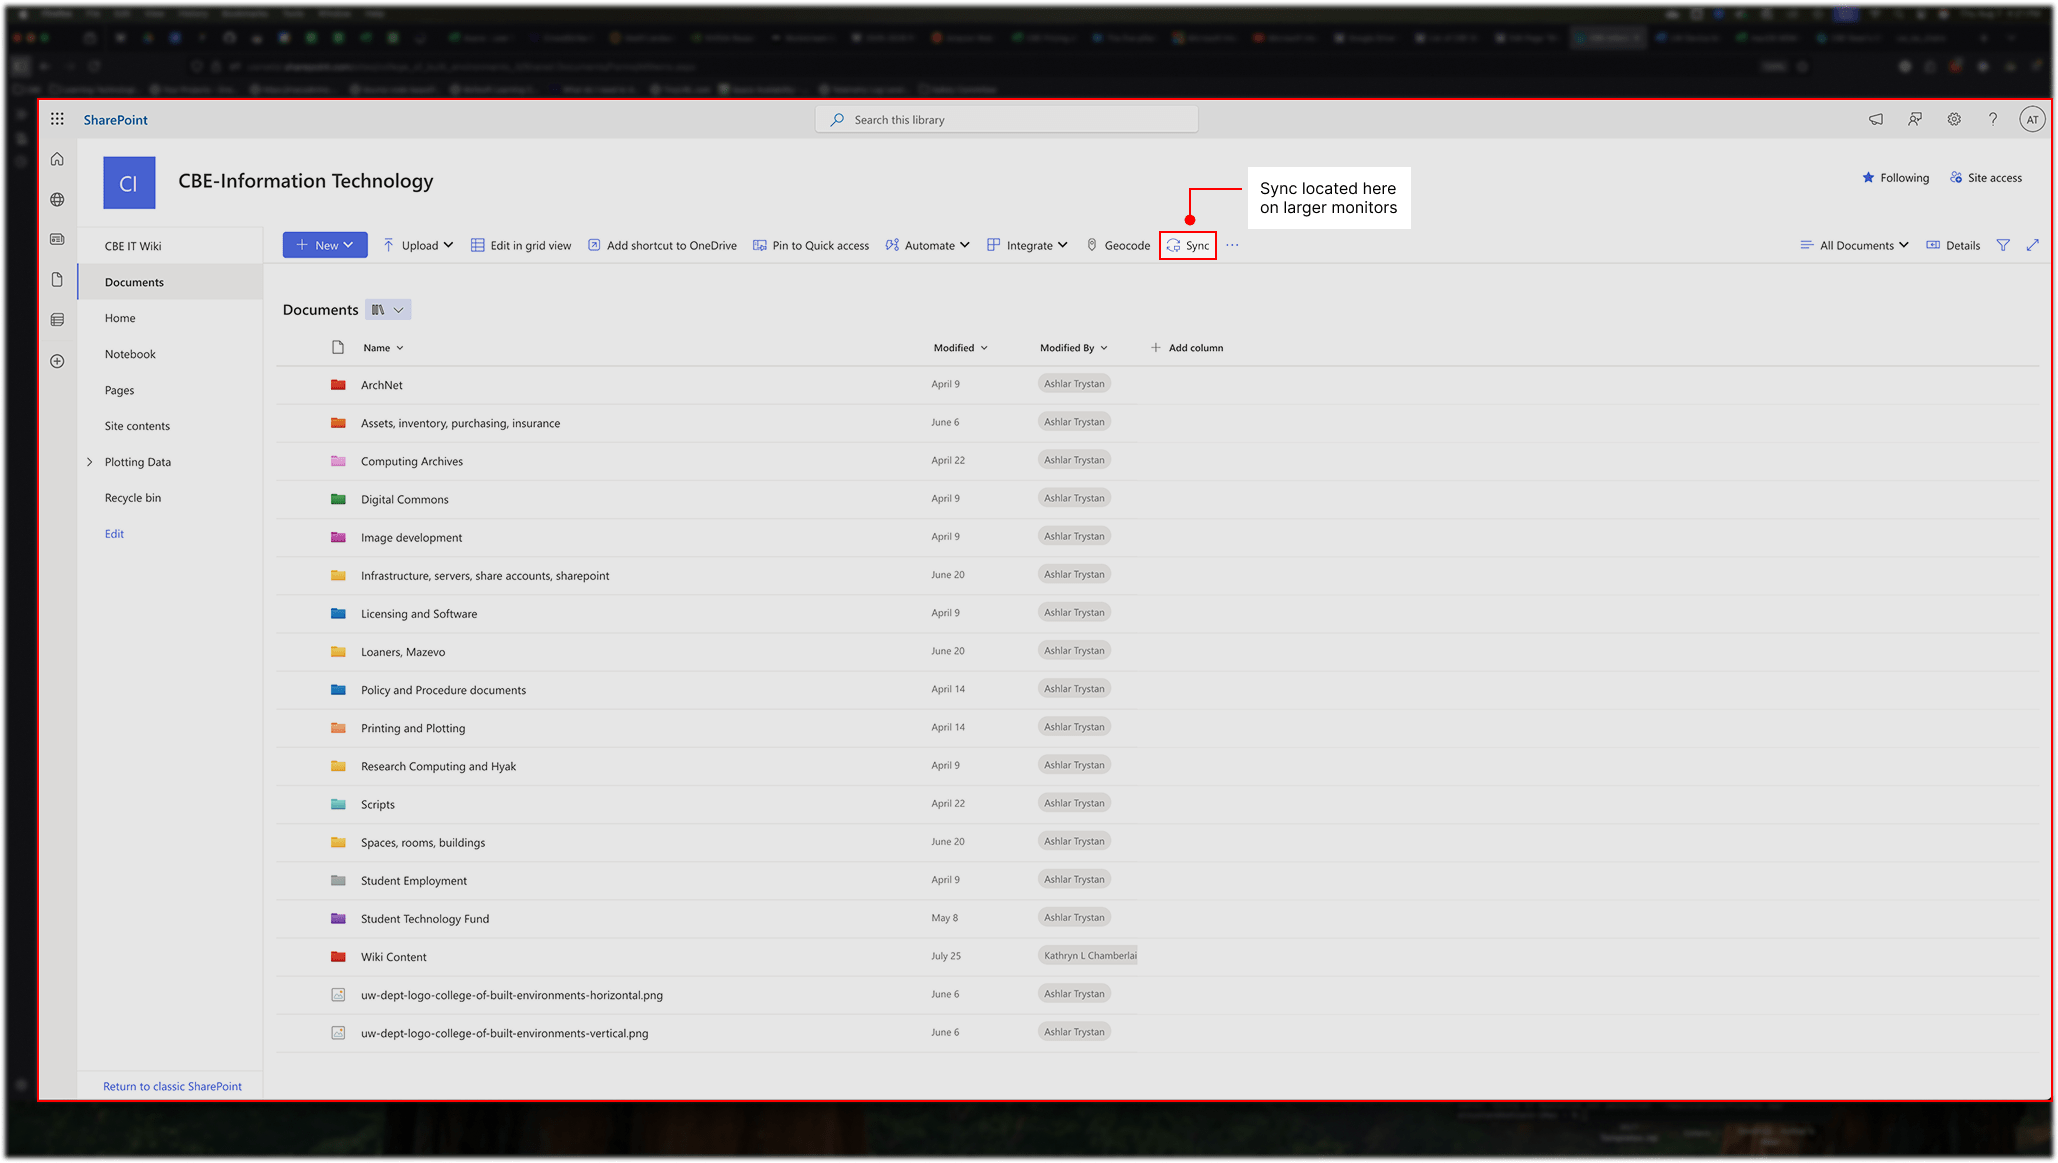
If your web browser is open on a larger monitor, the “Sync” button may appear in the toolbar.
A prompt will appear asking if you wish to allow the website to open OneDrive.
Mac:

Click “Allow” then “Close”.
Windows:
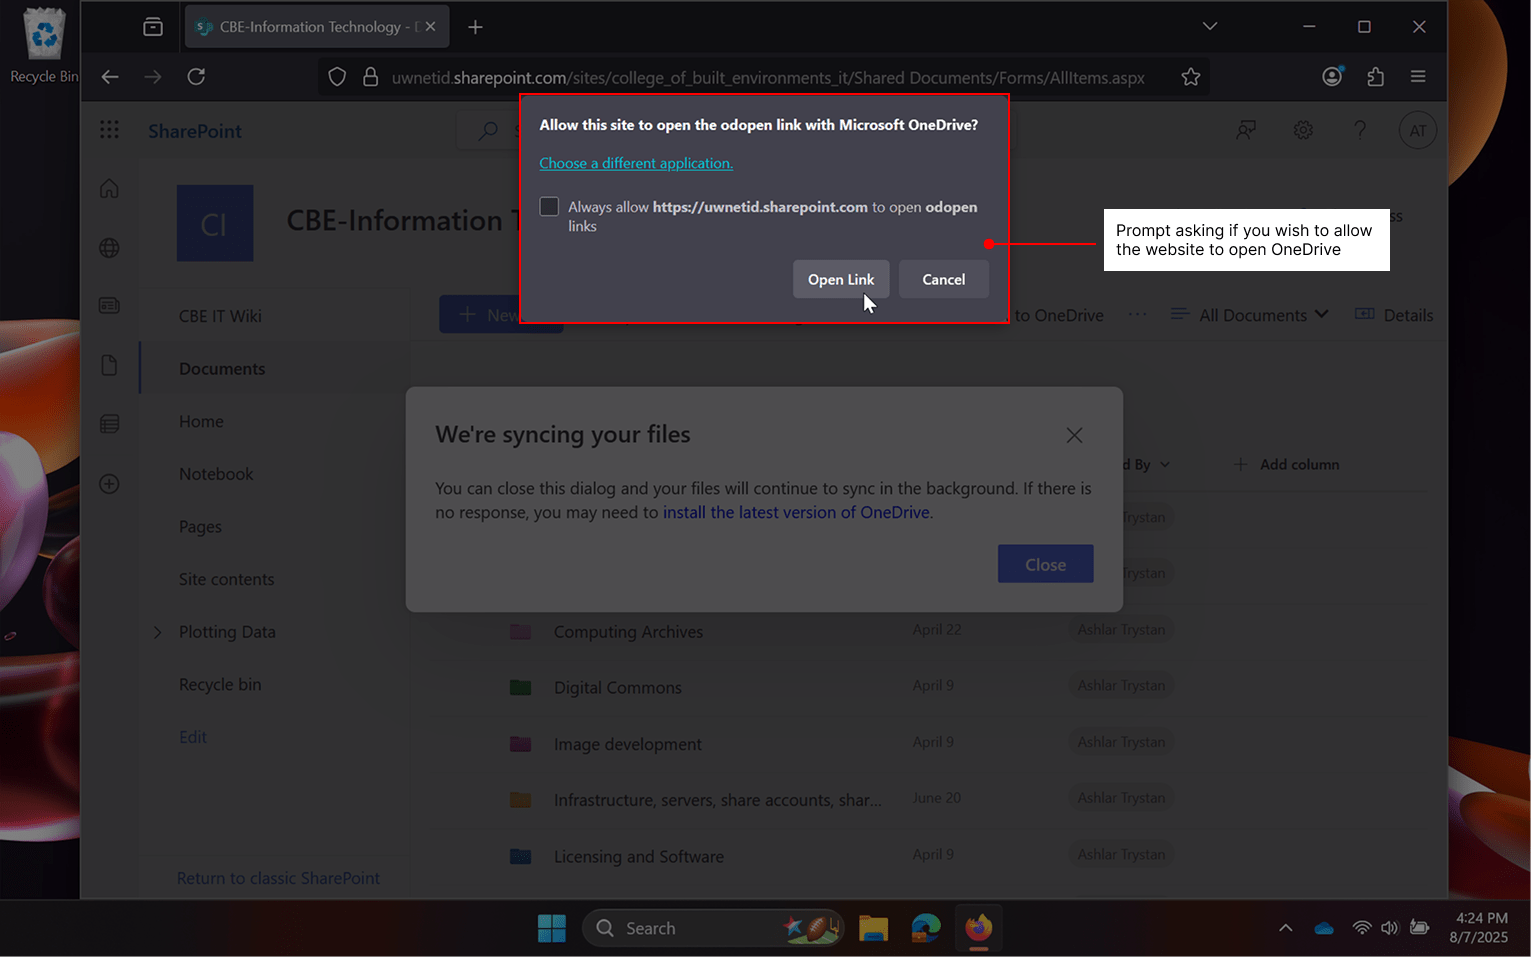
A window may quickly pop up and disappear–this is normal behavior. Click “Open Link” then “Close”.
SharePoint has now created a synchronization folder on your computer that can be used to copy files and folders into the cloud service or to access those documents that are already in the cloud.
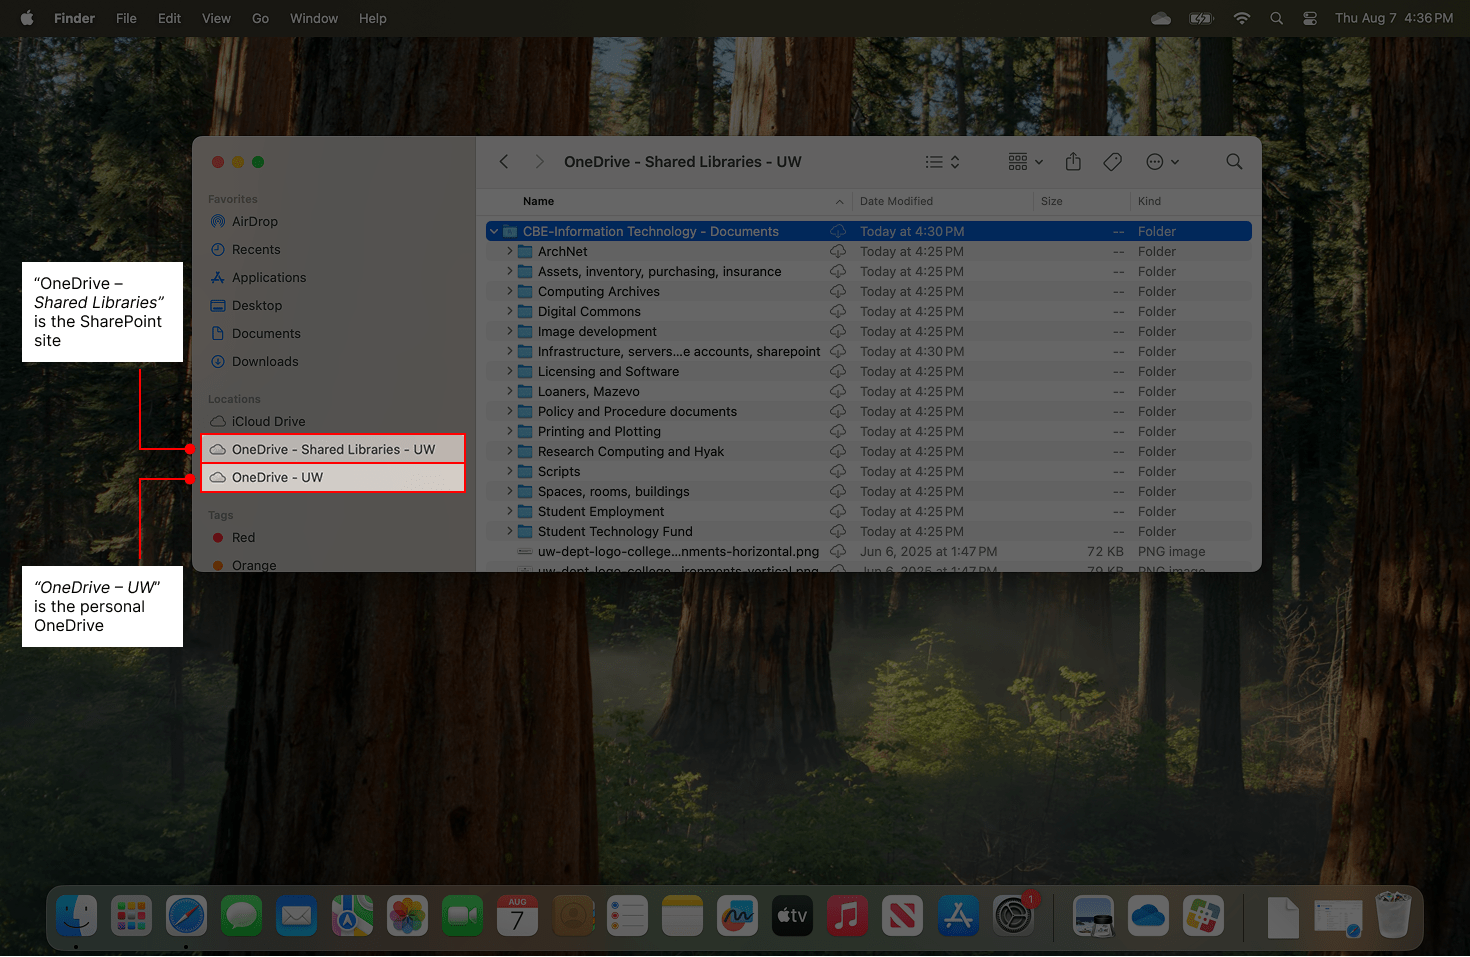
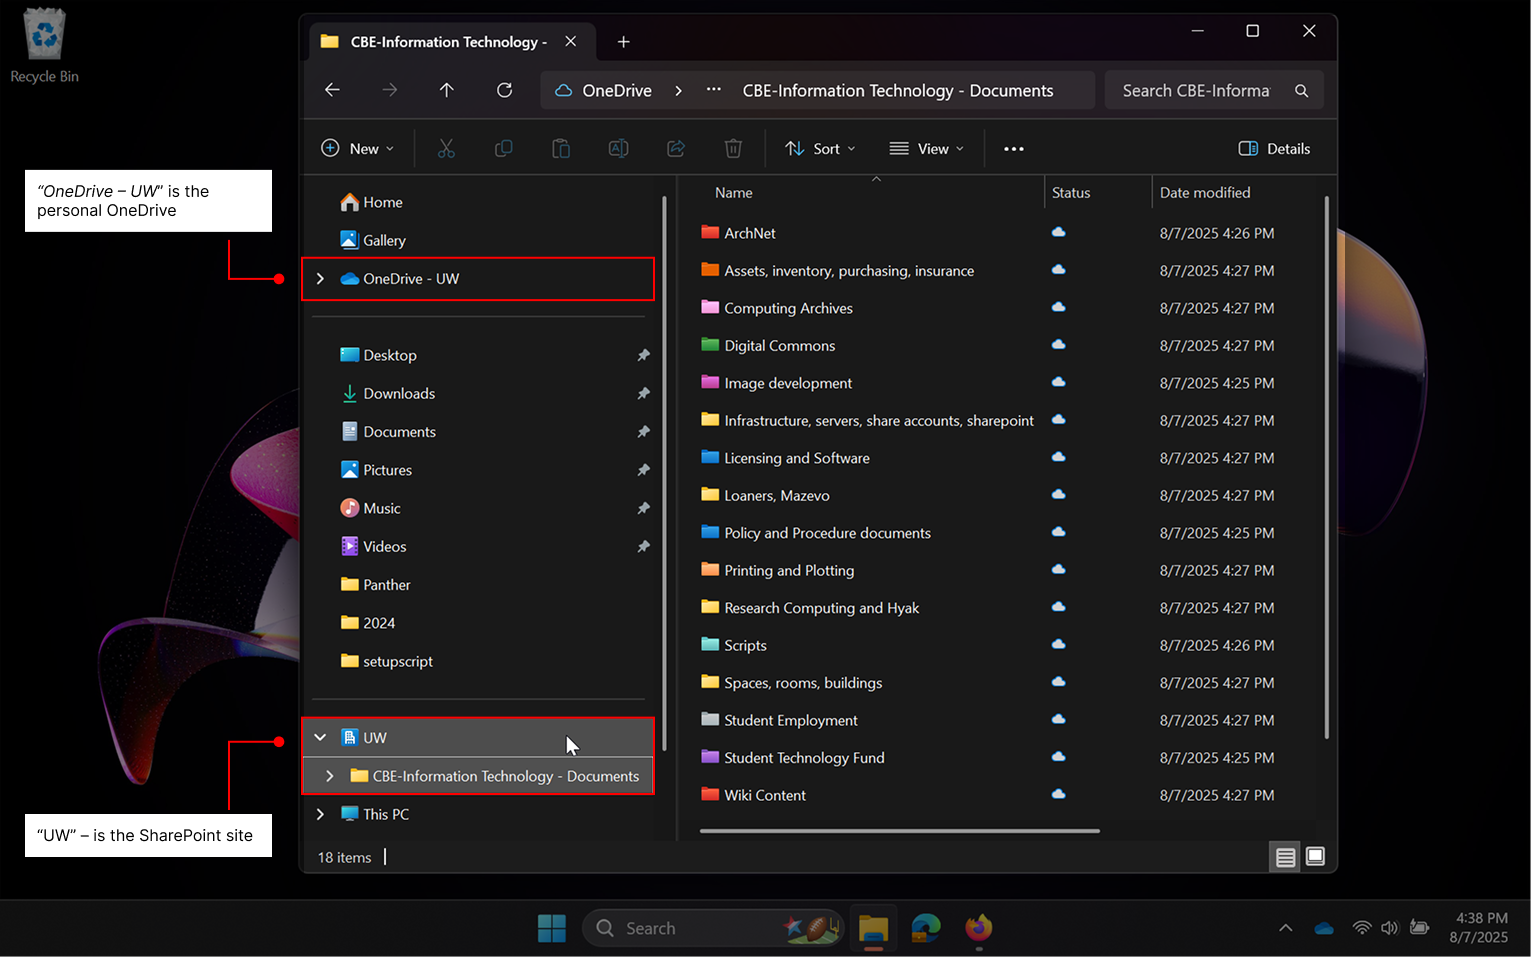
To locate the sync folder, open Finder on a Mac or Windows File Explorer on a Windows PC. You will see two sync locations, one for your personal OneDrive and one for the departmental SharePoint site you just added. If you have synchronized multiple SharePoint sites, then you will see additional site folders in the SharePoint folder. Note that we have observed several variations of how these folders appear so what you see may not match the images here. Please email be-help@uw.edu with any questions.
Mac:
Windows:
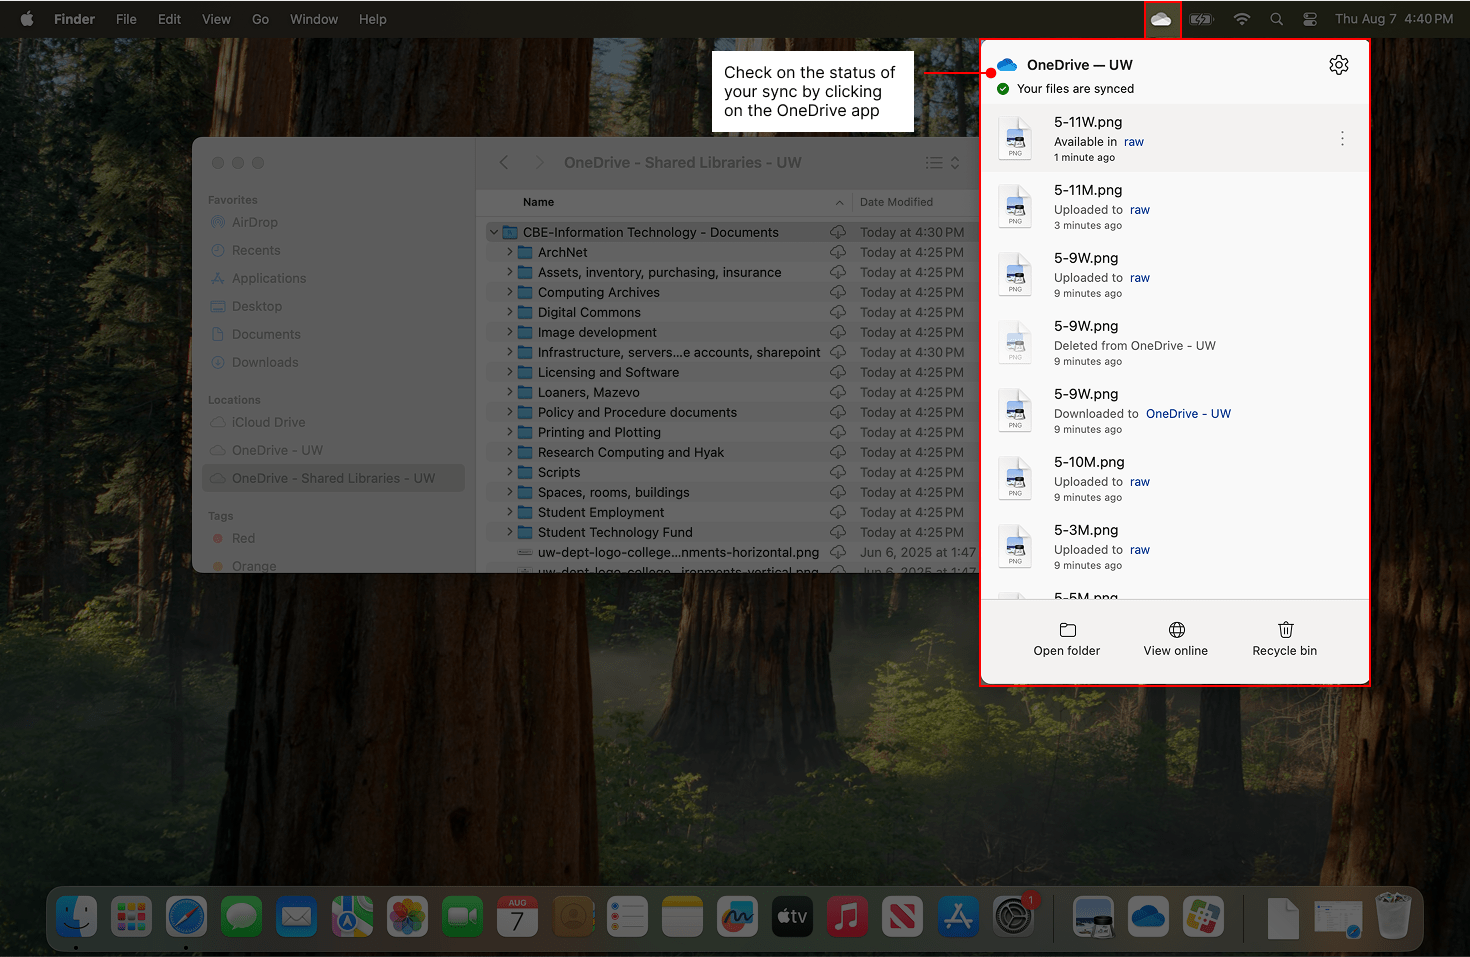
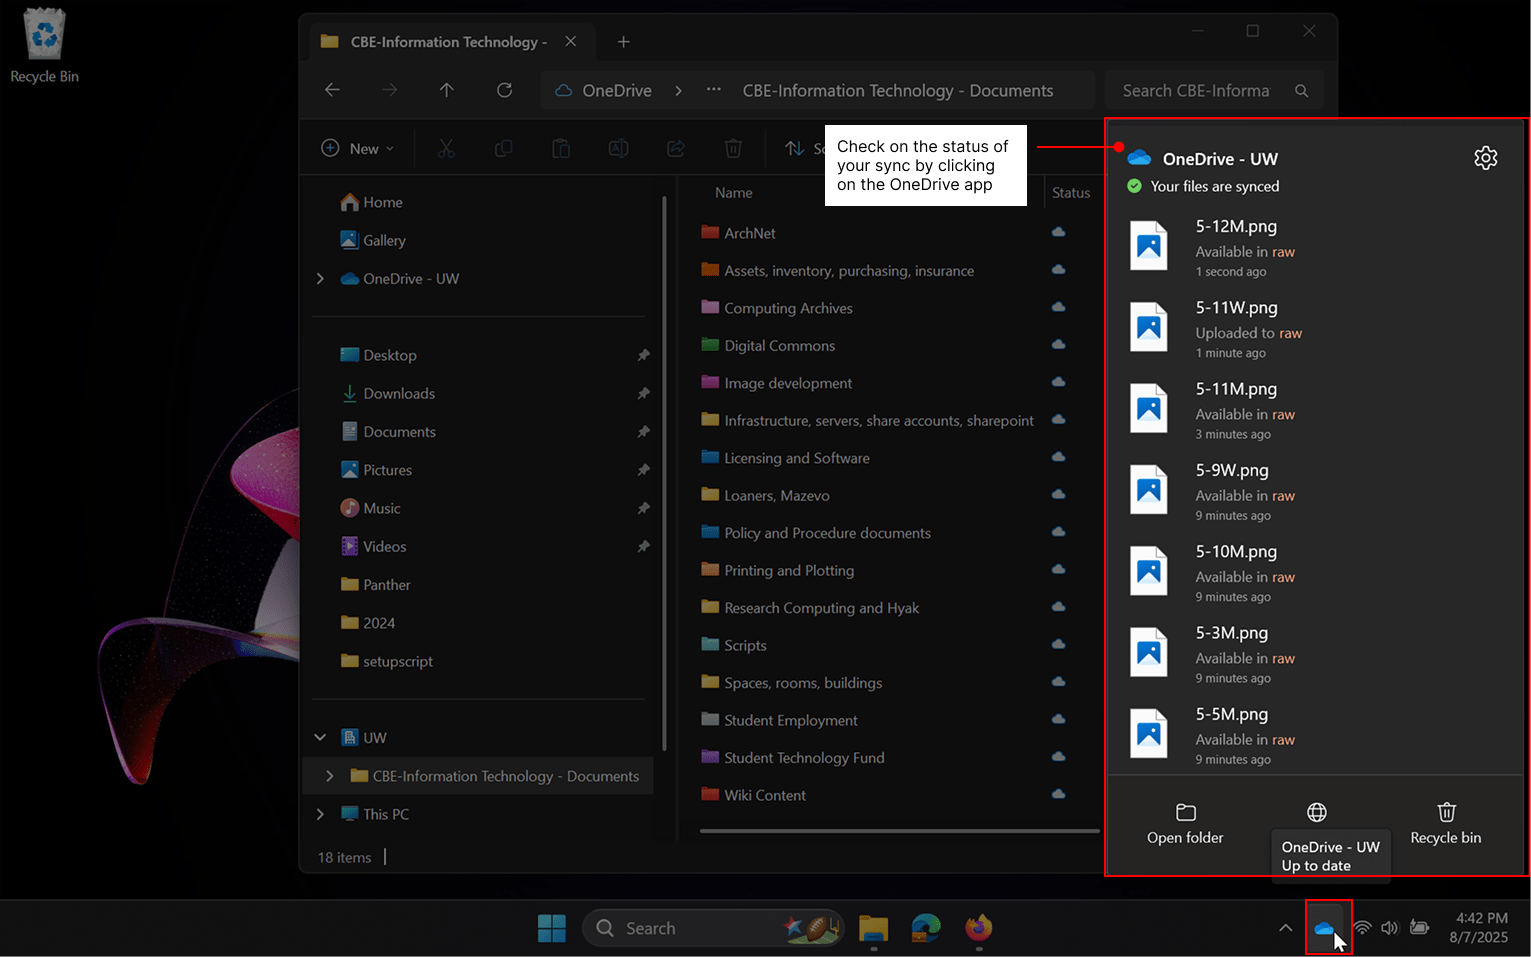
You may copy in any files or folders, which will synchronize into SharePoint in the same way that they synchronize with OneDrive. You may check on the status of your sync by clicking on the OneDrive app.
Mac:
Windows:
Sharing content in SharePoint
Sharing of files and folders within SharePoint is like Google Drive, but with a different interface. Sharing can be configured in three locations: from the web browser, from within macOS, and from within Microsoft Windows. For this demonstration, we created a folder in SharePoint called “Sharing Test Folder” which we will use to demonstrate sharing. CBE SharePoint sites have been configured to allow for sharing to external (i.e. non-UW) accounts, so continuous security auditing of your site is crucial.
Sharing types
Four levels of sharing are available:
- “Can edit” allows users to create, modify, and delete files. They can also share the folder to others.
- “Can view” allows users to open files in a web browser and to download them
- “Can’t download” allows users to view the contents of a file but not copy it for themselves.
- “Can review” exists for Word documents only and allows for the making of suggestions or comments, but no edits.
Sharing from the web browser
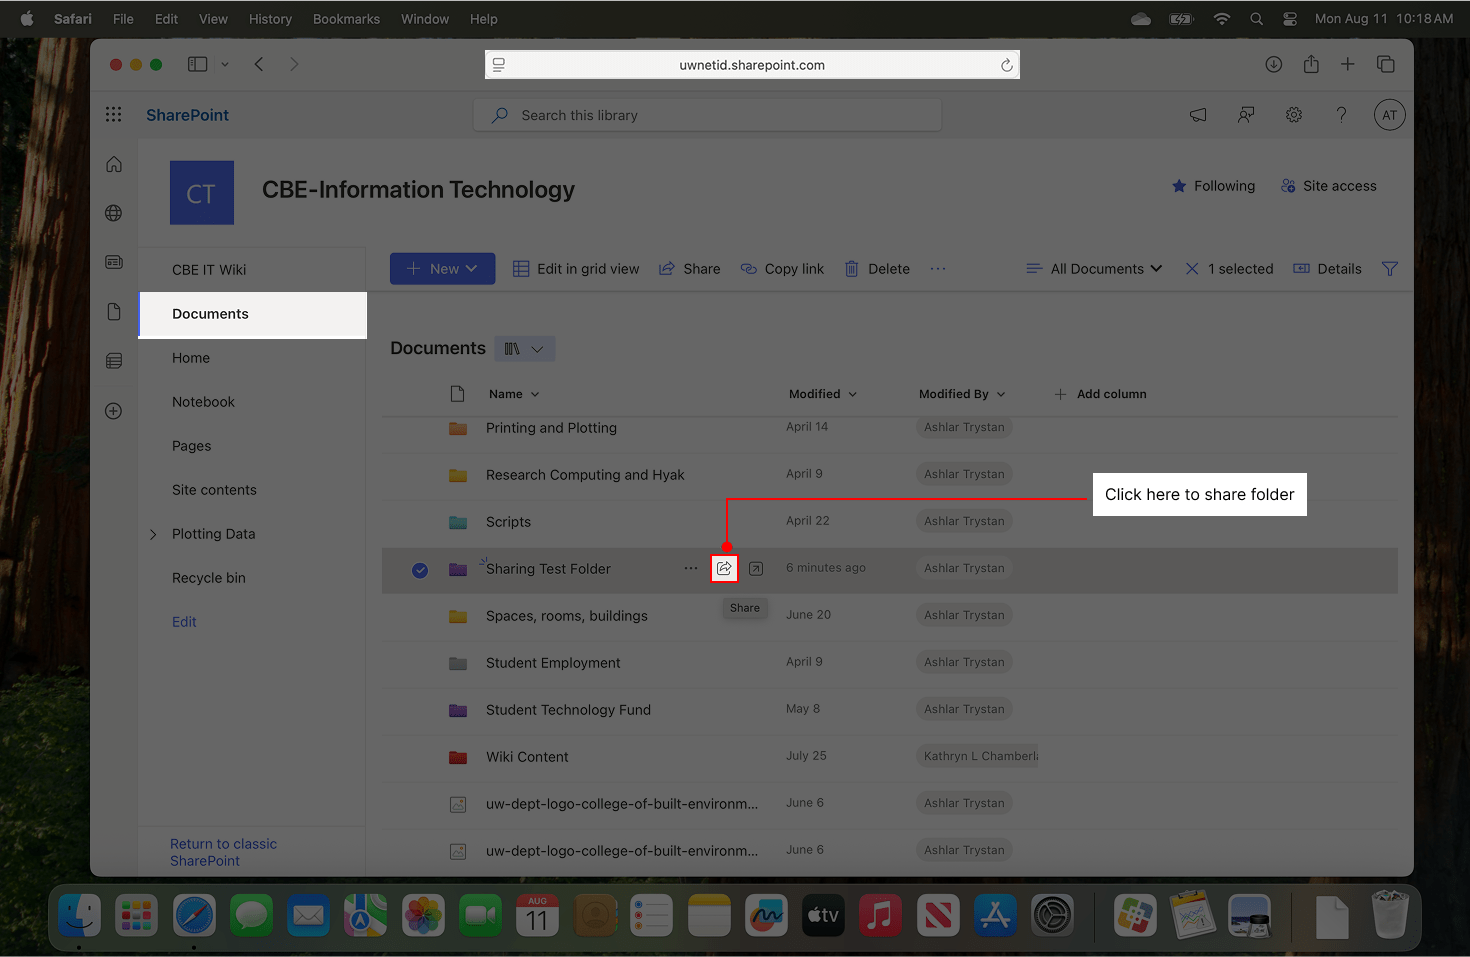
Open your SharePoint site in your preferred browser and navigate to the “Documents” folder. Locate the file or folder you would like to share and click “Share”, which has an icon of a small box with an arrow pointing outwards.
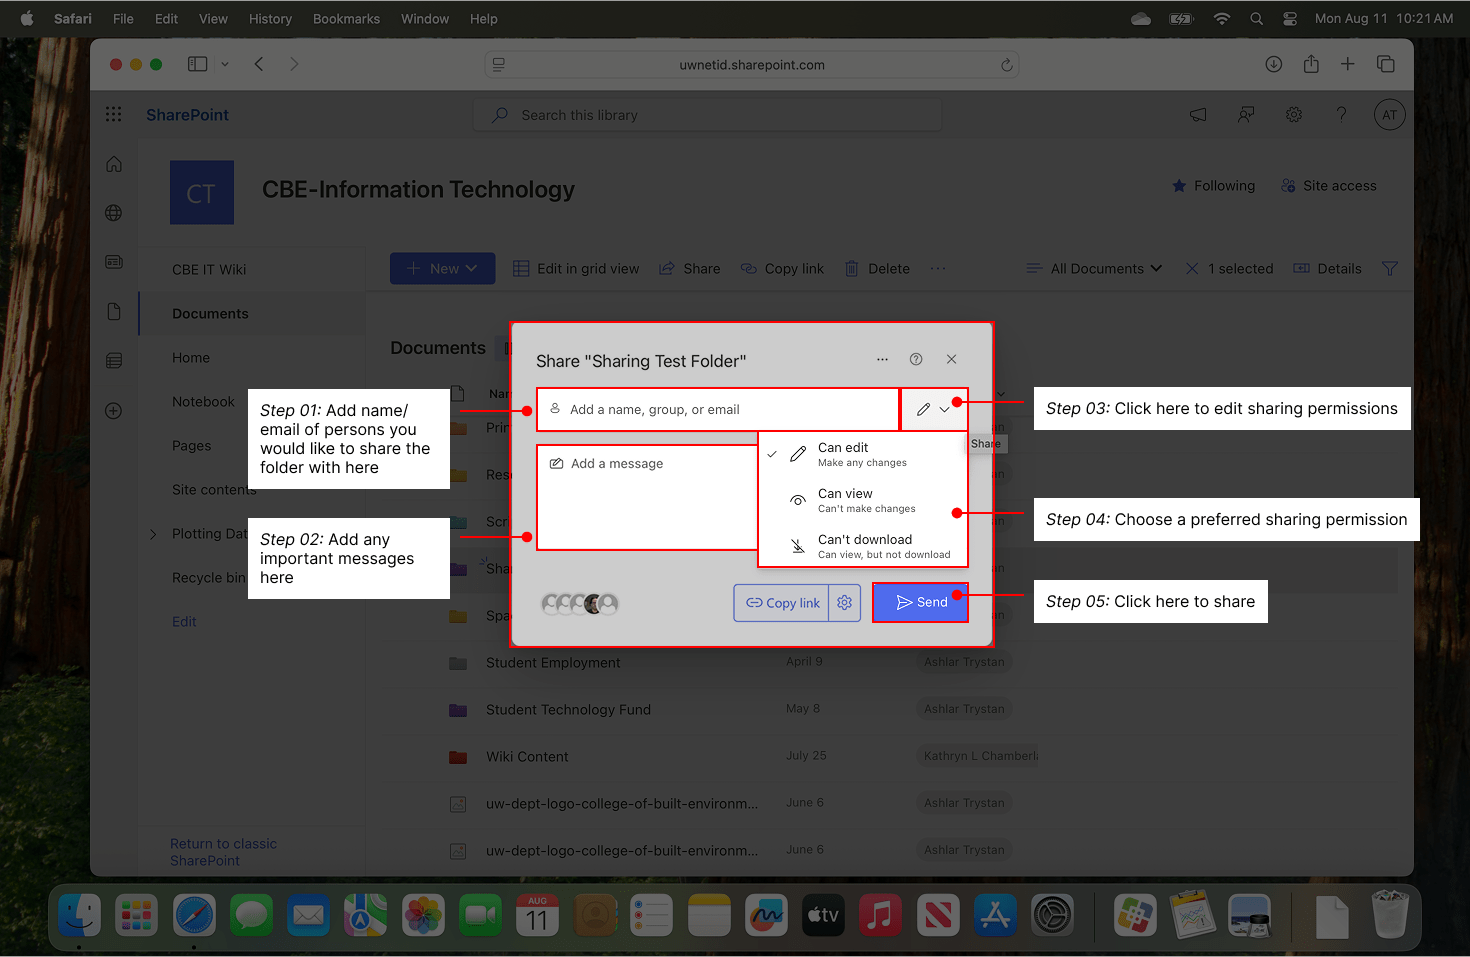
In the “Add a name, group, or email” field, you may type partial names of UW persons to perform a search or enter any email address or UW group. You will note a pencil icon that, if clicked, will reveal the sharing types. By default, “Can edit” will be selected, but you may change it as appropriate. When satisfied that the email address and permissions are correct, press the “Send” button. Note that your targeted users will receive an email that indicates that you have shared access to the file or folder in question. You may alternatively click the “Copy link” button and separately provide it to your target user.
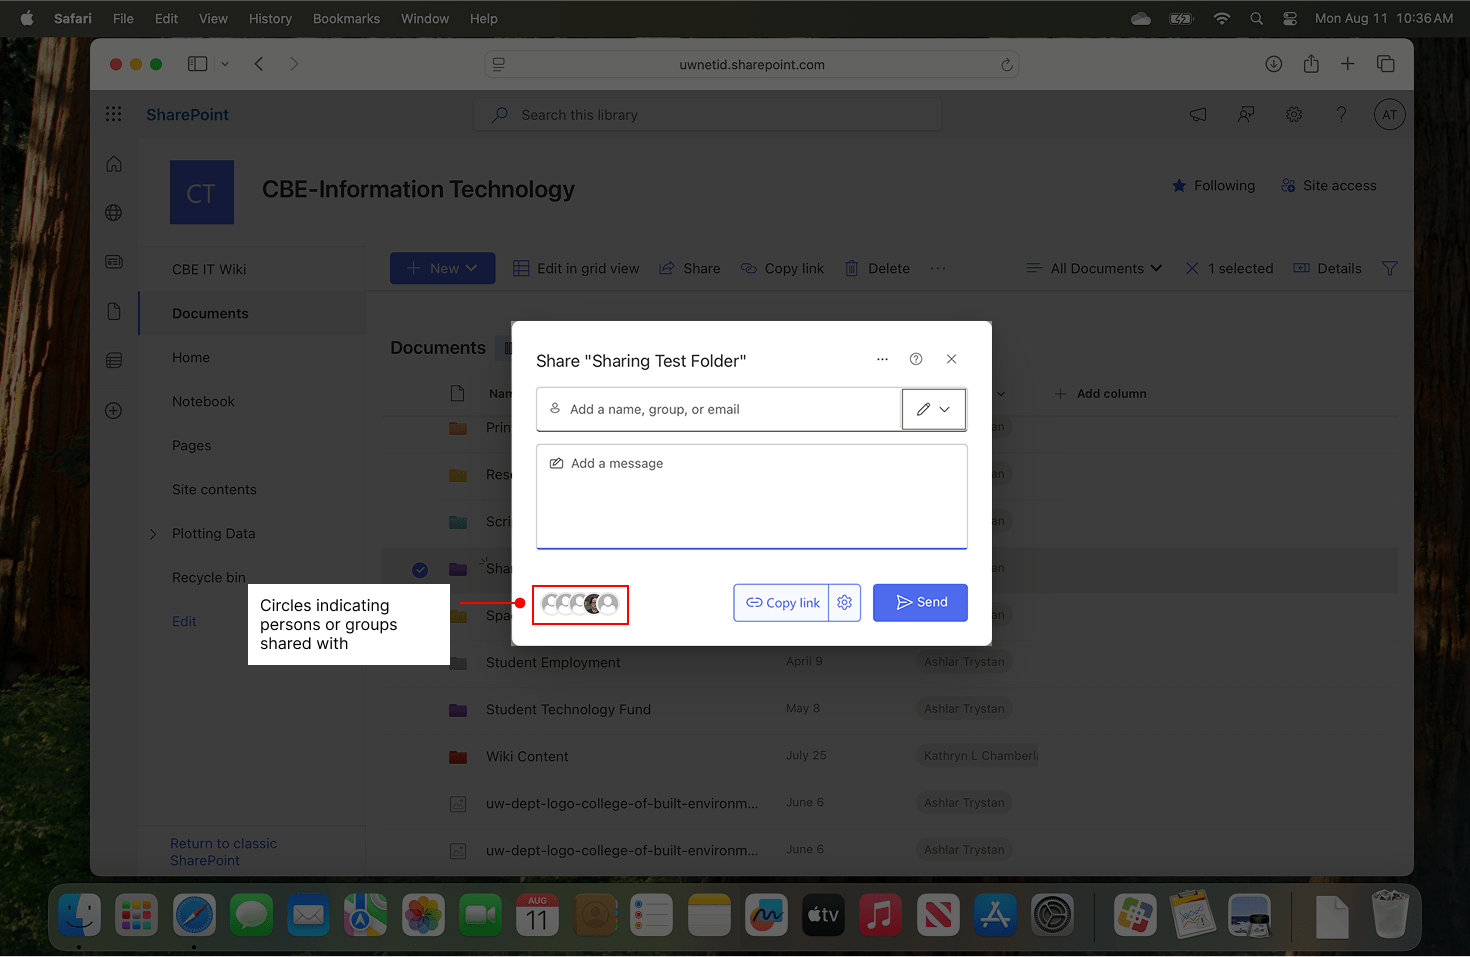
You may check on permissions at any time from the sharing menu. At the lower-left corner, you will note a series of circles that indicate any persons or groups shared to.
When clicked, the window will expand to show sharing details.
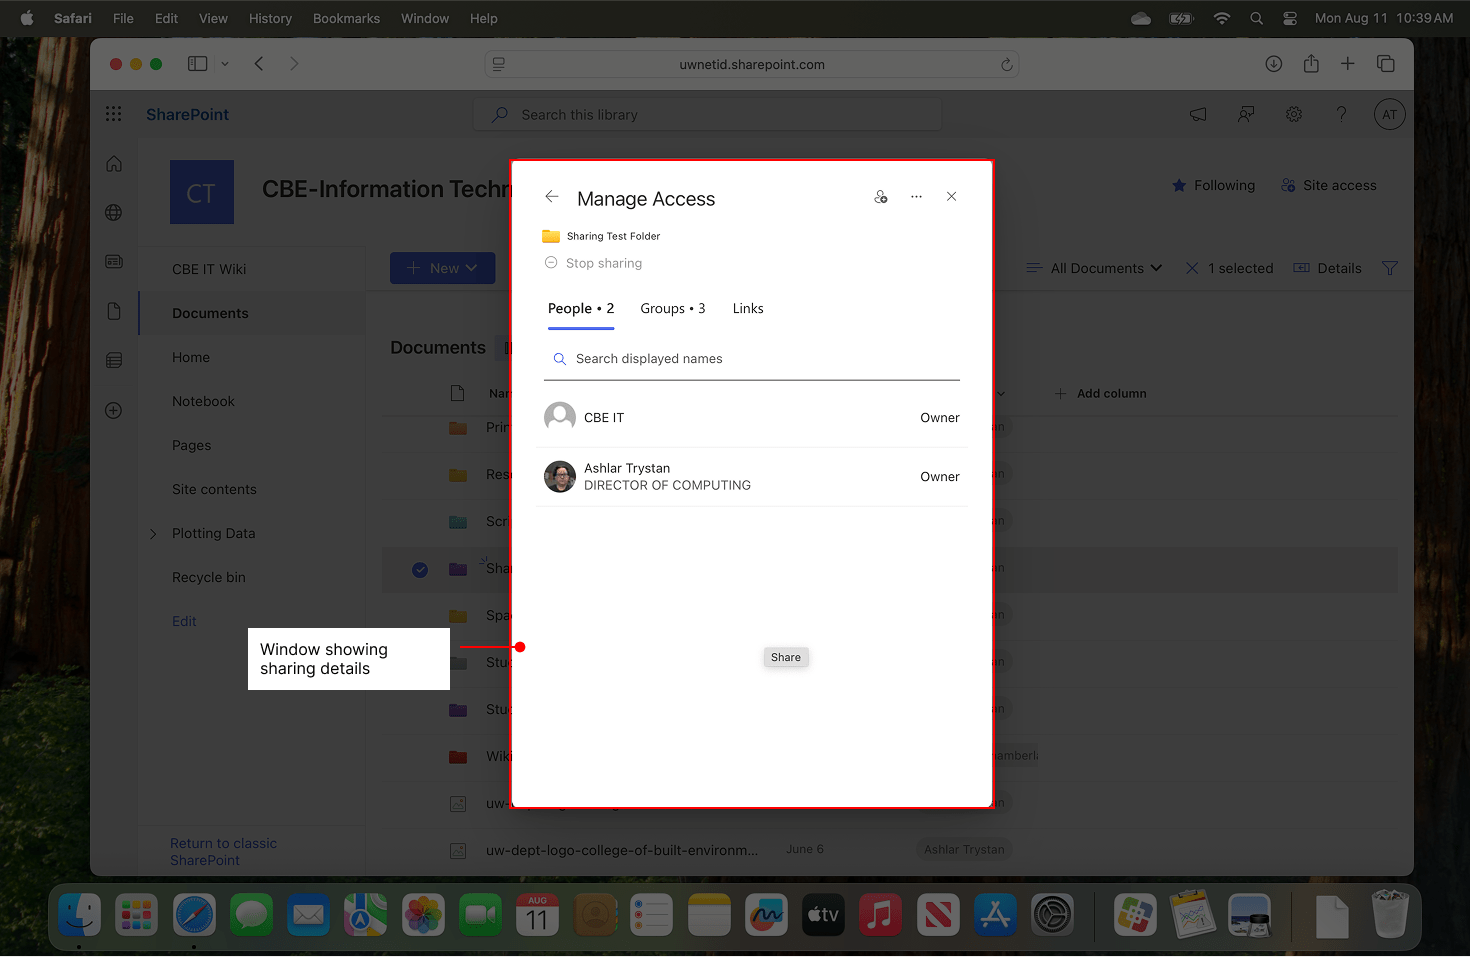
From this screen, you may remove shared users or groups who should no longer retain access. Note that three groups are automatically added:
- cbe-[DEPT] Owners
- cbe-[DEPT] Members
- cbe-[DEPT] Visitors
These groups are built in and should not be removed without prior consultation with CBE-IT.
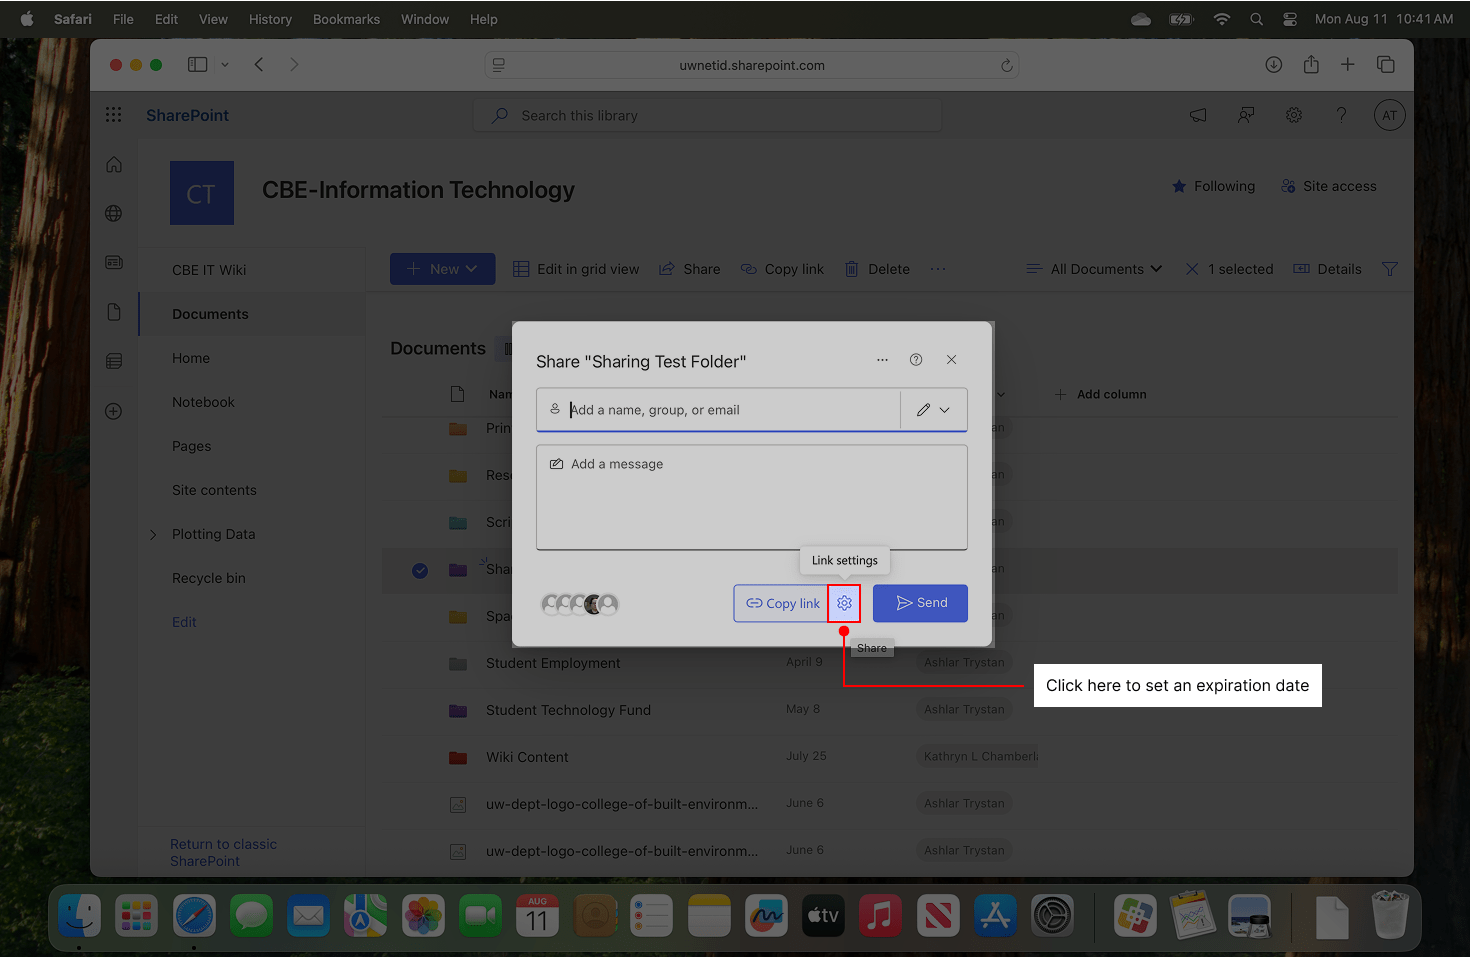
Sharing may also be set with an automatic expiration date, which is especially helpful when providing access to sensitive data that should only be available for a short period of time. From the “Share” screen, click the gear icon next to “Copy link”, set a permissions level, then enter an expiration date.
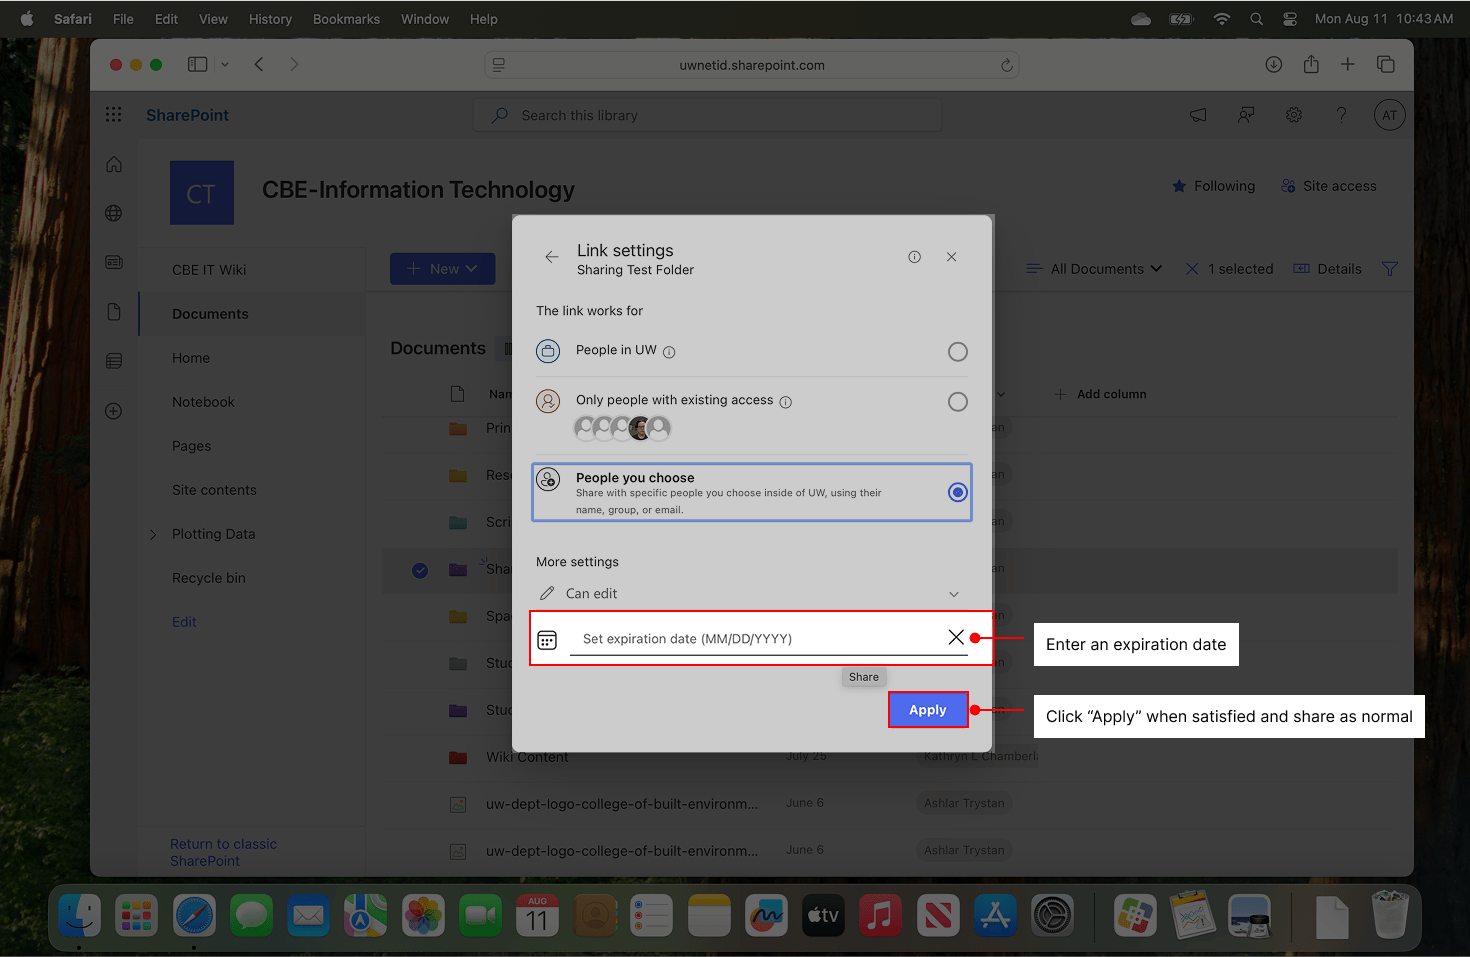
Click “Apply” when satisfied and share as normal.
Sharing from macOS
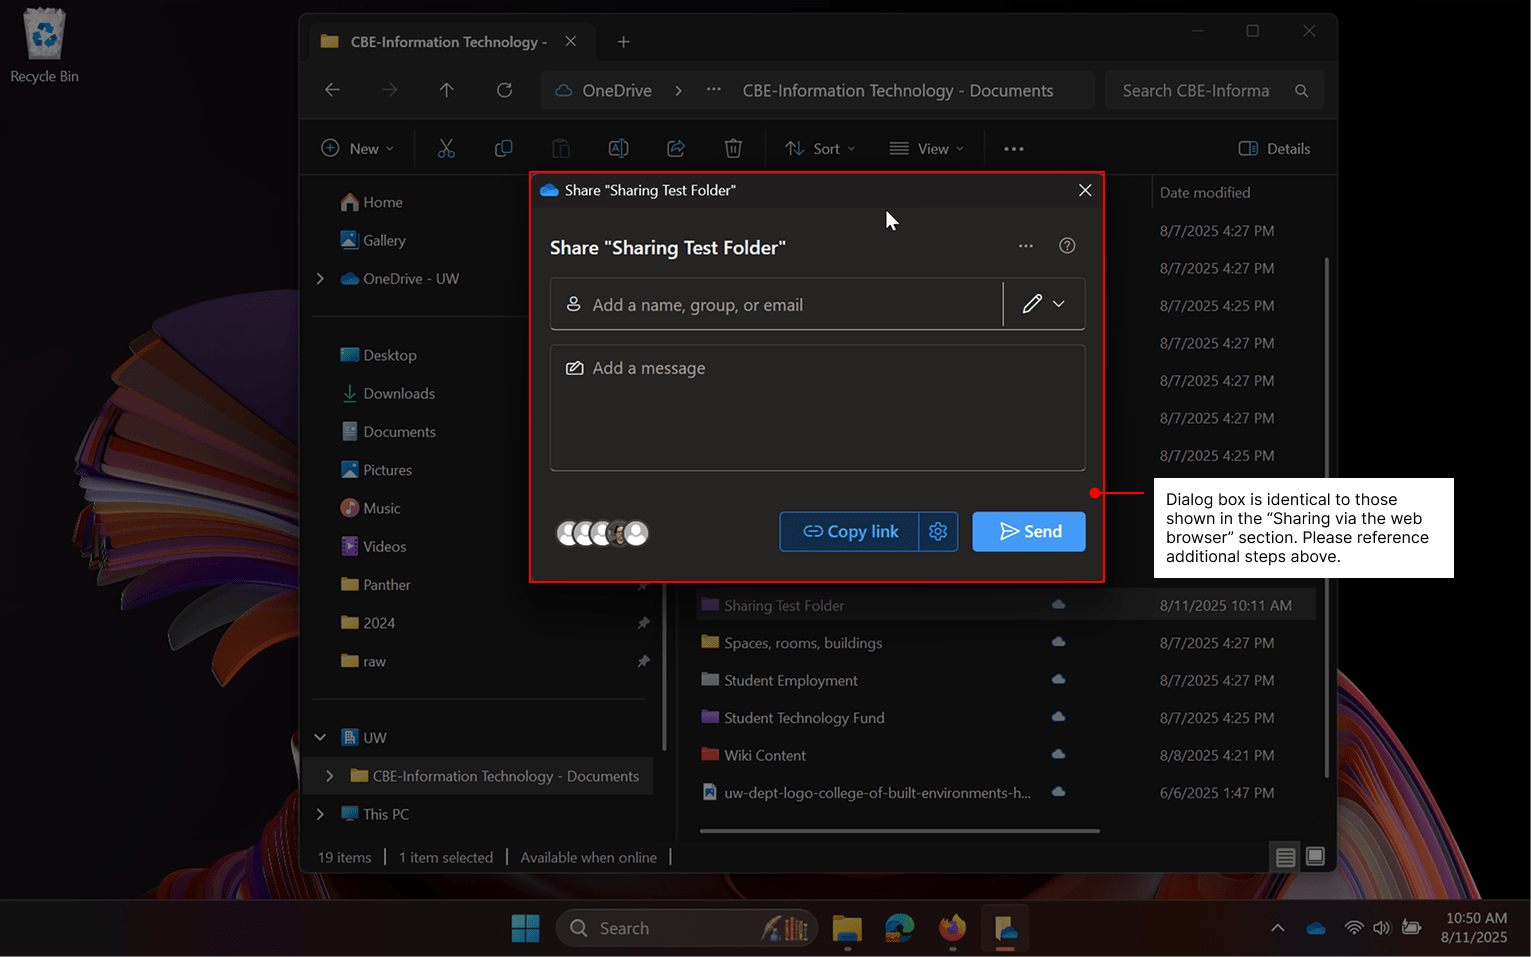
Navigate to your synchronized SharePoint folder and right-click on the file or folder to share. From the pop-up menu, select “Share”.
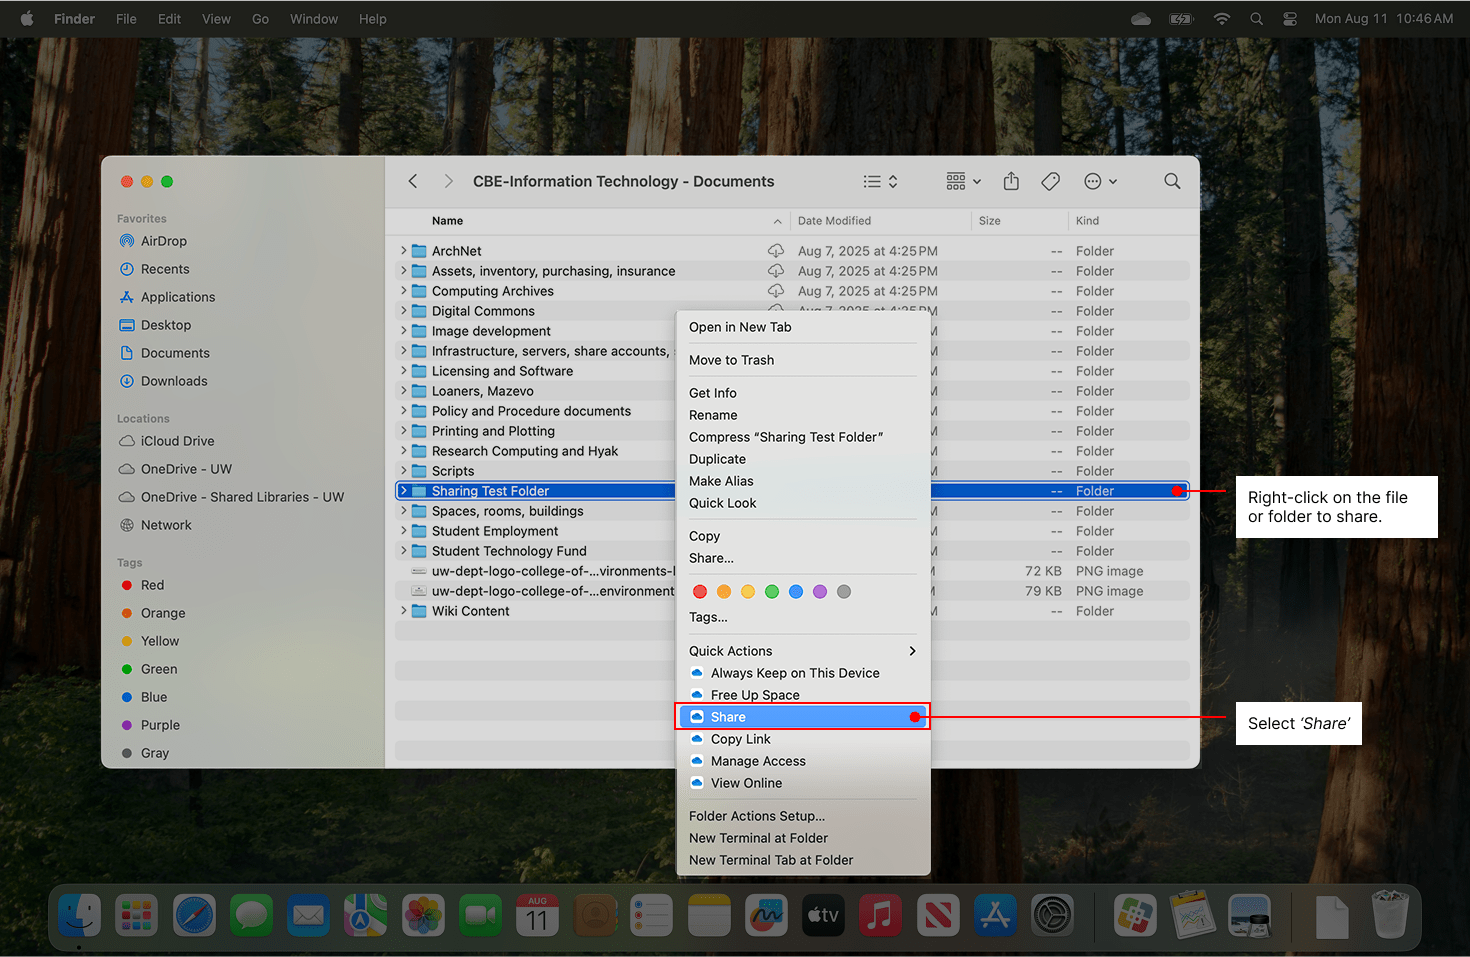
The dialog that appears is identical to those shown in the “Sharing via the web browser” section. Please reference additional steps above.

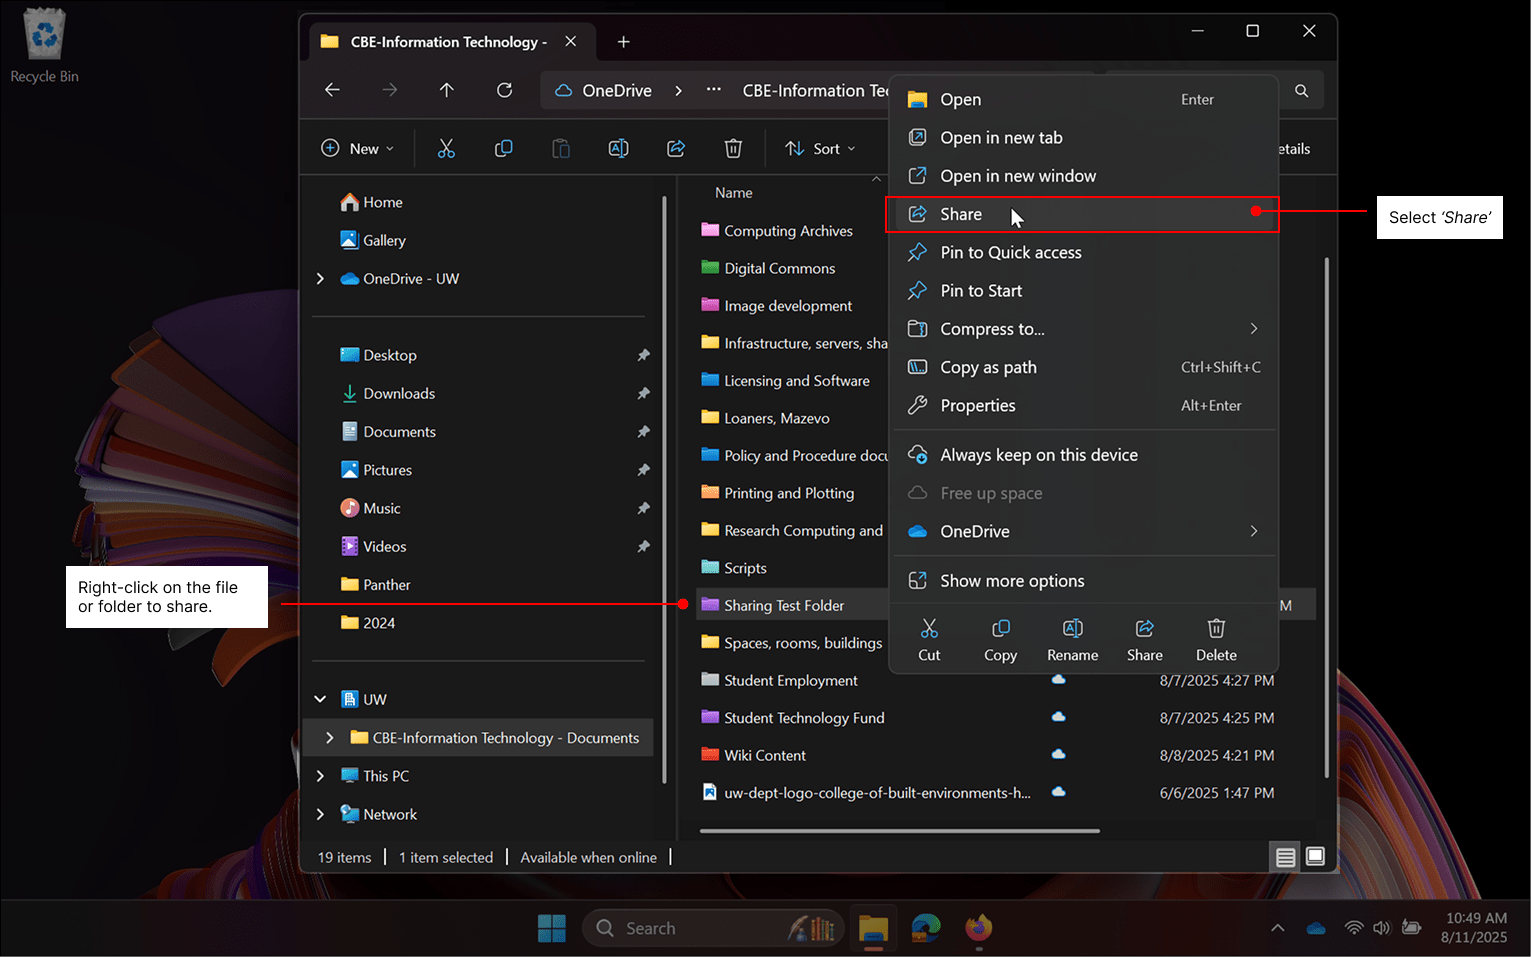
Sharing from Microsoft Windows
Navigate to your synchronized SharePoint folder and right-click on the file or folder to share. From the pop-up menu, select “Share”.
The dialog that appears is identical to those shown in the “Sharing via the web browser” section. Please reference additional steps above.