The Marketing & Communications (MarCom) team within the College of Built Environments (CBE) Advancement team focuses on increasing awareness, deepening engagement, and inspiring philanthropic support for CBE.
Need support? Fill out the MarCom request form.
UW Marketing & Communications Resources
University Marketing and Communications (UMAC) supports the UW Brand. You’ll find resources for editorial, equitable language, brand guides, templates and more.
The Accessible Technology center supports accessible content and technology. Excellent resources for documents, websites, and other services.
Software Platforms
Need support? Fill out the MarCom request form.
Trumba Event Calendar
The University uses a shared campus-wide event calendar system, Trumba.
When creating a new event in Trumba:
- Create your event only on the ‘CBE Internal Planning’ calendar
- Make sure to select the new ‘CBE Template’ in the template drop down
- To make an event visible to the public, share out to the CBE calendar. To do this, on the ‘Also shows on’ drop down, select only ‘College of Built Environments’
- Under ‘CBE Categories’, select your department to show on your department calendar
- Select any other relevant categories (these will eventually feed to other places/pages) applicable to your audiences
CBE Vimeo
- Login to Vimeo.
- Hover over the blue button in the top right corner and choose ‘Upload’
- Select CBE from the dropdown on the left
- Drag and drop your video file or select the ‘Or choose files’ button
- Once uploaded, edit the title and description. Also select the privacy setting your video. It will most likely need to be set to public
- Click the link icon in the upper right corner to find the link you’ll use to share the video.
- The MarComm team will handle adding to Vimeo collections and any other settings
CBE Photography
Find CBE photos to use in your work. Feel free to reach out if you don’t find what you are looking for. Photos continue to be added.
UW Visual Asset Collection
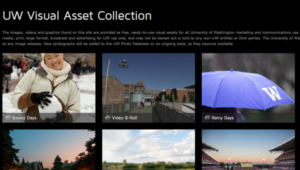 Visit the UW Visual Asset Collection for photography and video b-roll. Log in with your net id to use this resource today.
CBE Visual Resources
Visual Resources provides image and video services to meet the teaching and research needs of the College of Built Environments community. Students and faculty are invited to access images and research assistance at the Image Library or through our online image database.
Visual Resources is open Monday through Friday, 10 AM – 4 PM, and other hours by appointment. Contact the director of Visual Resources, Joshua Polansky, at vrcbe@uw.edu.
How do I get more images?
- Collect images from your students and faculty.
- Hold a department photo contest.
- Grab a camera and take some! Your cell phone camera will work just fine.
- Browse or search the collections below.
Inquire with CBE Marketing & Communications or University Photography about taking photos at a special event or for a specific purpose.
If you are taking photos, make sure you get a Personal Release form signed.
Alt Text for Images
Alternative text (alt text) should be added to all images uploaded to a website’s media library and added on social media when posting. Alt text should be succinct and explain what the image is if the user cannot view it. It is used by screen readers, search engines, and text-only browsers. By adding alt text you improve accessibility and search ranking.
Here are some articles that explain in greater detail how alt text is used and how you should decide what to include as your alt text:
UW: Making Images Accessible
WebAIM: Alternative Text
About.com: Writing Great Alt Text
Intranet + Bulletin
The CBE Intranet is a site intended for internal audiences in CBE. It is not private/password protected. Resources for faculty, staff and students are posted here and updated regularly.
The Bulletin is the outward-facing news “tile” or blog roll aspect of the Intranet. It includes timely content of interest to CBE students, staff, faculty, PACs and alumni. With the goal of minimizing use of email and listservs, particularly to students from advisors, it serves as an online repository for content where it can be easily found and sorted.
https://intranet.be.uw.edu/news/
How to create a Bulletin post
Anyone is invited to submit a post – news, events, course descriptions, etc. – via the Bulletin submission form, or to approved admins via multi-site. To ensure consistency with best practices, one person or “admin” in each department is designated to review, edit, and publish posts.
NOTE: The date of post creation will appear underneath every post when viewed as an array from the main Bulletin page. This can be confusing when creating a post for a future event. For this reason, ALWAYS put the event date in the Title field and/or Excerpt field.
(Example below)
Required fields
- Your name & Email:
These fields are for internal use only and will not appear in the body of the post. If you wish for your name and email address or other contact information to appear in the post, include that information in the “Post Body” field. - Post title:
See above re. including relevant date/deadline. - Post excerpt:
Keep to a minimum! Text in the Excerpt field is only visible when viewing the tile array of posts from the “Bulletin” view. Excerpt text does not appear on the post itself, so make sure any important info appears in the body of the post or in the post title. Max character count for excerpt field is 70 characters. This includes spaces, punctuation, etc. - Post Body:
There is no limit to post body length, but concise posts are preferable. Please note that formatting will not transfer if you copy/paste from an HTML source. Copy/paste from a plain text source whenever possible. - Post image:
This is the image that will be visible as a thumbnail on the Bulletin array, and in full size at the top of a post. If you do not include an image, a default image of Gould Court will appear. - File:
If applicable, upload flyers, posters, etc. to complement the post. Accepted file types: pdf, docx, xlsx, Max. file size: 20 MB. A “View Flyer” button will appear at the top of a published post.
Use of tags
Use the “Communities” and “Topics” tags so your post can be found using the sort fields at the top of the Bulletin.
Courses
Please use the following naming convention when posting courses.
QTR/Year: Dept + Course # – Course Name
(Example: “WIN 2021: ARCH 526 – Topics In High Performance Buildings”)
Post body should include the instructor’s name and email address, day/time course will meet, number of credits, and if the course is open to non-majors. Excerpt field may feature this information as well, but make sure it’s also in the post body.
TAGS: For “CBE Communities”, please select the department in which the course is being offered. You may select more than one department as the distribution, if your course is open to students from all departments. (Hold the shift button down to select a range or the command or CTRL button to pick one-by-one.) For “Topics”, select “Courses” and any others that are applicable (such as “Sustainability” or “Equity Diversity & Inclusion”.)
Please DO NOT use Courses tag for offerings that are not within CBE & UW (such as third-party trainings, course offerings at other institutions, etc.)
Retiring old posts
Posts will be moved to the Trash by a CBE Admin at the end of each quarter, with the exception of “Courses” which are kept indefinitely.
Email Marketing
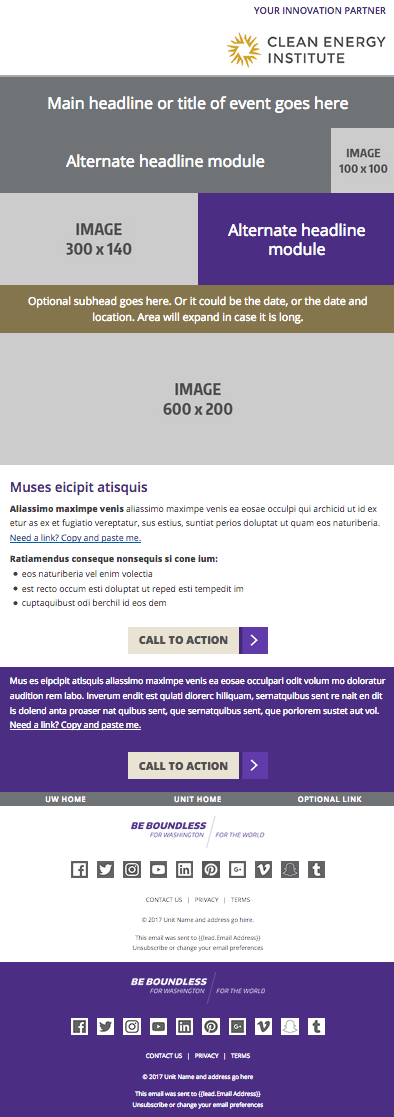
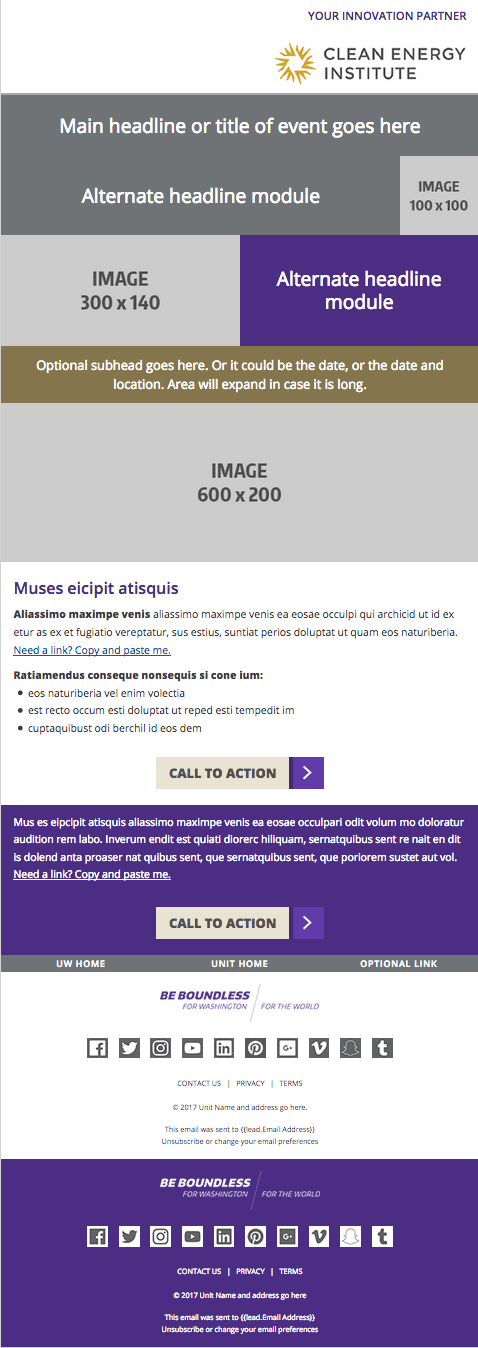
Bulk email is great for reaching external audiences with visually rich HTML content and is perfect for newsletters, event announcements, recruitment or holiday messages.
When sending emails to large groups of recipients, we need to honor some basic principles:
- one recipient per address
- accessibility + privacy
- subscription preferences
Things to Avoid
- Outlook group lists
- Large BCC lists
- Sharing lists of contact details via email
- Constant Contact, Mailchimp, or other non UW-supported email service providers
Marketo/Jeto
UW uses the Marketo email platform for delivering bulk email. Access to Marketo is limited, so you will be working with the MarCom team to have things built in Marketo. For more direct editing, you may be eligible for access to an alternative front-end for Marketo, called Jeto.
Bulk Email delivery is specially built to maximize successful delivery. Common spam triggers are avoided. Each email is sent to one recipient at a time. Detailed metrics are available for each sent mail campaign.
Opt-ins: The Subscription Preference Center
There are two main ways we collect information for email audiences. One is to assemble them from our various systems, reports, or lists. The other is opt-ins. Opt-ins are managed via the Subscription Preference Center.
The Preference Center also provides the final say in how a person wishes to receive email. Users can specify their preferred name and email address in this system, ensuring all bulk email they are sent by UW reaches them properly addressed.
Audience
When we send bulk email, the total collected group of recipients is referred to as the Audience.
There are many possible inputs used to build an audience. You might have your own curated list of key people. Often, we reference reports, like attendees of a recent lecture, or alumni from a specific degree track. In some cases we can even use UW Groups.
To arrive at a final audience, these inputs go through some useful data processing. Duplicates are removed, ensuring anyone who might be in multiple inputs is only present once in the final audience. Additionally, the subscription preference center is consulted. We might have a recent graduate’s old email address in our alumni report. But the preference center may be more recently updated, so we will use any address or names that a person has specified via the preference center in favor of what we have in our various inputs.
Marketo Templates
Social Media Toolkit
- Good for:
- Events
- Live: Real-time video of predetermined events/actions
- Photo based posts
- Audience:
- 25-34-year-olds with influx of boomers
- 56% male/44% female
- Good for:
- Action photos
- Building our brand
- Showcasing our amazing departments, programs, faculty, and students
- Audience:
- 25-34 year olds
- 57% female/43% male
- Good for:
- Connect with professionals, industry leaders
- Establish yourself as a thought leader
- Recruitment
- Audience:
- Over 70% of LinkedIn users live outside of the U.S
- 51% of college graduates use linkedin
- 24% of millennials
- Create minimal text on images/graphics
- Write concise/short post text
- Don’t create new hashtags for everything
- Use photos, graphics, GIFs as much as possible
- Link to our CBE, Research portal, or lab websites when possible
- Live tweet major events
- Post or forward breaking news/announcements within the first 30 minutes
- Look for ways to incorporate ‘behind the scenes’ through an Instagram story or video
- Look for local – local angles, local influencers, local news outlets where we can play
- Take advantage of trends, current events, and cultural moments
- Reply and engage with comments
- Use the correct image dimensions for each platform (see here)
- Hashtags to use:
- #UWdiscovers
- #UWserves
- #BeBoundless
- #HuskyExperience
- #ThisIsUW
- #UWinnovates
- Tag relevant parties – list of social handles
- @UWBuiltEnv (twitter)
- @UWBuiltEnvironments (instagram)
- @UW (twitter)
- @UofWA (instagram)
- Each post needs either a photo, video, or link
- Post on FB at peak times
- Wednesday at 11 am and 1 pm CST (source: Sprout Social)
- Find your peak post times in Facebook analytics
- Wednesday at 11 am and 1 pm CST (source: Sprout Social)
- Post on FB up to 3 times a day
- Use only 1 – 2 hashtags
- Utilize videos
- Use 8-15 hashtags on Instagram
- Keep captions short & include emojis
- Utilize videos and Stories
- Use student stories to highlight your department and programs
- Use carousel posts to include more than one photo
- Put links in Linktree not in the caption (unclickable)
- Post clickable, engaging content
- Produce content that is audience specific
- Share industry events and recaps
- Keep your profile visually appealing
- Profile and cover photo on your personal page
How to post
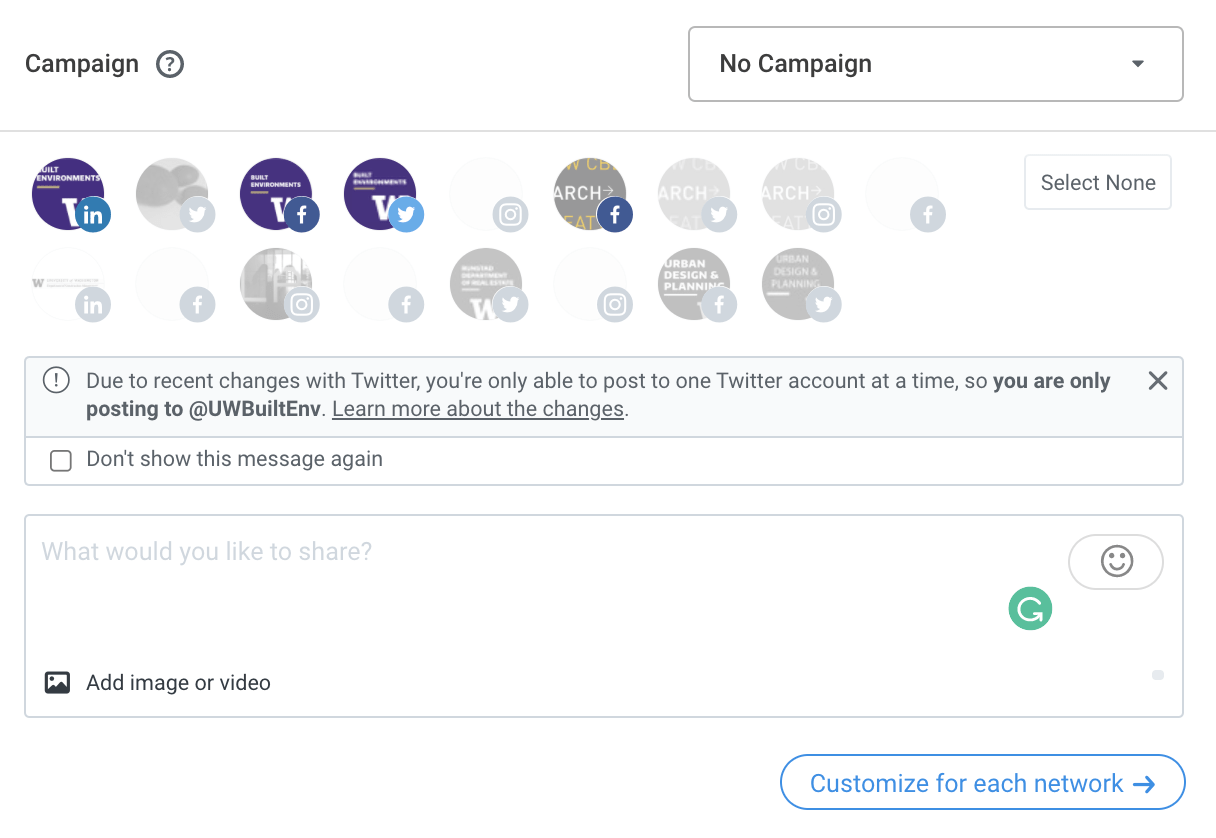
- Click on ‘Create Post’ or a specific timeslot

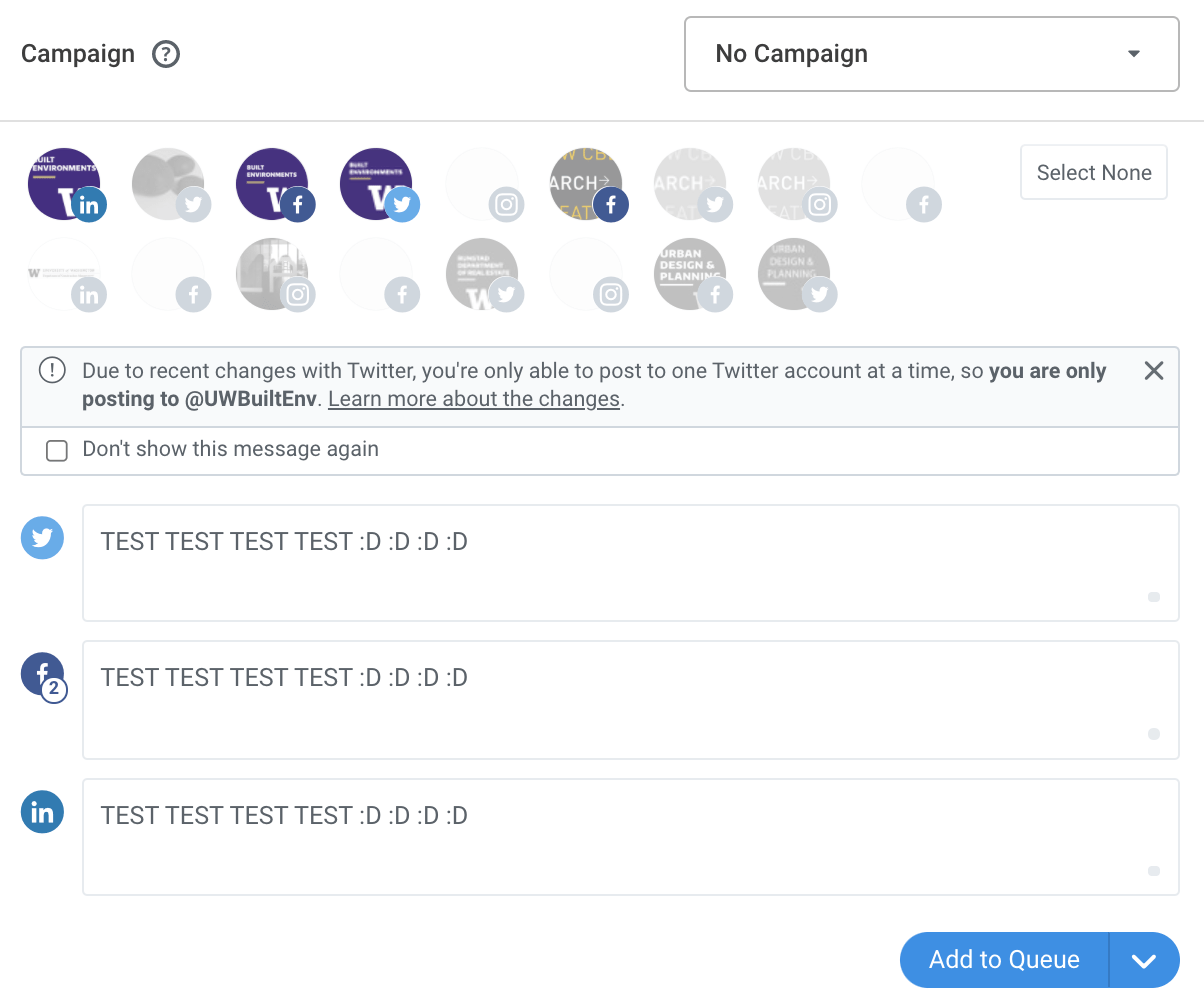
- Select the social media profile and channel you want to share your content on a. You can select more than one Instagram, Facebook, or LinkedIn account at a time. You can only select one Twitter account at a time.

- Type or paste in your content and then click ‘Customize for each network’

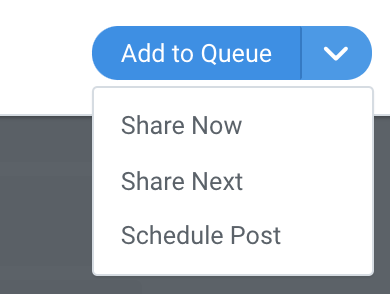
- Click ‘Add to Queue’ or the drop-down arrow and select from the menu
- Add to Queue: posts will fill into the next pre-selected time slot available. Time slots have been chosen based on best posting times and data from when our followers are most engaged with our pages
- Share Now: will be posted at the time the button is clicked (after approval)
- Share Next: post will move to the top of the queue and be published next. Posts already in the queue will all be moved down a slot
- Schedule Post: choose the exact date and time for the post to be published

Best Practices
Media
When scheduling posts, the options for including media will vary depending on the social network you’re sharing to. The table below outlines the types of media you can include for each network, as well as how many images you’re able to include.
Links
- If you’ve included a link in your post, a link preview will be automatically generated for Facebook and LinkedIn. Link previews mirror what you would see if you were sharing a link directly on FB or LinkedIn
- If you prefer not to have the link displayed in the body of the post, you can remove it from the composer after the link preview has been generated. The link will show up, but not in the text section (THIS IS PREFERRED)
Mentions/Tags
- You can mention (tag) Facebook pages, Instagram profiles, and Twitter profiles in posts scheduled through Buffer.-
- It is not currently possible to mention Facebook profiles, Facebook groups, LinkedIn profiles, LinkedIn pages
Website Resources
Getting Started
CBE Websites are built in WordPress using the W Theme. These resources will focus on common content editing tasks.
Access
Login to the multisite network here: https://be.uw.edu/wp-login.php. Your login name is your UWNetID. If Google Apps is enabled for your UWNetID, you can login via the blue Google button and your UW email address. If not, then you’ll need to create a wordpress password for access.
To request access to edit a CBE site, please use the MarCom request form.
Editing Pages
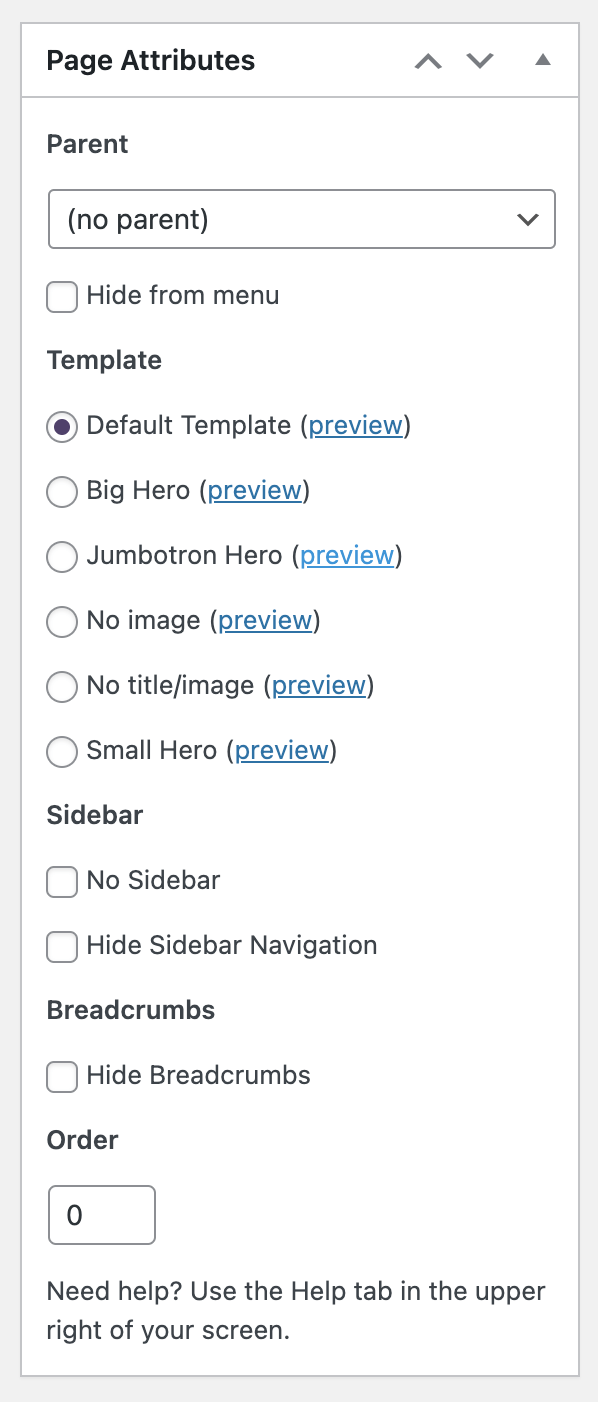
Pages are the backbone of your content set. Page layout is determined by Page template. Each Page has its place in the information structure determined by its Parent Page. Pages do not support Excerpt or Taxonomy parameters.
Page templates include Default, Big and Small Hero, No Title/Image, and Jumbotron. Generally speaking, most content pages should use the same template for consistency. Most often this is Default or No Image. More visual pages are usually used sparingly, for home pages or landing pages for major content sections.
Page Parent
Page Parent is important for establishing site structure. Setting a Page’s parent impacts the URL of the Page, and is what is used to build sidebar navigation menus. Several pages with the same parent are called siblings. The order in which sibling pages are listed is driven by Display Order parameter, smaller numbers showing first.
Sidebar Navigation
If a Page has the sidebar enabled, the first content in the sidebar should be a navigation menu. This menu will begin with the Parent of the current page. Then, all sibling pages will be listed — that is, all pages that share the same parent. For the current page only, any child pages will show, that is, pages whose parent is the current page. It is important to ensure the sidebar and any main main dropdowns are in agreement and link order and names match.
Revisions
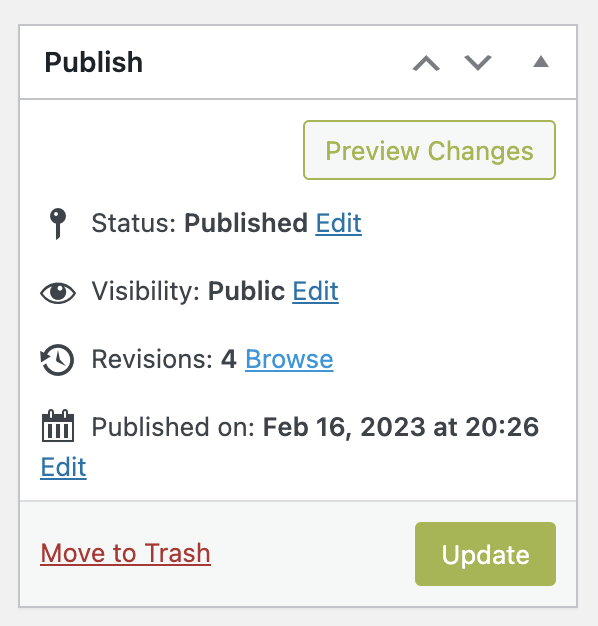 On complex pages, it’s easy to break things. Rather than try to rebuild things, locate the Revisions link and browse through the history of the page to restore a working version, then continue your edits.
Editing Posts
Posts differ from Pages in several key ways. Posts are generally structured chronologically, and by taxonomy (usually Category). Posts use Featured Image and Excerpt to offer a short introduction to the full post content, which we use in sidebars, blog pages, and even to populate bulk email.
Taxonomy
All posts should be tagged appropriately. This will differ site to site. Most common will be the Category taxonomy, but you may also work with custom taxonomies such as Role, Research Theme, Person, Community, Topic, etc. Taxonomy allows us to group and filter posts, and is critical to getting content in front of the right audience.
Excerpt
Excerpt should be a short(400 chars) blurb introducing the post to a public audience. Excerpt will show on post archive pages, anywhere the blogroll shortcode is used, and when a post is shared via social media or email.
Featured Image
Each post should have a featured image for visual interest on archive pages and when sharing the post via other media channels. Follow guidelines for image size and dimension, and always provide alt text.
Redirection
When a post’s full content is published elsewhere, we use Redirection. Create a post with excerpt, featured image, title, and taxonomy tags. then, under Tools -> Redirection, redirect the blog post URL to the full post URL.
Media
WordPress stores media in the Media Library. Generally, this includes images and documents. Video content should be posted on the college’s Vimeo page and tagged to flow to your Vimeo Channel.
Images
Images for the web are most commonly jpeg, gif, png, or svg. Images should be 72 dpi, and 2000px max on the long edge. If not showing full screen, 800px max is sufficient. No images should exceed 1MB. Keep in mind some folks may be paying for the bandwidth they use to view your site. All images must have Alt Text.
PDFs
PDFs are often the most accessible way to present complex information. Content editors are responsible for implementing accessibility best practices for all PDFs that will become web content.
Editing People Profiles
- Faculty and staff profiles are under People on the left hand side of WordPress
- Select the role on the sidebar category “Roles” – you can click on the “Choose from the most used Roles” to see what titles are available.
- Check the box on the sidebar category “Persons” listing their name so that associated sidebar posts can be directed to their page. For new profiles, you will have to add their name to the list using the Add button.
- To remove a profile from the website but keep the post information on WP, unpublish the post.
- Add profile picture to the sidebar category “Featured Image”. Profile pictures should be sized at an approximate ratio: 640×480
- Upload resume to the Curriculum Vitae field (scroll down the page)
- Assign an Appointment to expose additional position title fields.
Fixing Broken Links
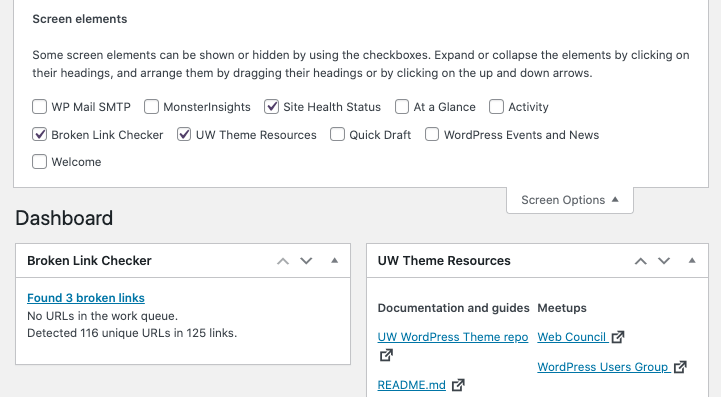
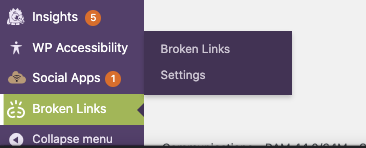
You can check for and repair broken links using the Broken Link Checker tool. These may show on your pages using a strikethrough style on the link.
- On a site’s Dashboard, look for the Broken Link Checker box. If you don’t see it, you may enable it via the Screen Options menu in the top right.

- Via the Broken Links menu near the bottom of the left side Admin menu.

Repairing Links
The Broken report will catalog any URLs that the Broken Link Checker can’t reach. Sometimes this is because there is a typo. Other times, the page may have been retired or had its URL change. If the URL reaches a paywall, that too will register in this report.
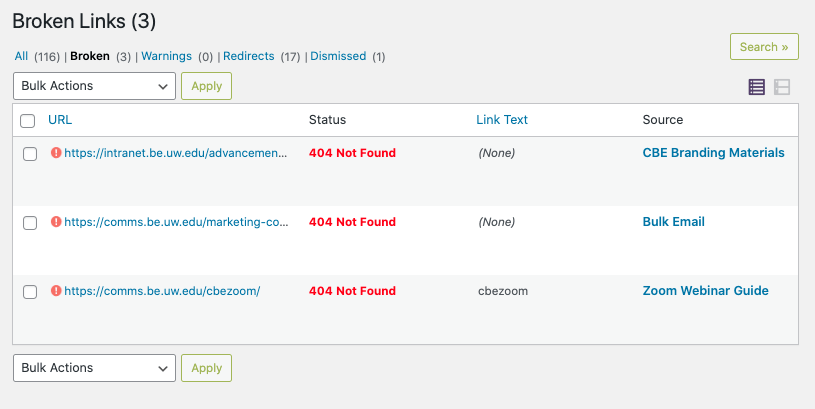
For each broken URL, follow these steps:
- Click the link itself and see what happens. What actually happens is much more indicative than anything the report says.
- The link may indeed be broken. If you get a 404 error, a woof page, or other error page, the link is indeed broken.
- If the page goes to a working site, but not an error, the link may be fine. For example, you might hit a seattletimes.com paywall, or need to login through UW Libraries. These links are fine.
- If the link link is fine, simply resolve the problem via the Not broken button.

- You can use Dismiss to ignore a broken link without resolving it.
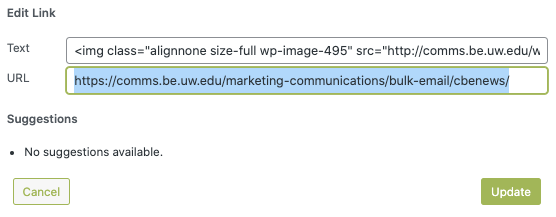
- If you have a correct URL to replace the bad one, use the Edit URL option to provide it.

Working with Text
Using copy and paste to bring text into WordPress is common, but has some pitfalls. It is critical to keep an eye on the results of pasting text into the editing window using both the Visual and Text editor views.
If you see HTML markup, indicated by angle brackets (.e.g <span>) you’ll want to sanitize your text to prevent template errors or accessibility problems. Of particular concern or <div> tags, <font> or <span tags>, or anything with inline styles, e.g <p style=”MSOp1″>.
To sanitize, experiment with the Clear Formatting and Paste as Text functions in the Visual editor tab. You can limit the scope of Clear Formatting by highlighting the section to sanitize. This is useful if you discover lots of markup in an existing page. Clear Formatting is gentler than Past as Text and will preserve images, links, and lists. Paste as Text is more thorough but you’ll need to re-establish paragraphs, headings, links, and other markup. If you find yourseslf in this situation, work with smaller segments one at a time rather than a large complex full document all at once. Save often!
You may also encounter WordPress shortcodes, indicated by square brackets (e.g. No content inside the tab element. Make sure your close your tab element. Required stucture: [uw_tabs][tabs_section title="section title"]content[/tabs_section][/uw_tabs]). It is best to edit content containing shortcodes in the Text Editor view to ensure the shortcodes remain functional.
The last tricky bit with text is HTML entities. If you past shortcode or html markup into the text view, certain characters will be automatically translated so that they can be displayed by content. In the text above, < and > are translated to < and > respectively. This allows them to be shows on screen as text and not interpreted as code. If you run into this problem, try pasting into the Text View to preserve markup.

